The next tour I took with WowCo was about the history of the city of Cartago, la valiente ciudad de Cartago.
Park of the Journalists (Parque de los Periodistas)
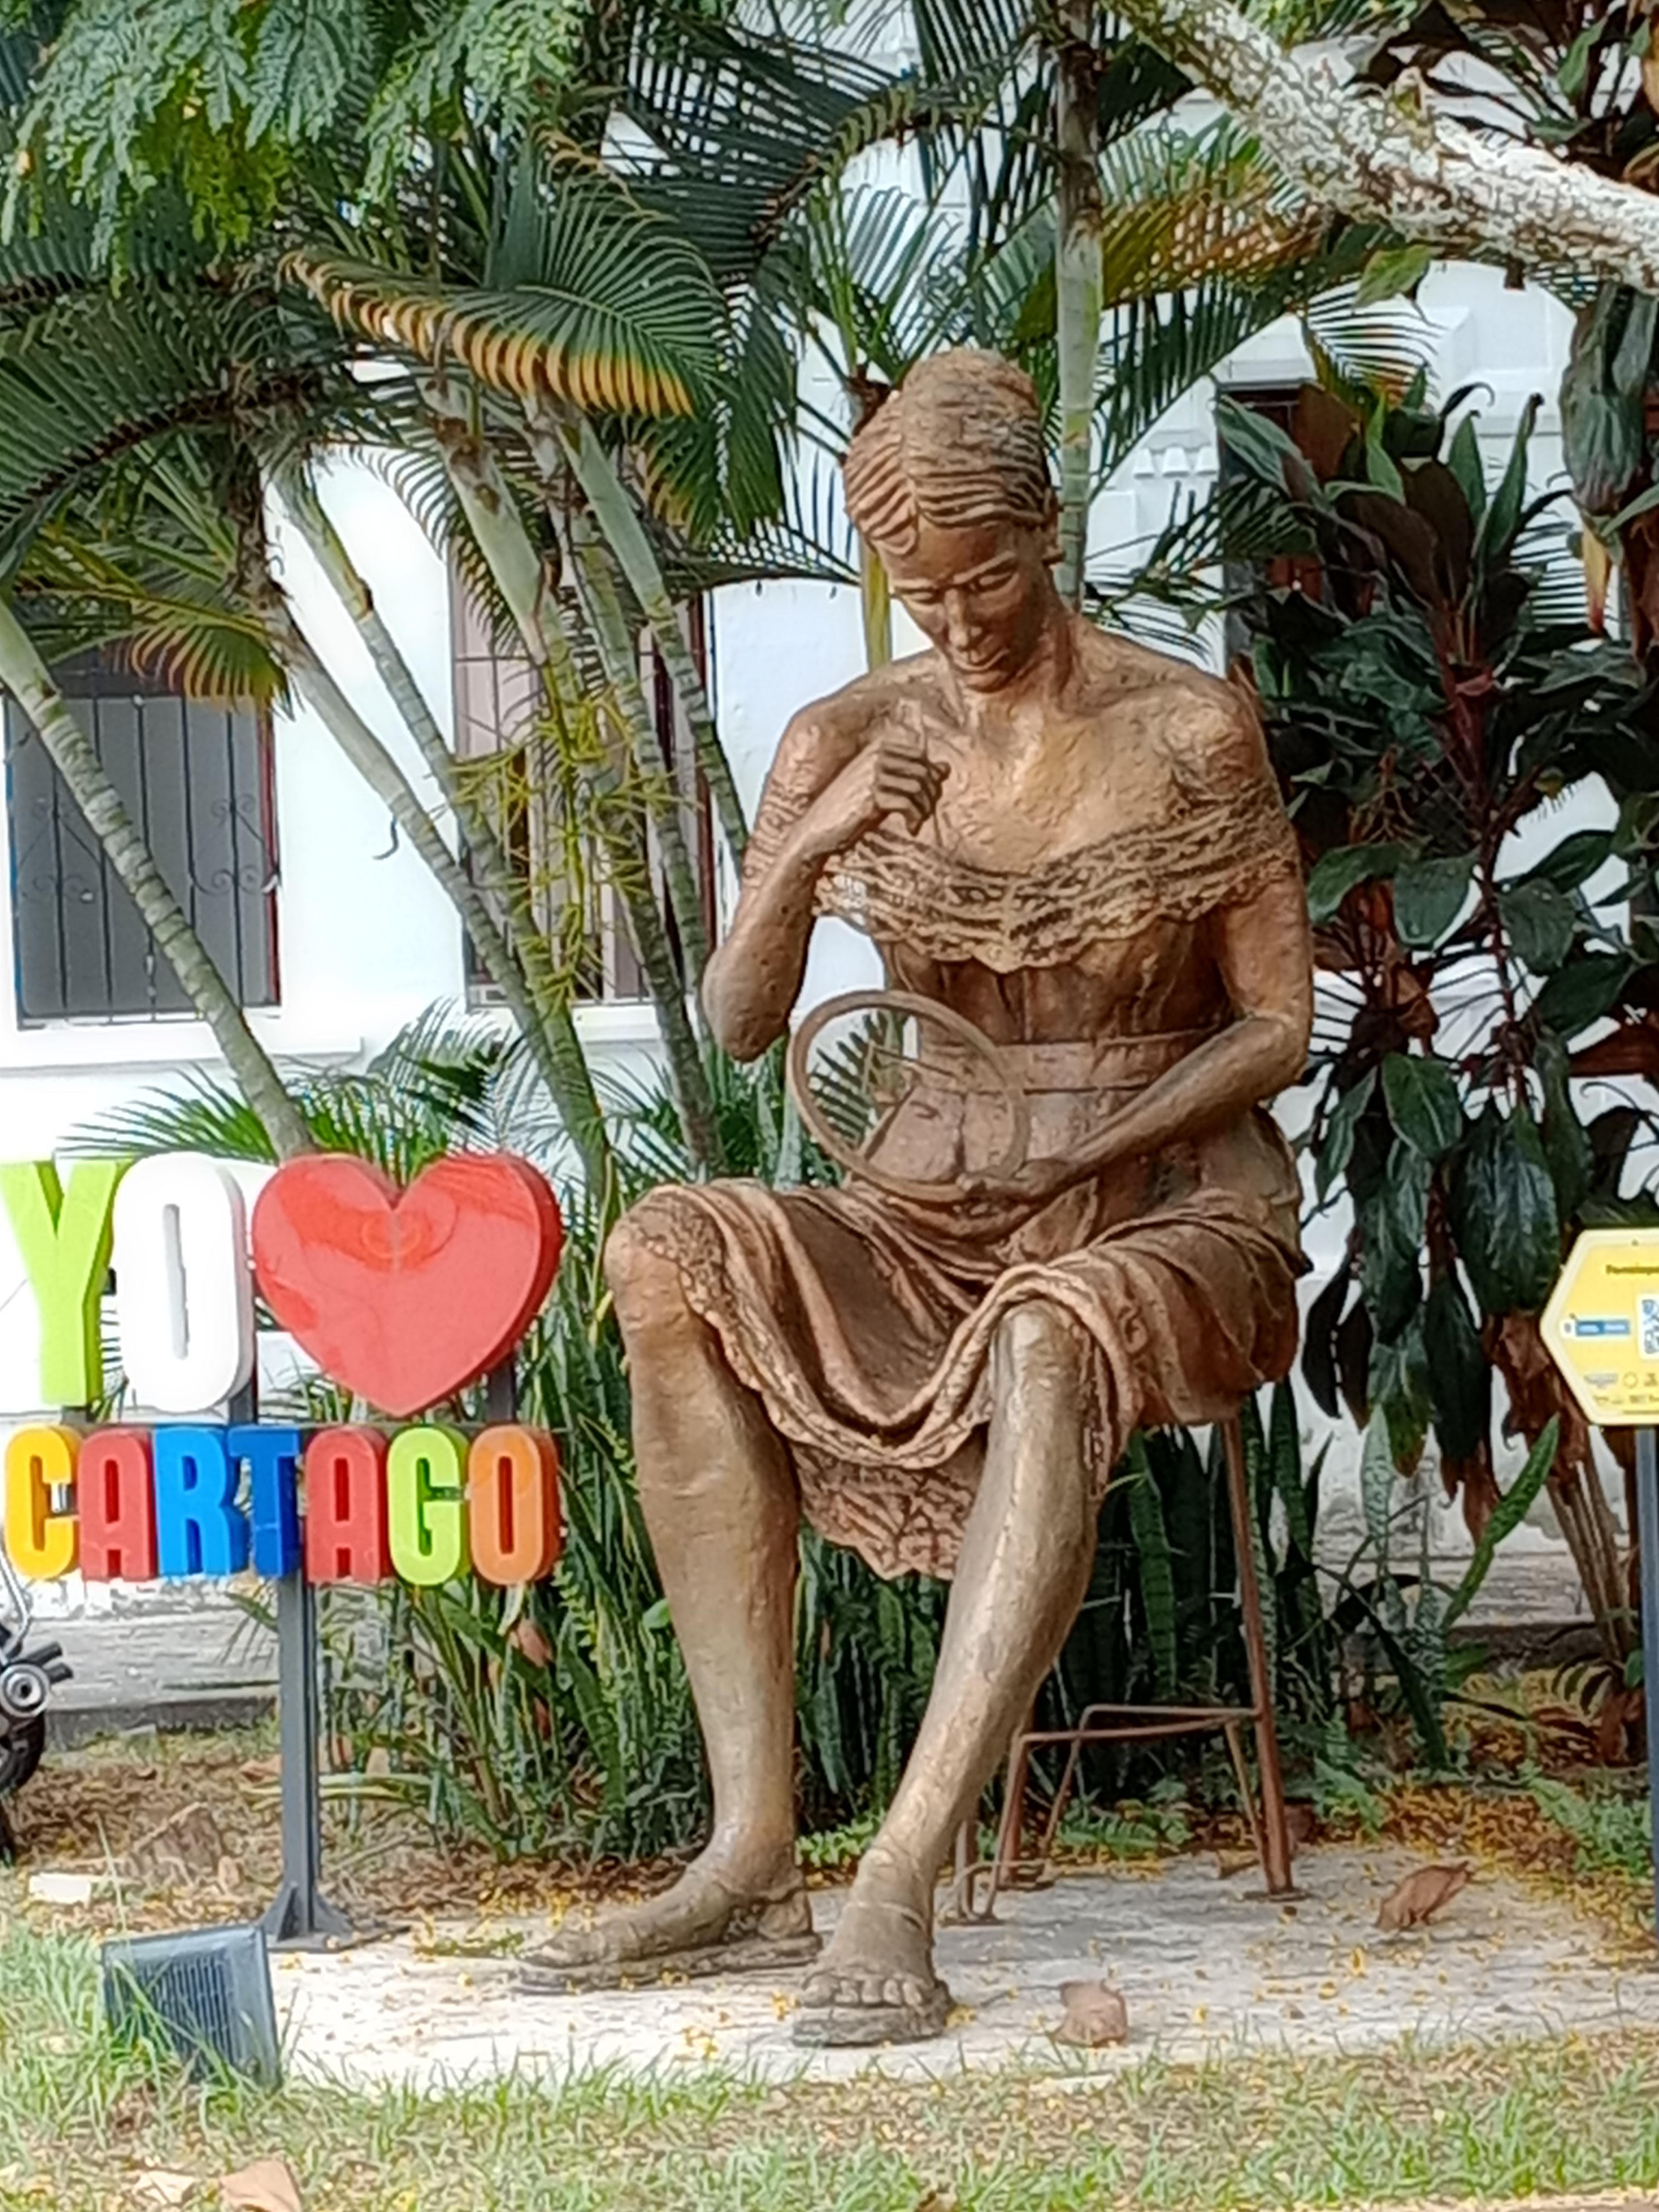
We met at the Park of the Journalists, next to the I love (heart) Cartago sign.
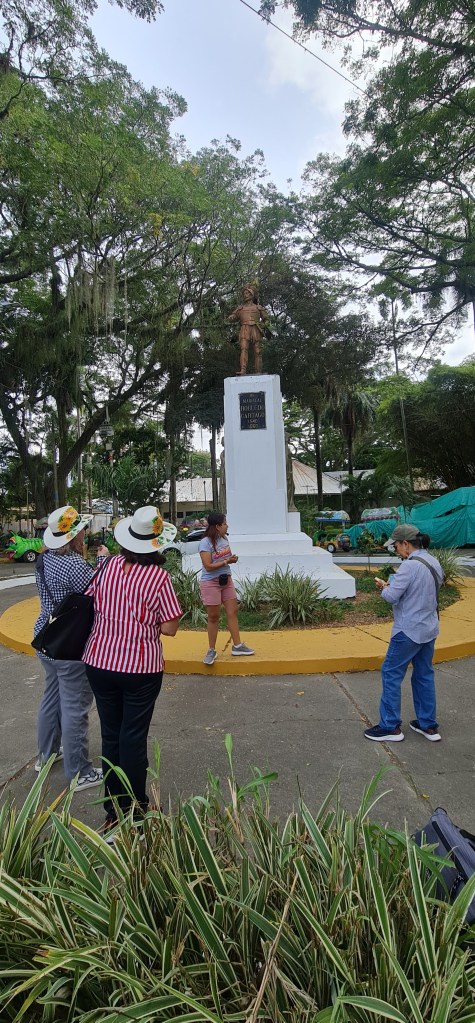
Isleta Park (Parque de la Isleta)
Monument to Cartago’s Founder, Marshall Jorge Robledo, Isleta Park.
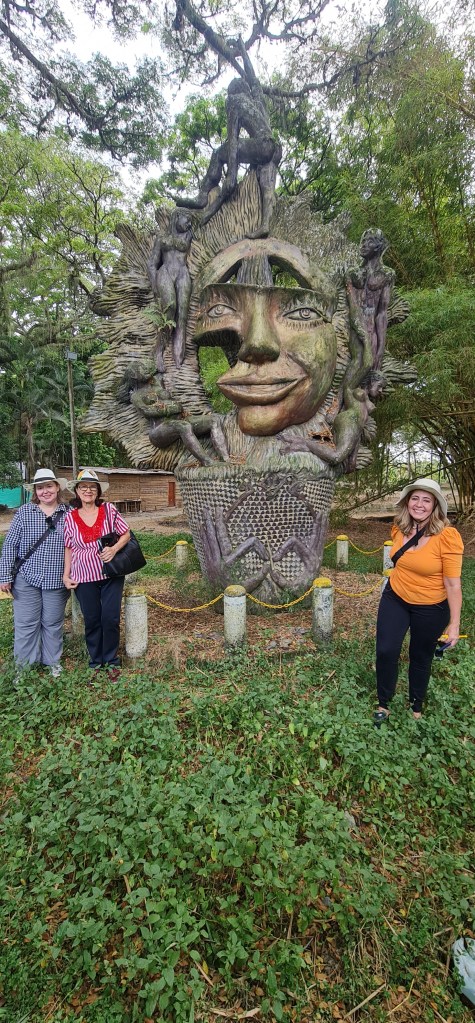
Monument to the Sun, Isleta Park.
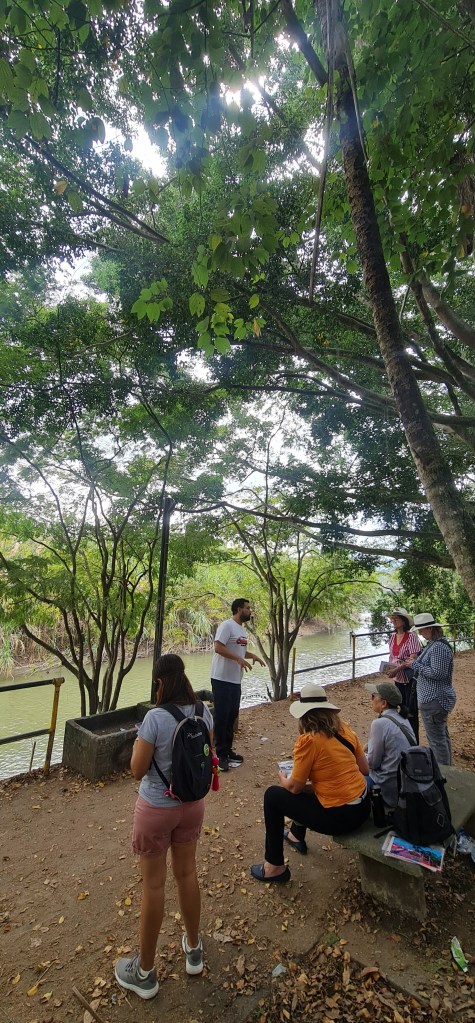
Old Railway Bridge, Crone River (Puente del Ferrocarril, Río La Vieja)
The river that passes through Cartago is called La Vieja, meaning the old lady or crone. It received this name because of a story written in the book Elegías de Varones Ilustres de Indias (Stories of Illustrious Men of the West Indies.) Captain Miguel Muñoz arrived to the area of the river that would be called the old lady/crone in 1536. He found an elderly indigenous woman dressed in fine gold jewelry. So the foreigner proceeded to steal the lady’s jewels and kill her by throwing her into the river.
There is a movement retelling the story from the elderly lady’s perspective and make her anonymous no more. They call the river Tata Yamba, meaning Yamba’s mother. This references Quimbaya Chief Yamba and imagines that it was his mother who was assaulted and killed by the Europeans.
Crone/old lady (La Vieja) River. Andrés Felipe Castaño from WowCo leading the tour.
Old Railway Bridge.
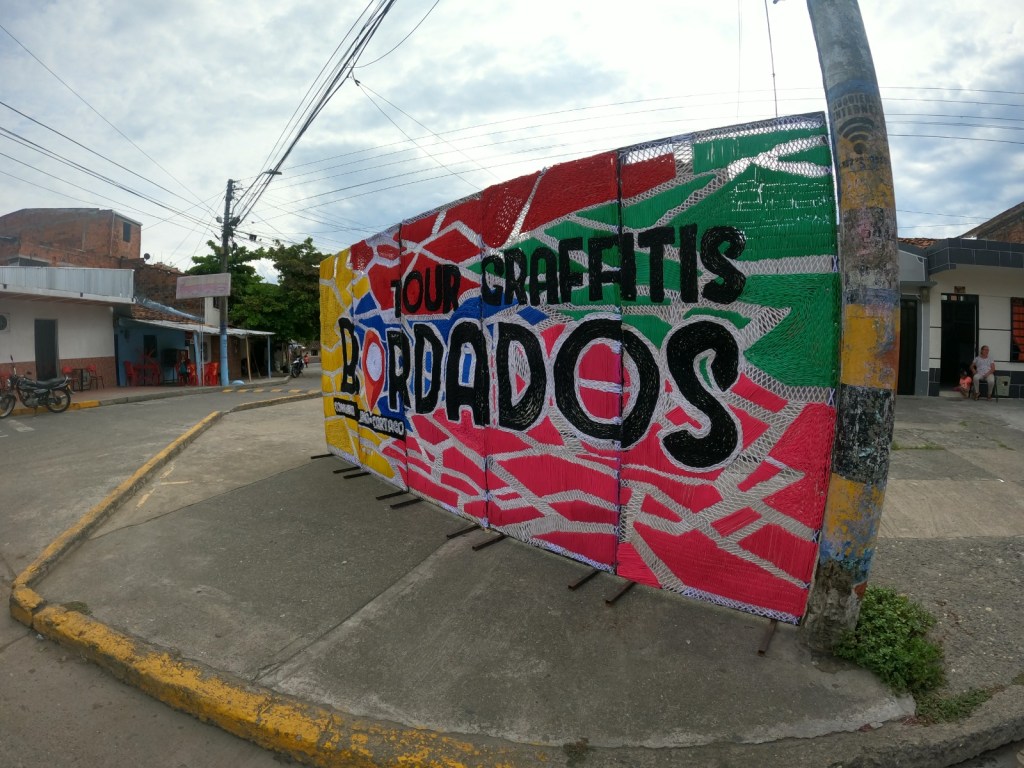
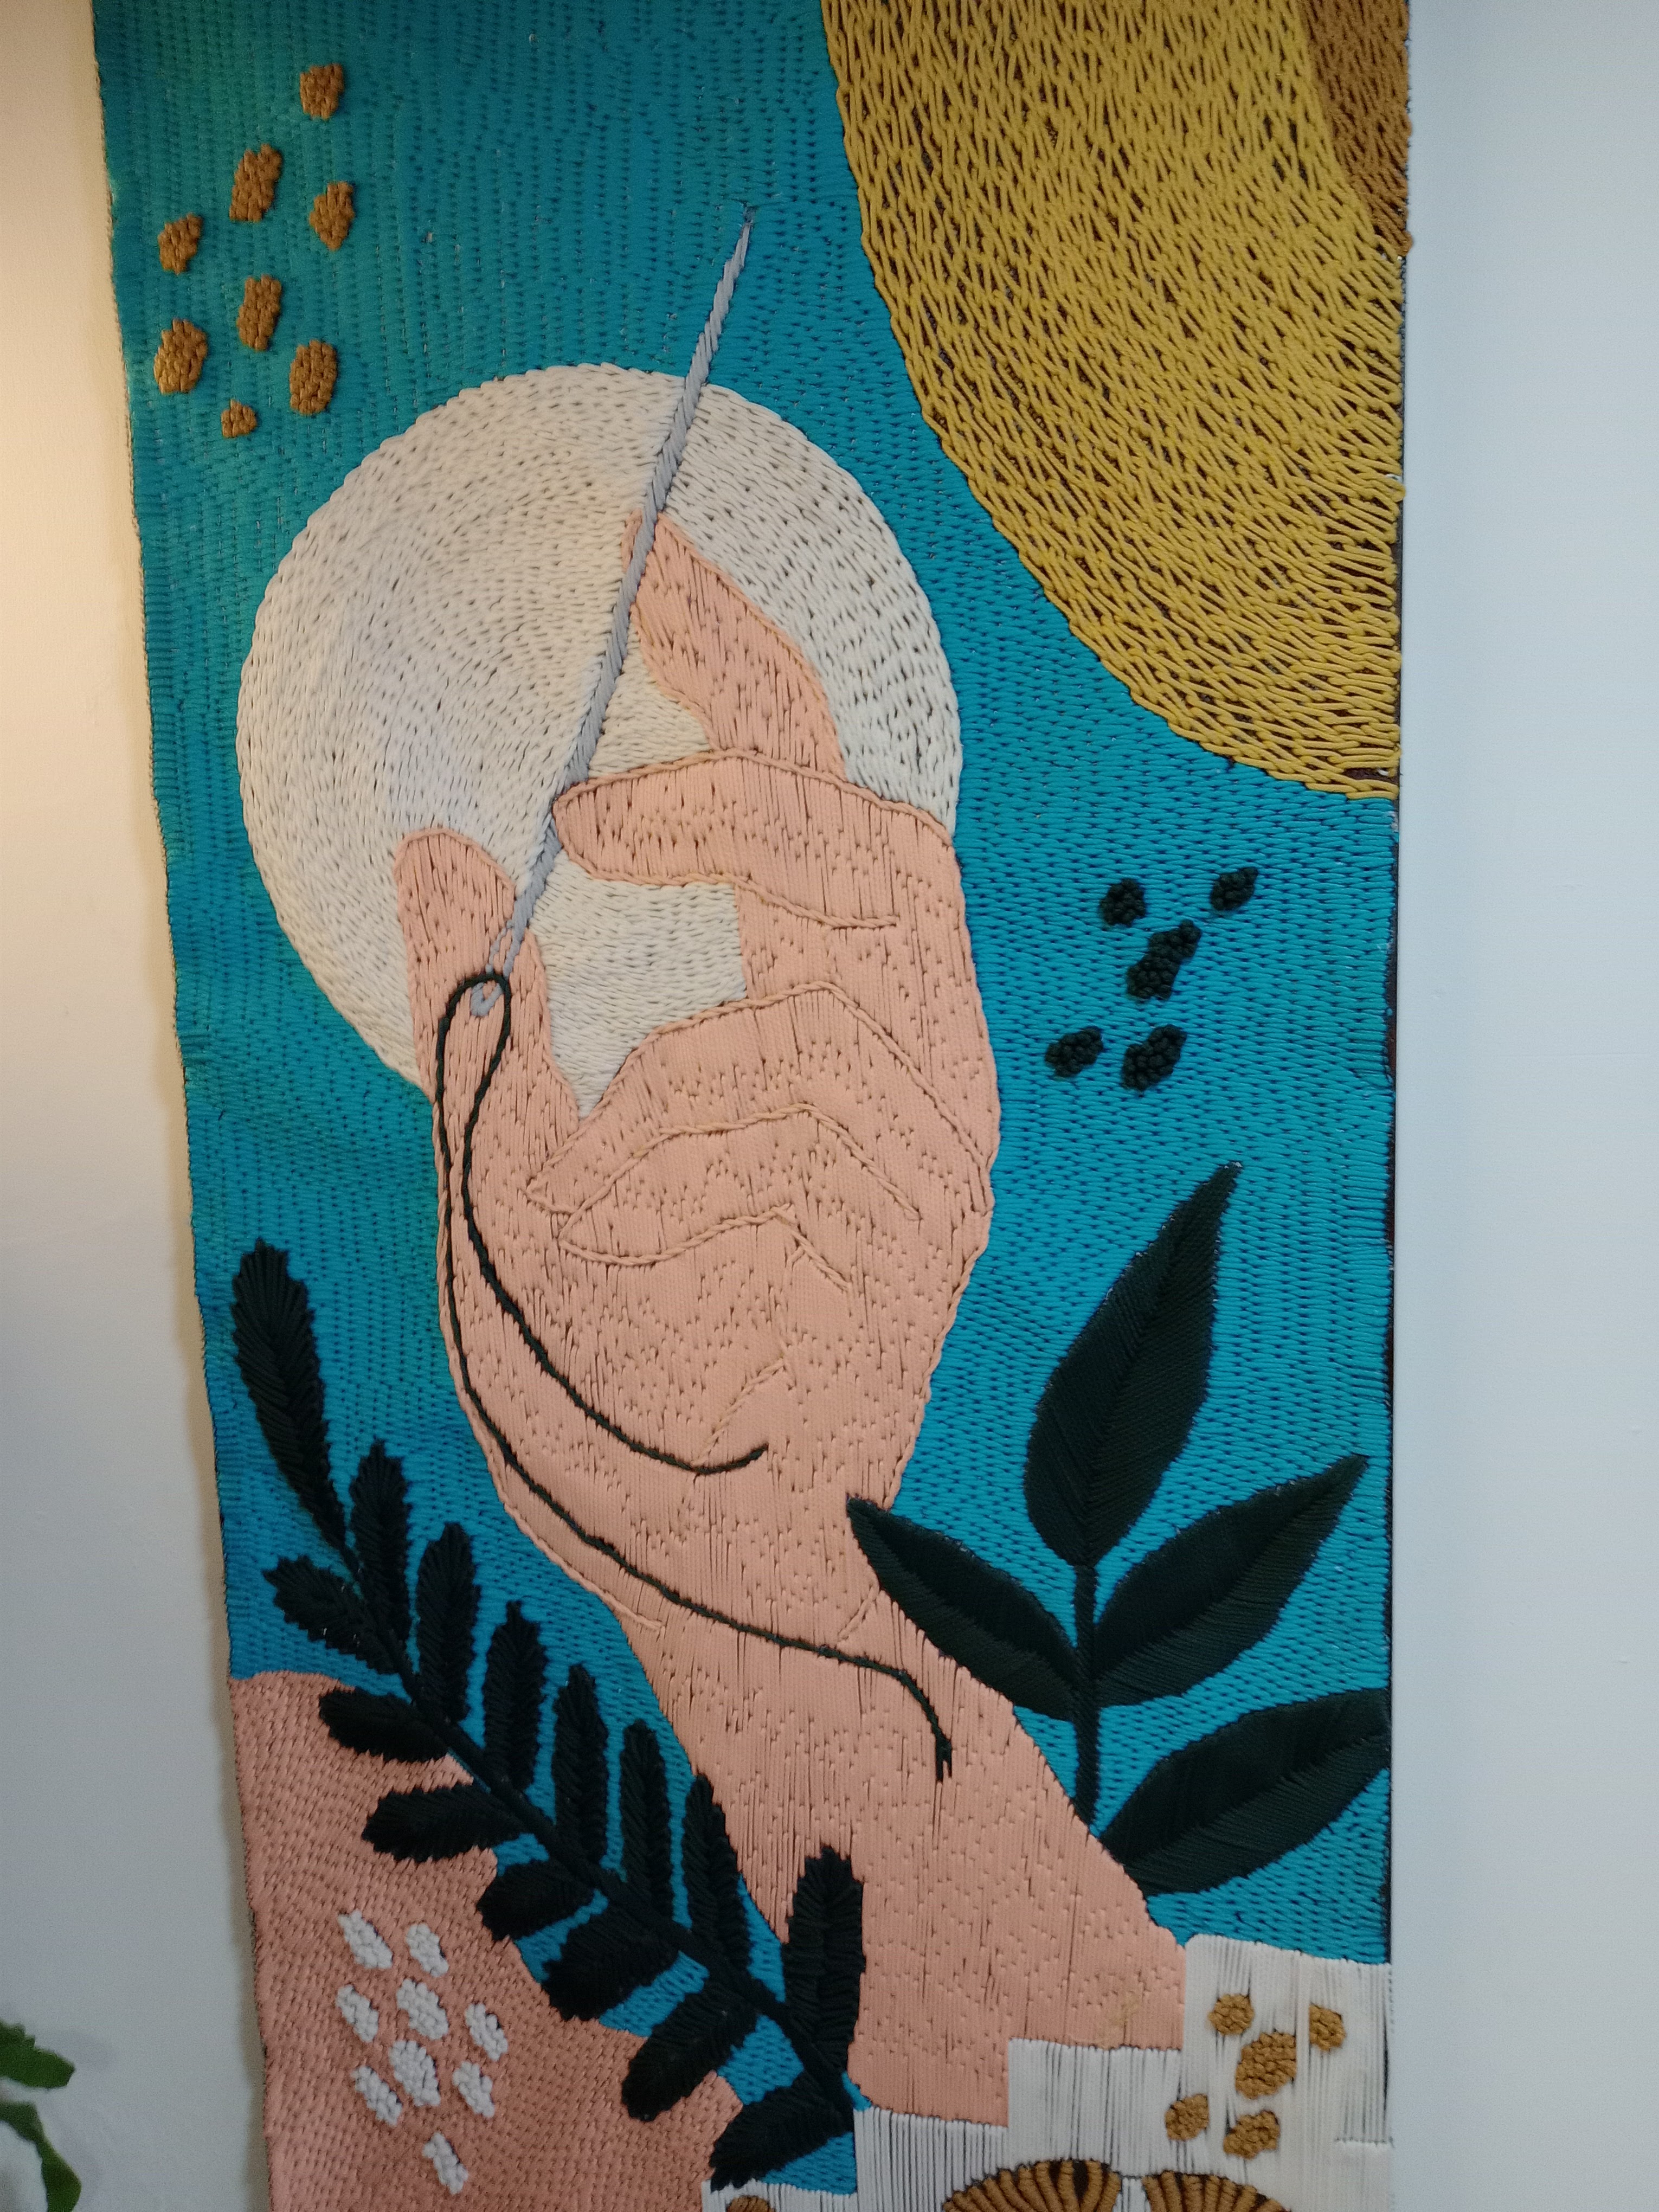
We found some new embroidery-themed floor paintings and graffitis on the way.
Embroidery-themed paintings and graffitis
Pedro Morales Pino Plaza (Plazoleta Pedro Morales Pino)
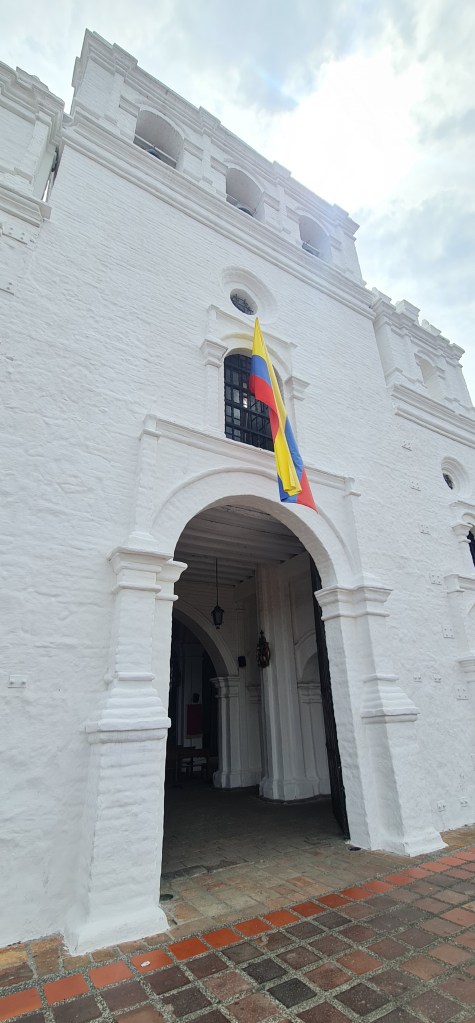
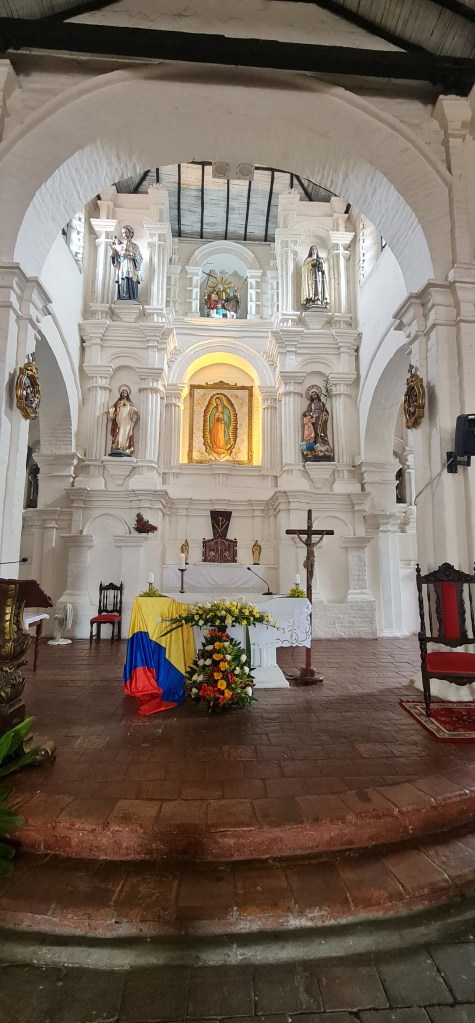
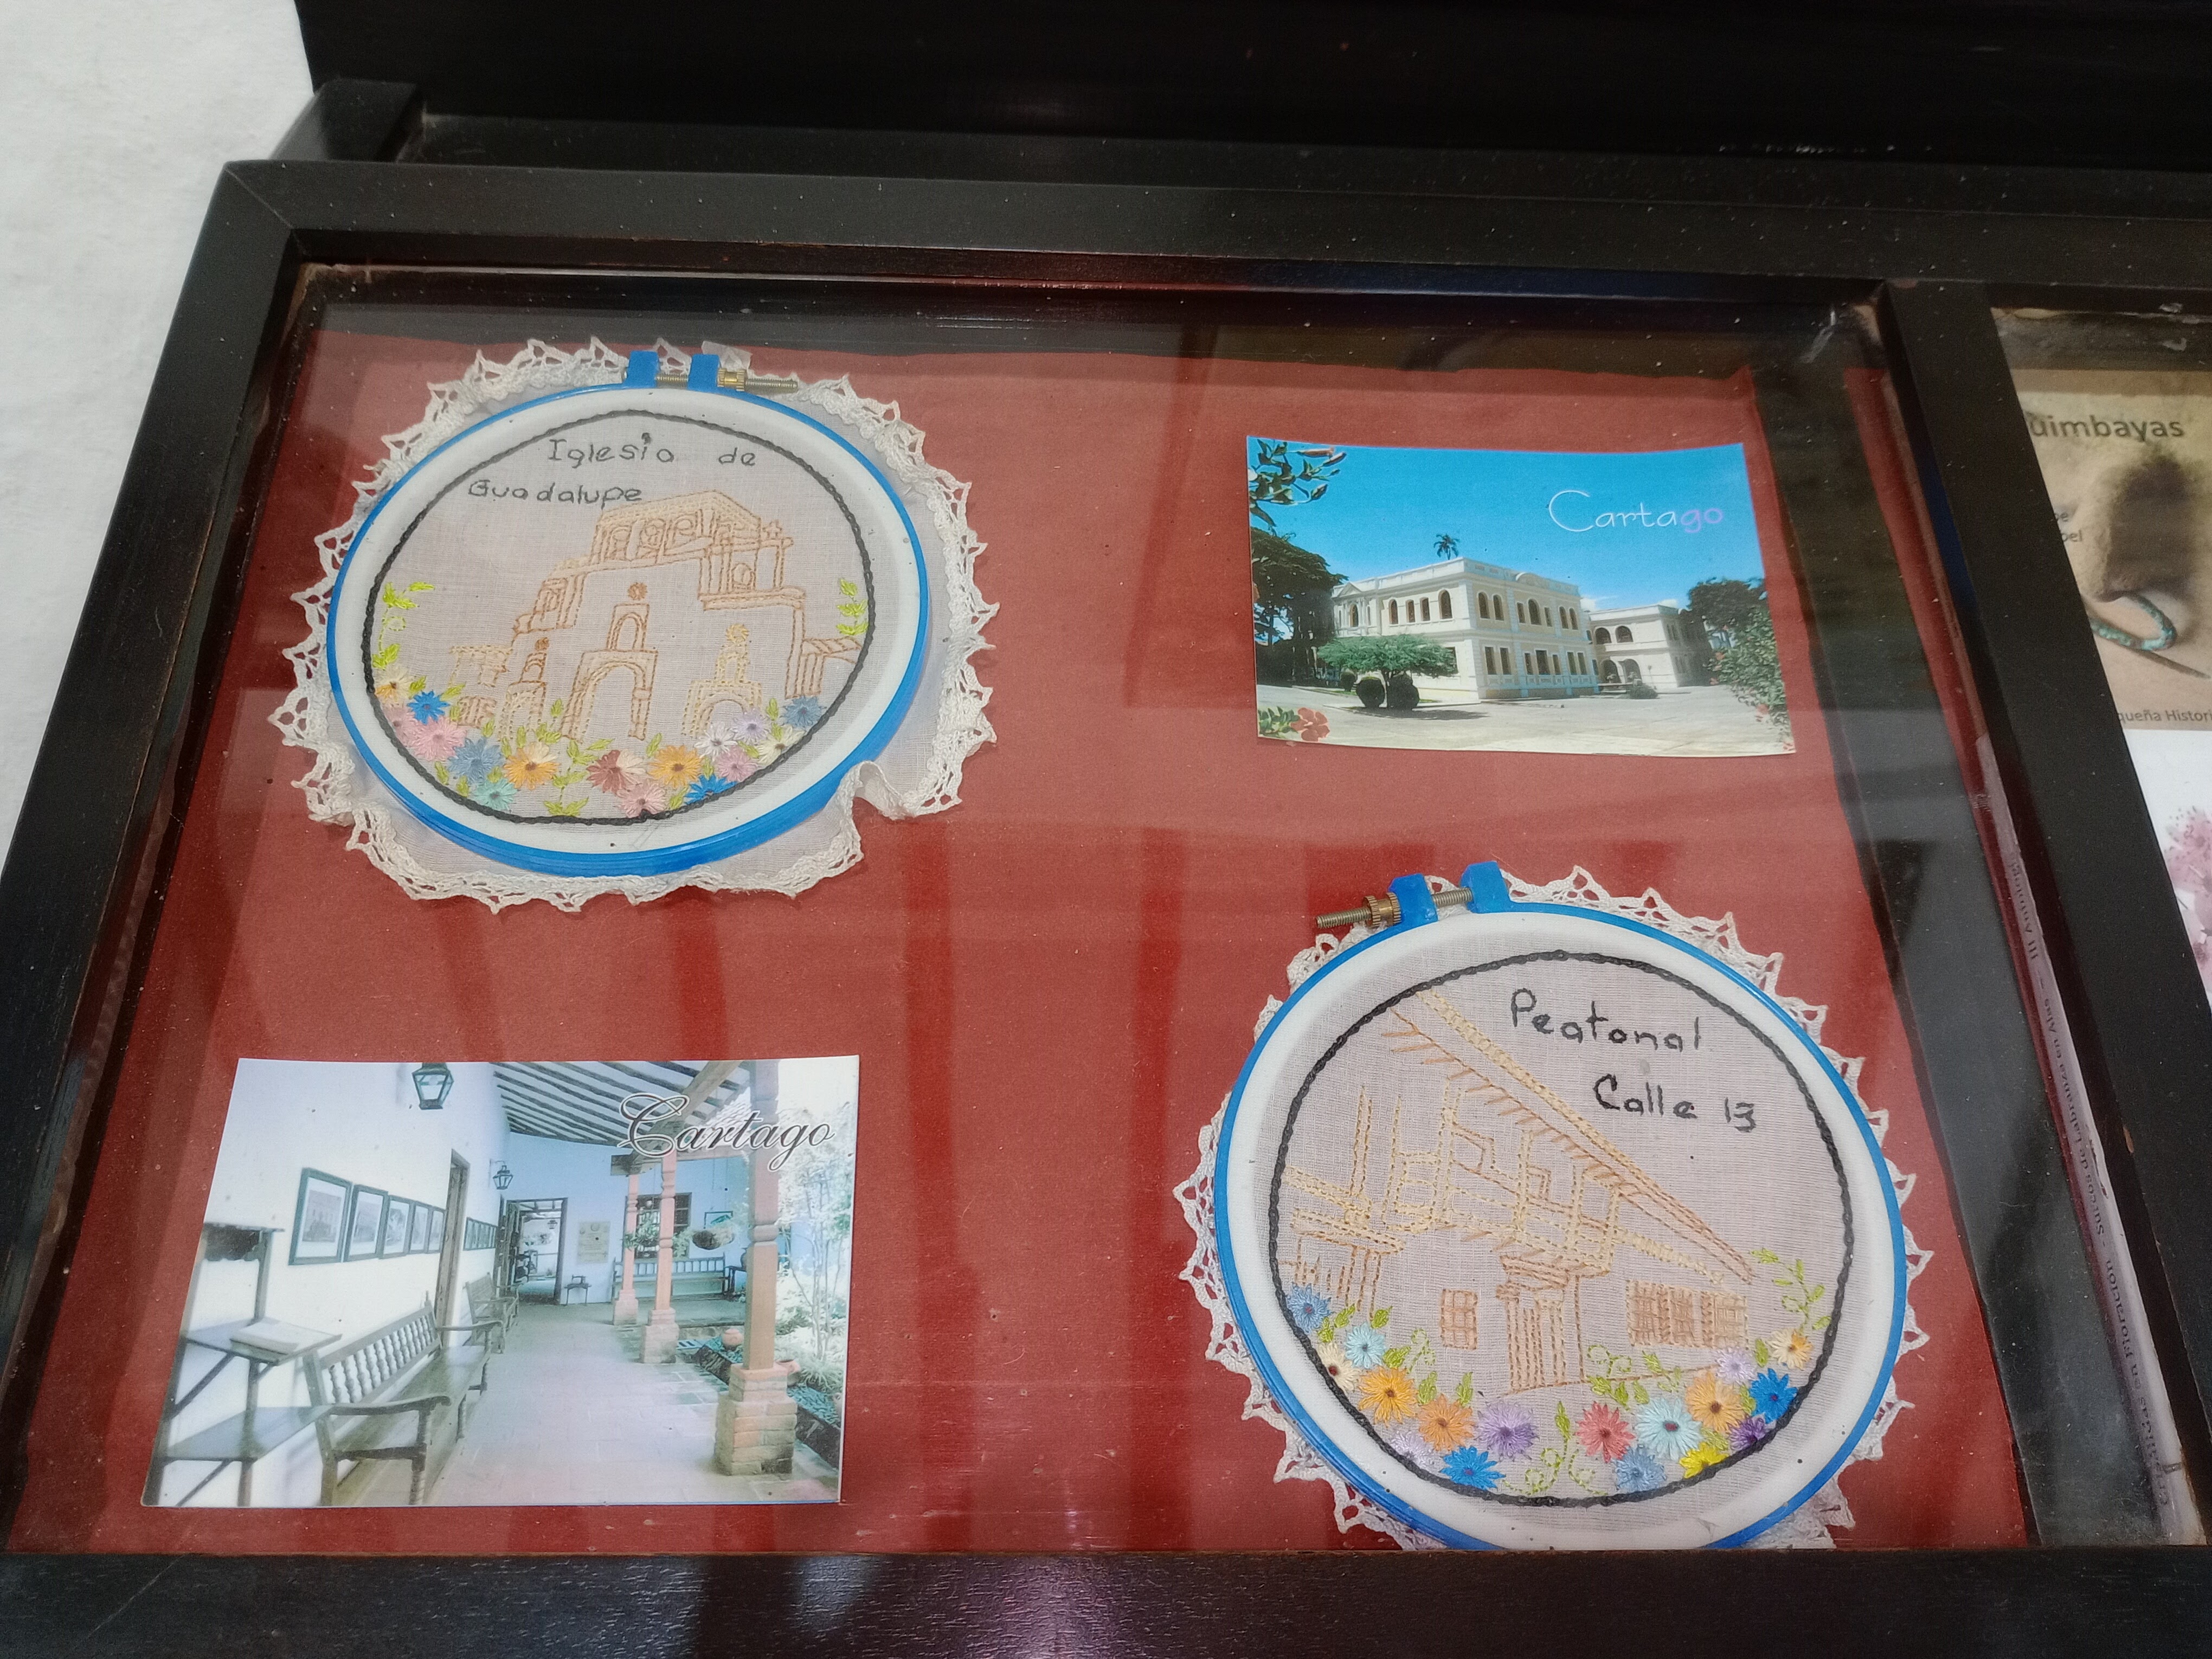
Some of Cartago’s many churches.
Church of Guadalupe
Church of Guadalupe
House of the Artisan (Casa Artesanal)
There is a really nice little store selling handicrafts in Pedro Morales Pino Plaza across from the Church of Guadalupe. It is a cooperative space where each artisan has her own space to sell her wares.
House of the Artisan
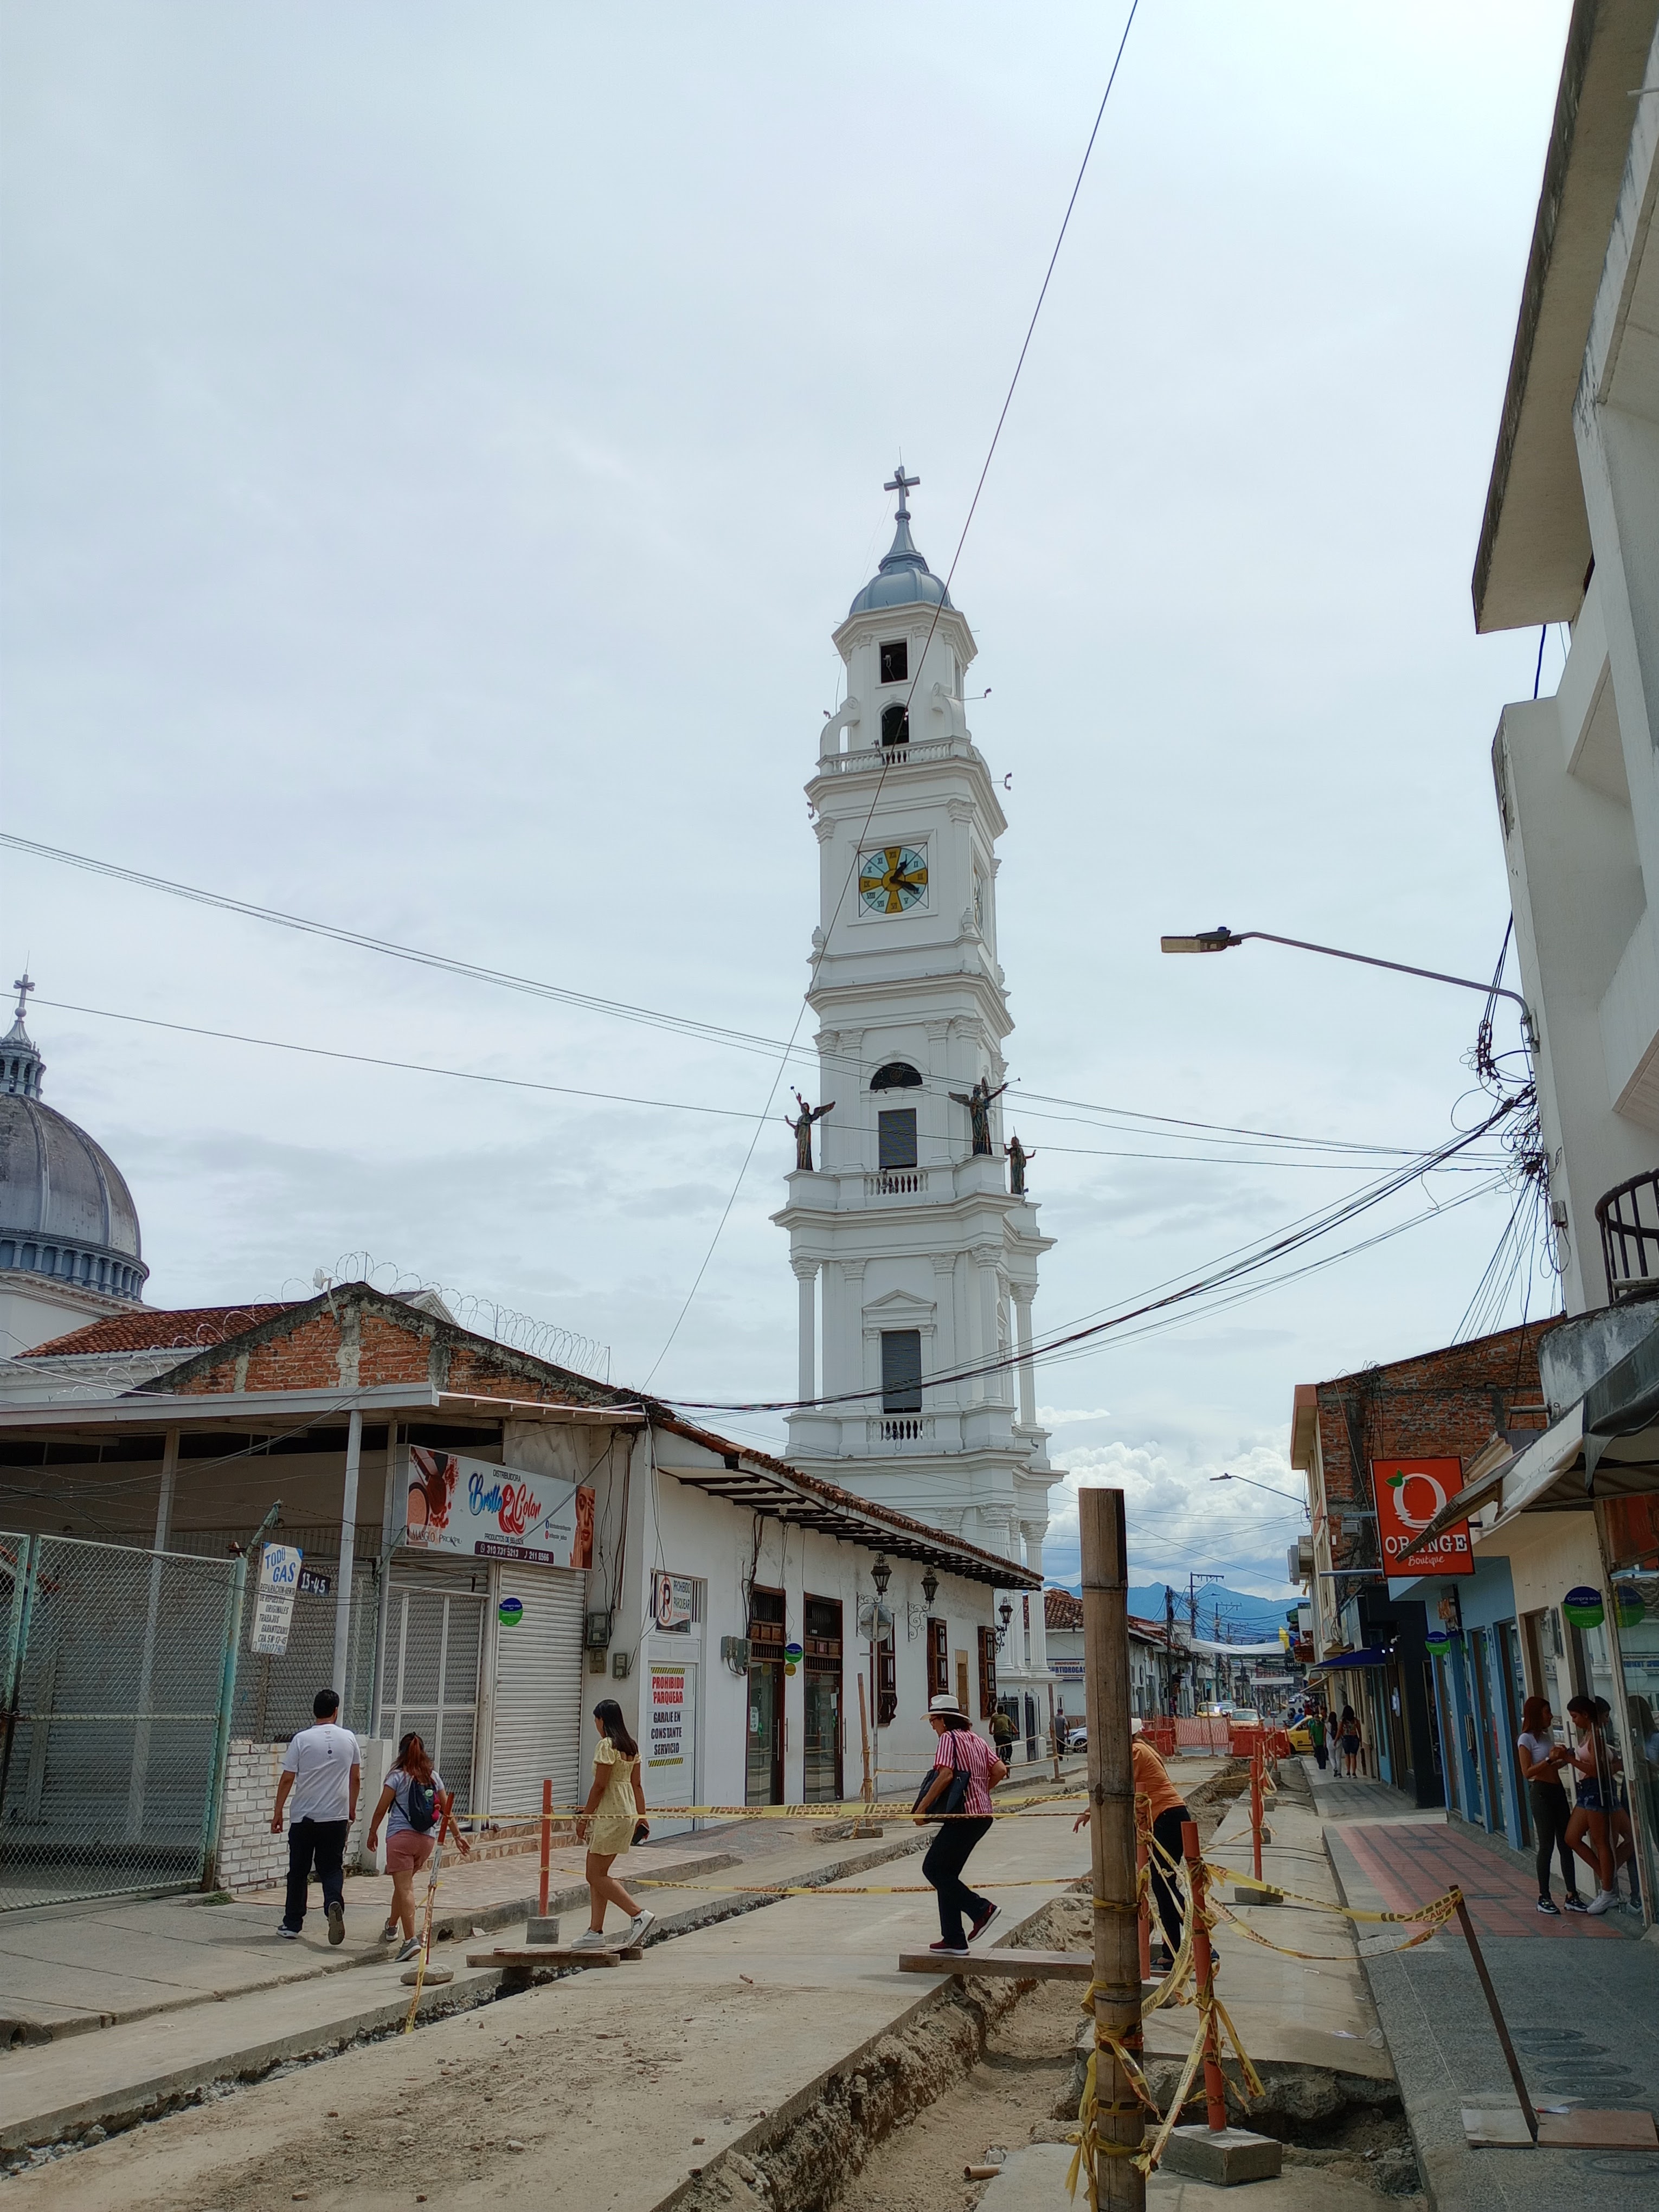
The city is seeing lots of public works improvements.
Church of Mt. Carmel bell tower
Church of Mt. Carmel
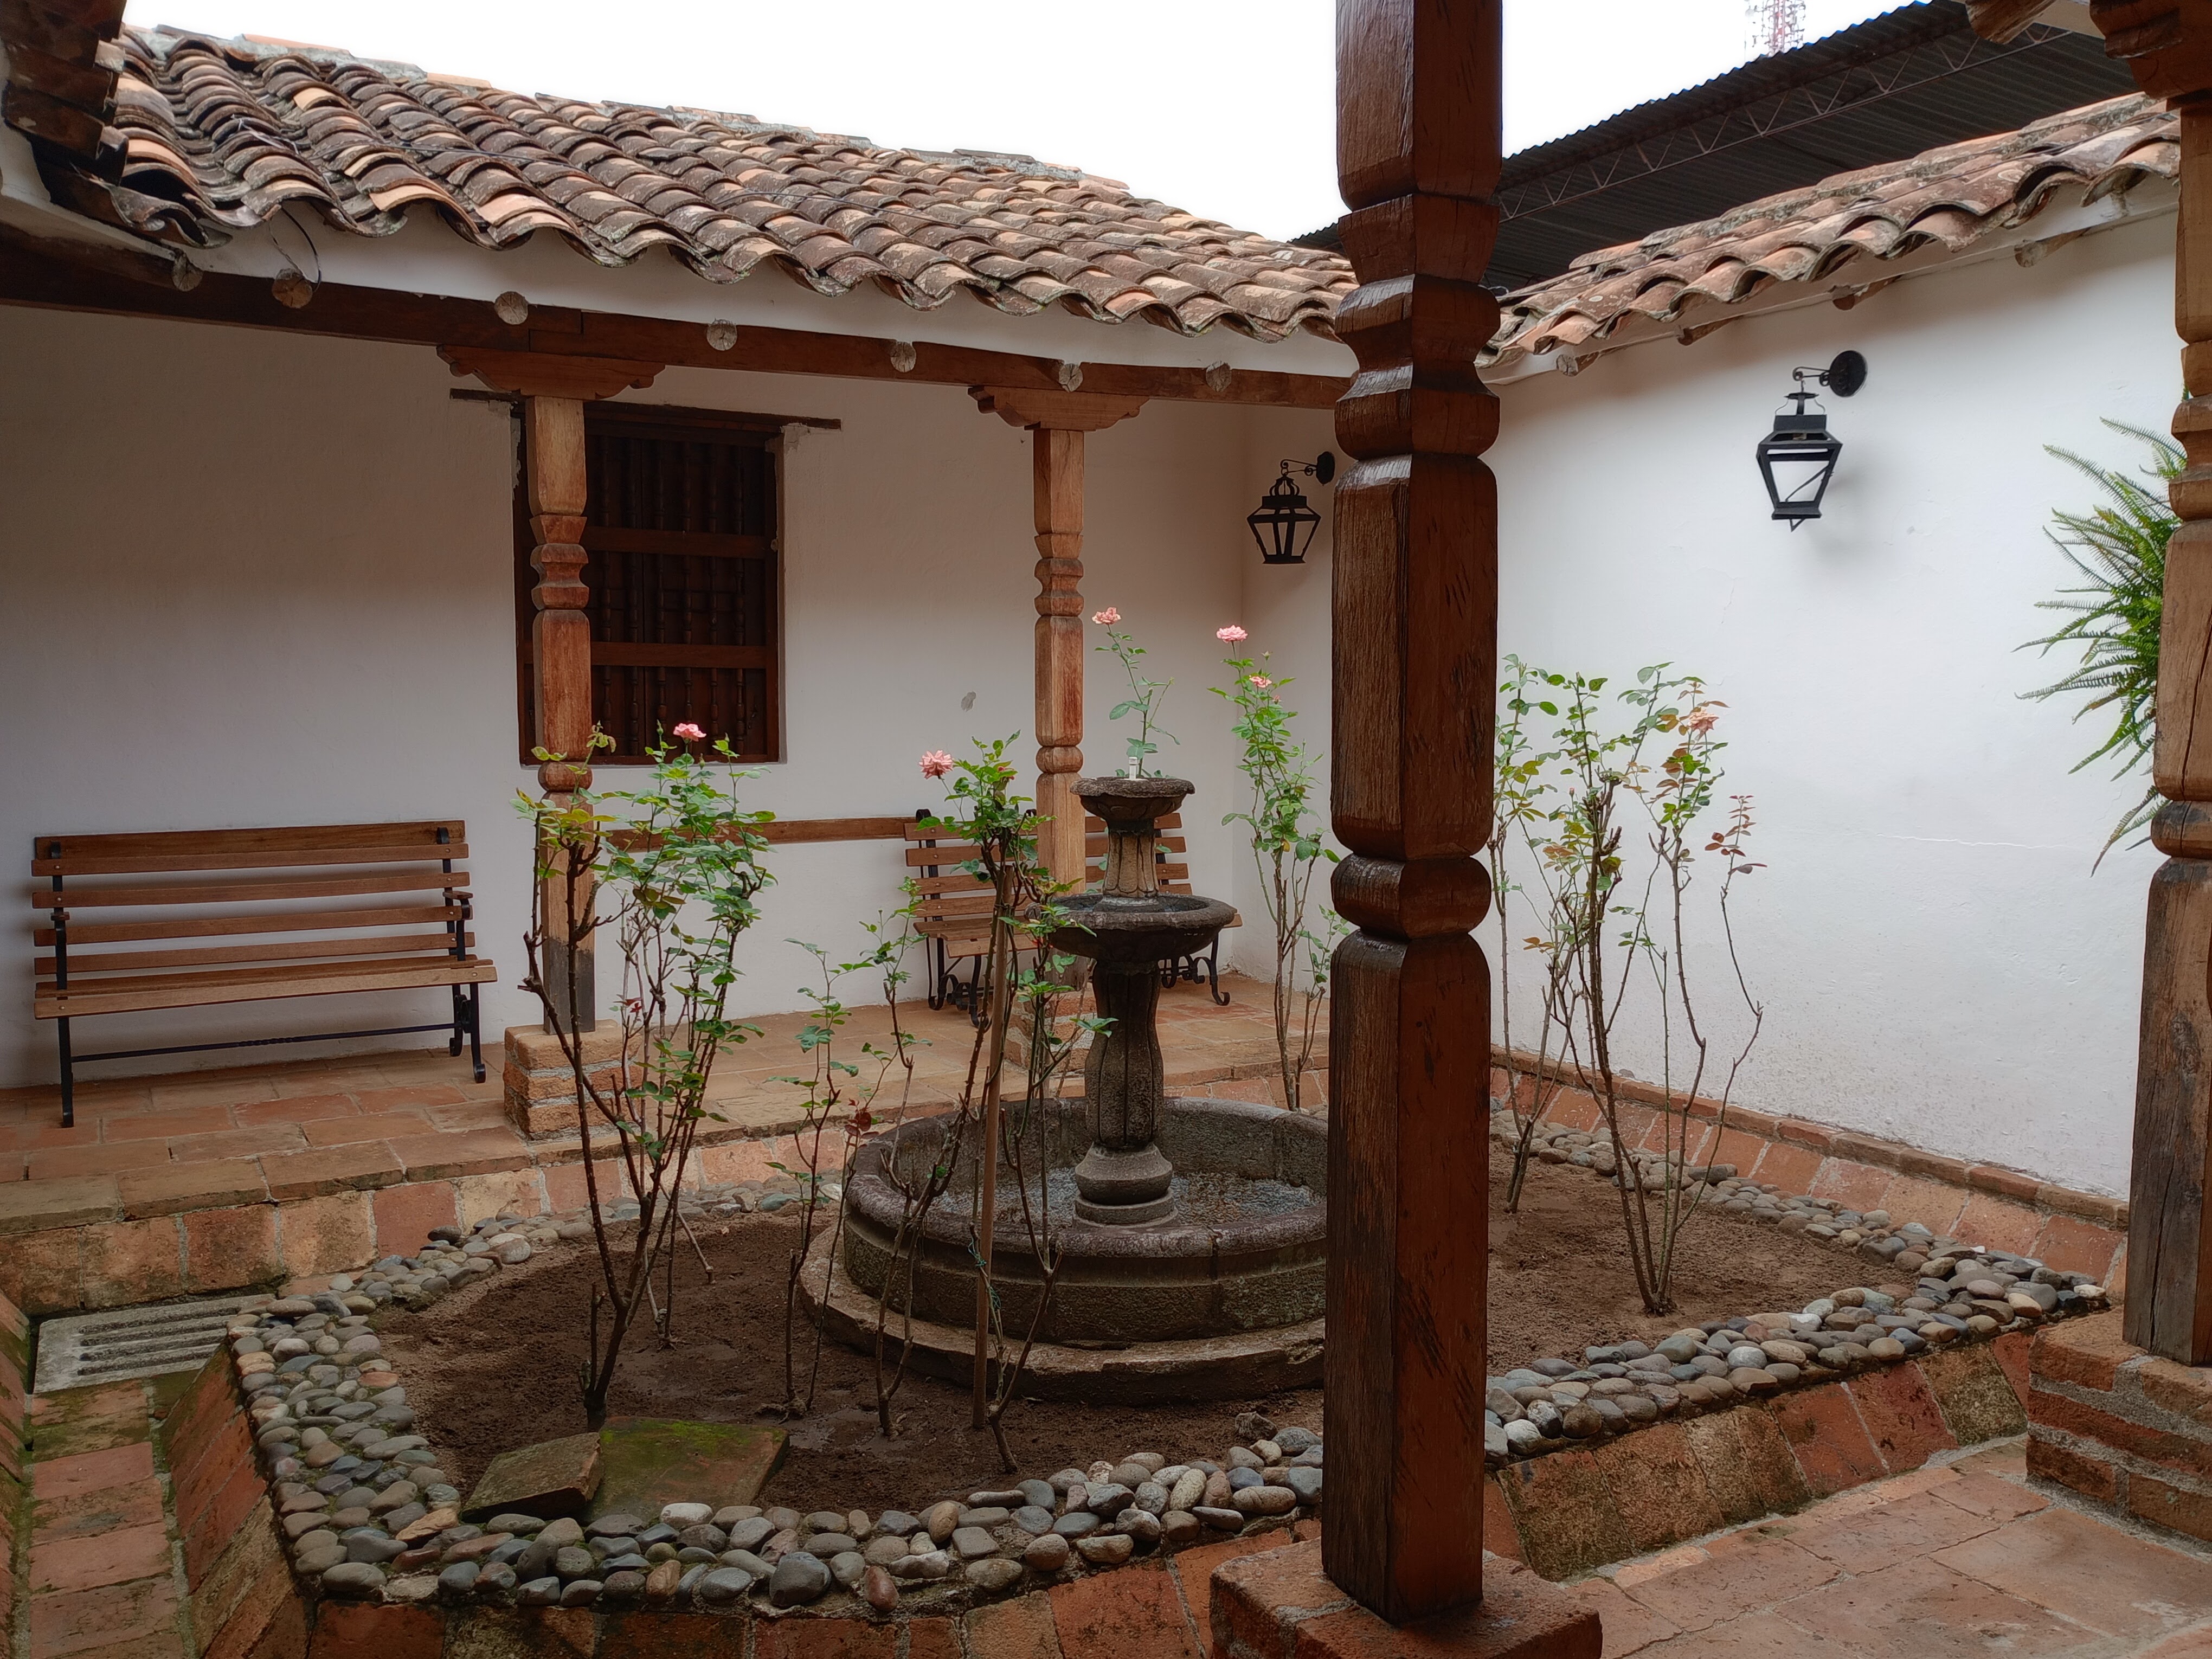
House of the Viceroy (Casa del Virrey)
The house of the Viceroy was built in the late 1700s (18th) century by the Marisancena family to allegedly receive the Viceroy José Manuel Ezpeleta.
The Pedro Morales Pino Music Conservatory is housed in the back half of the property.
House of the Viceroy
Interior courtyard, house of the Viceroy
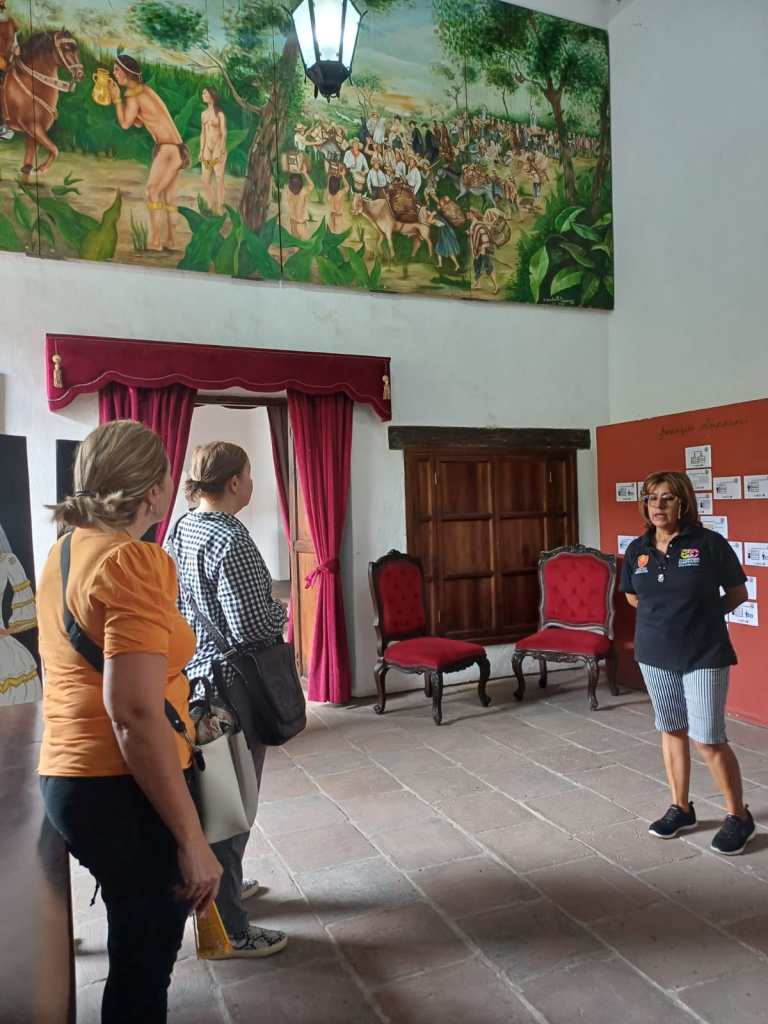
House of the Viceroy tour
Entrance, house of the Viceroy
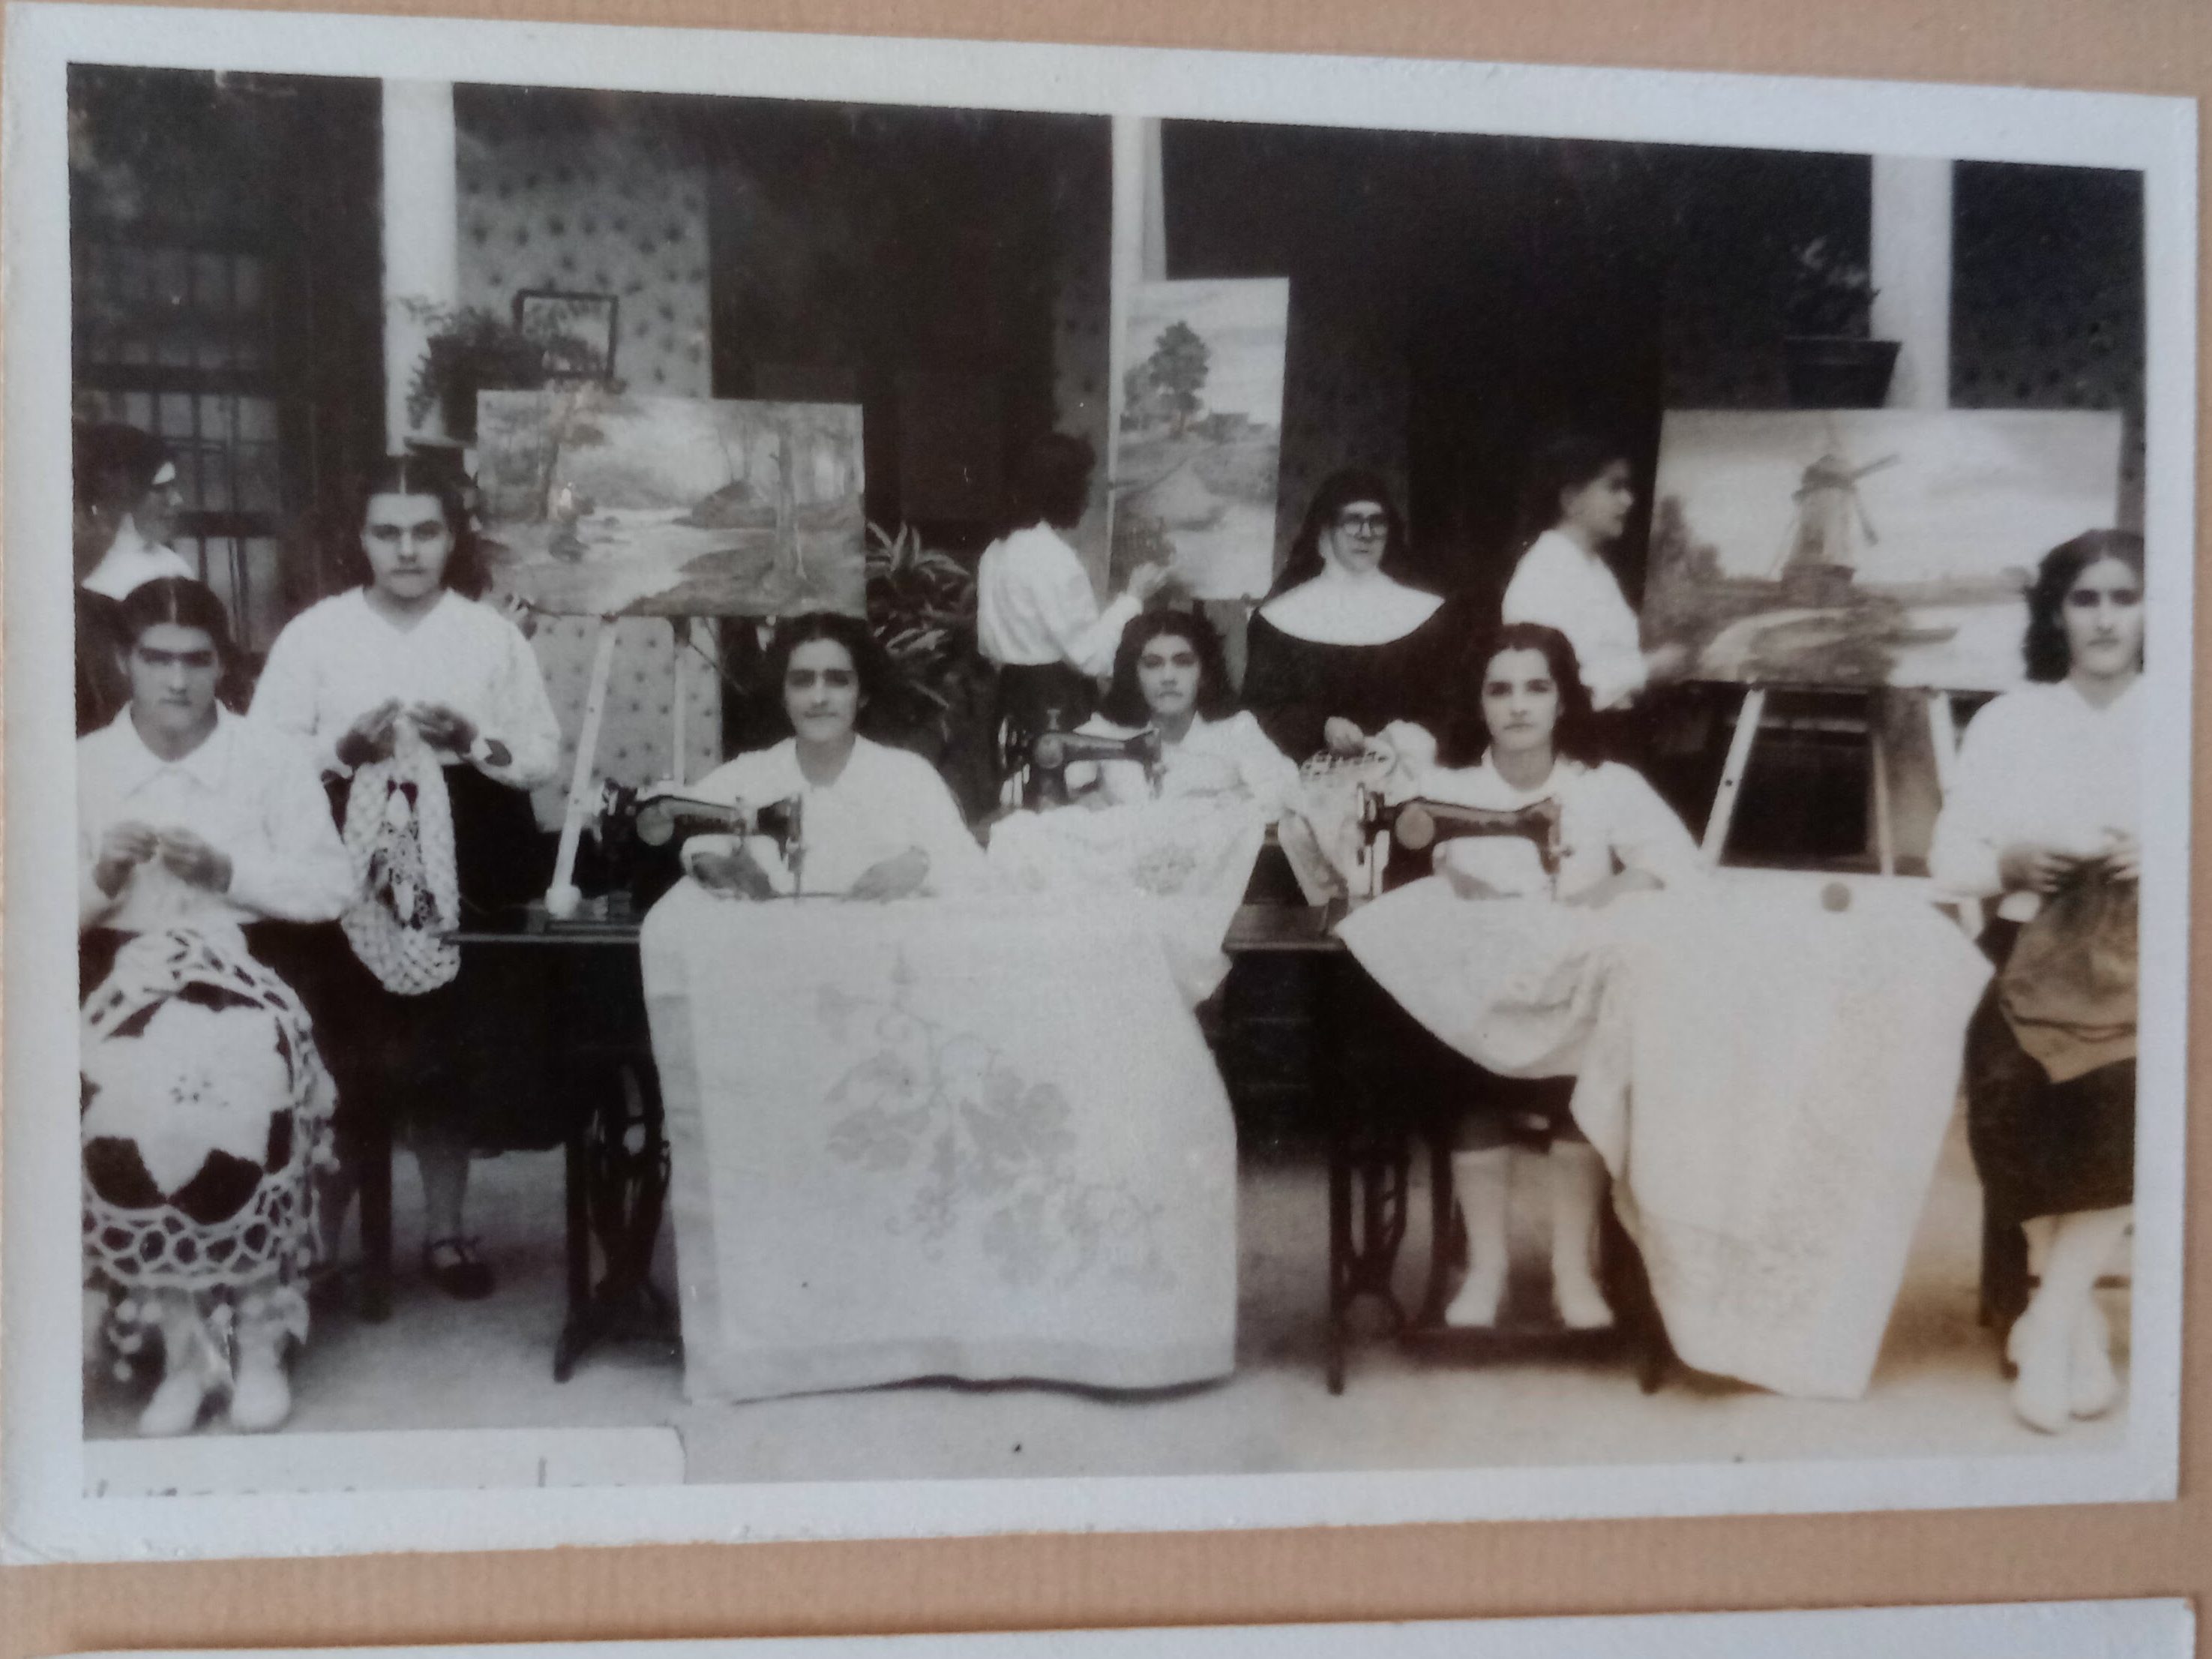
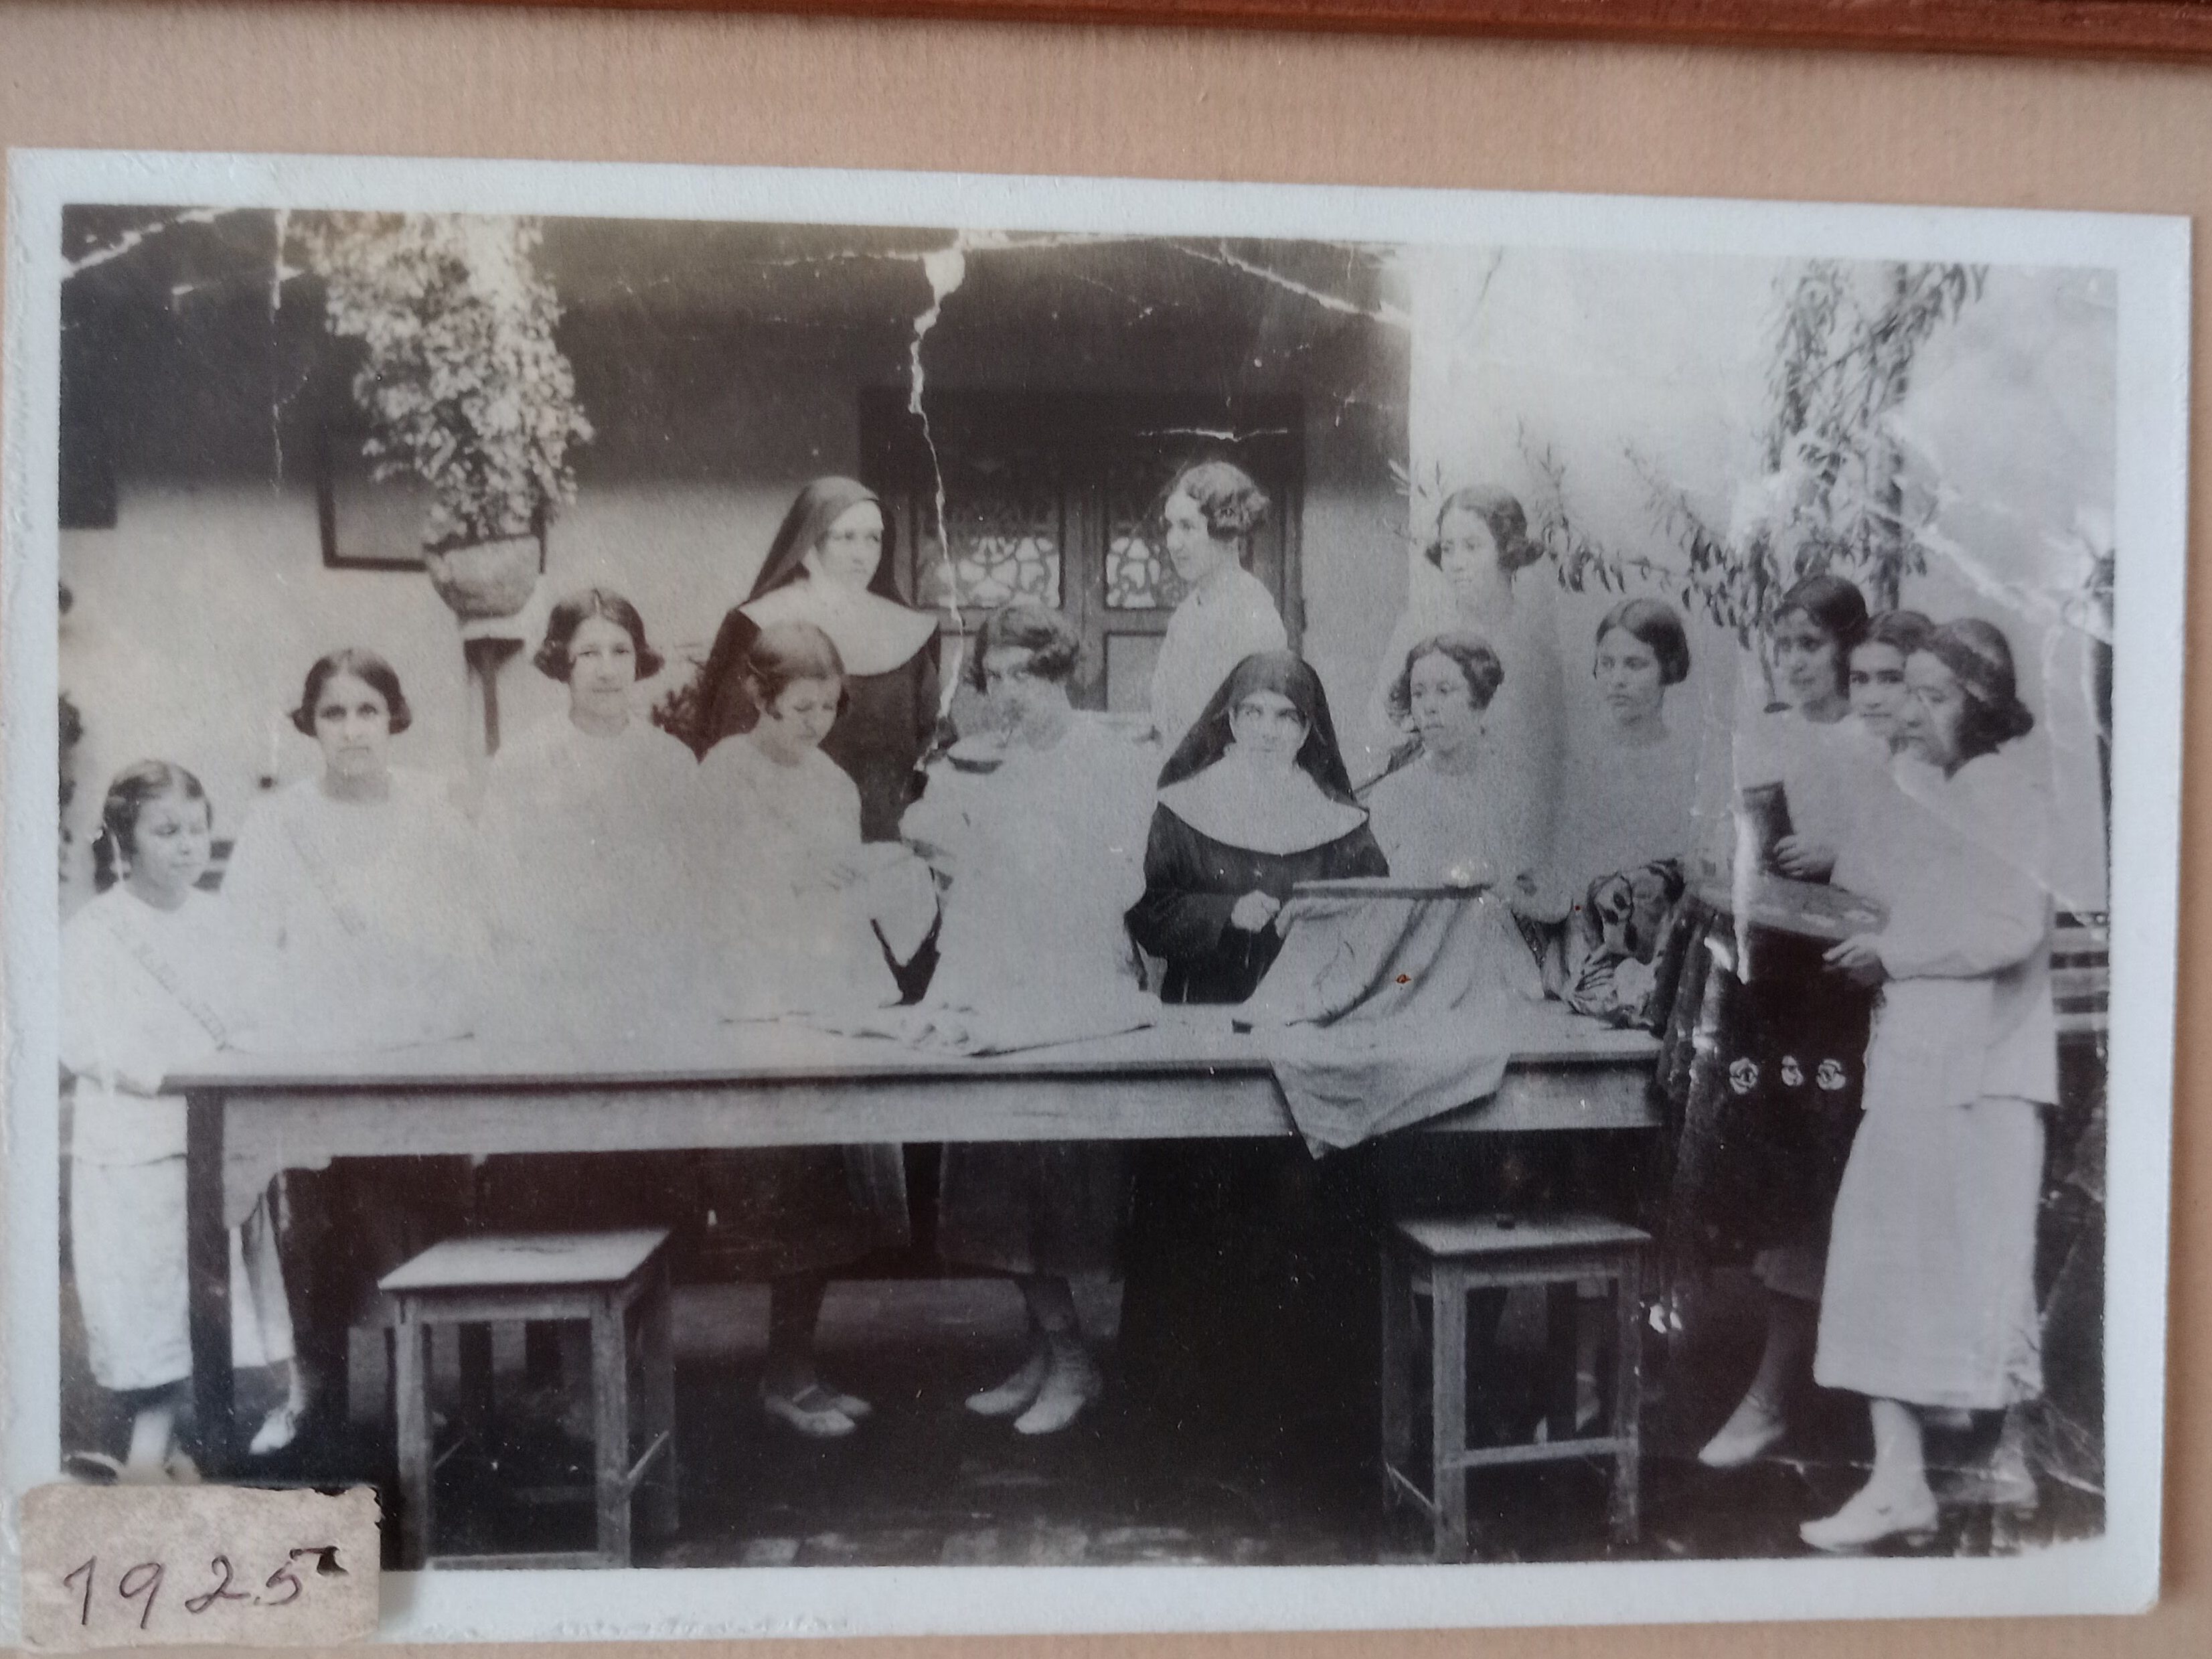
Sewing class at the María Auxiliadora (Mary help of Christians) School
Embroidery class at María Auxiliadora School, 1925.
The girls also learned work skills like typing.
Embroidery is part of Cartago’s identity.
There is a saying in Cartago, Más cartagüeño que un bordado. It means more Carthaginian than an embroidery. It is used to describe someone or something that represents the city’s identity well.
Window, House of the Viceroy.
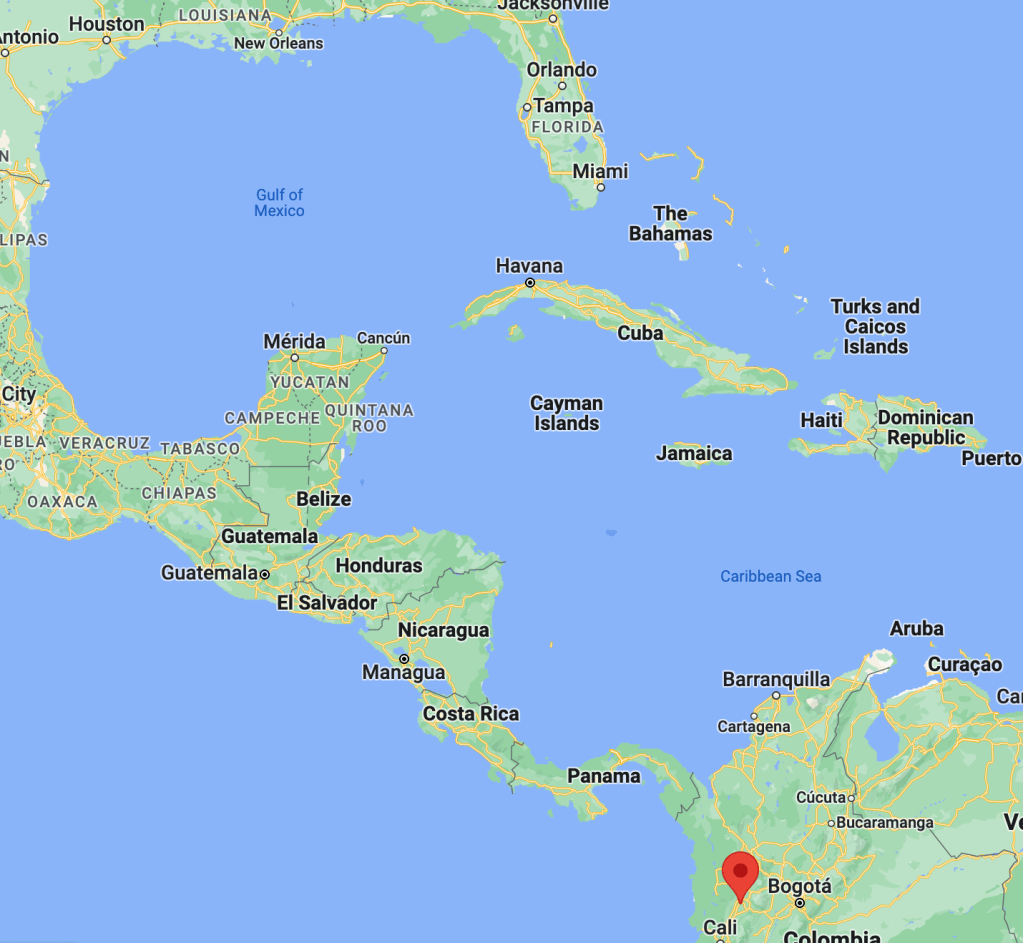
Cartago was founded on August 9th, 1540. It just turned 483 years old this year (2023.)
It’s been a while since I visited Cartago (since before the pandemic) so it was time.
Cartago, in the southwest of Colombia.
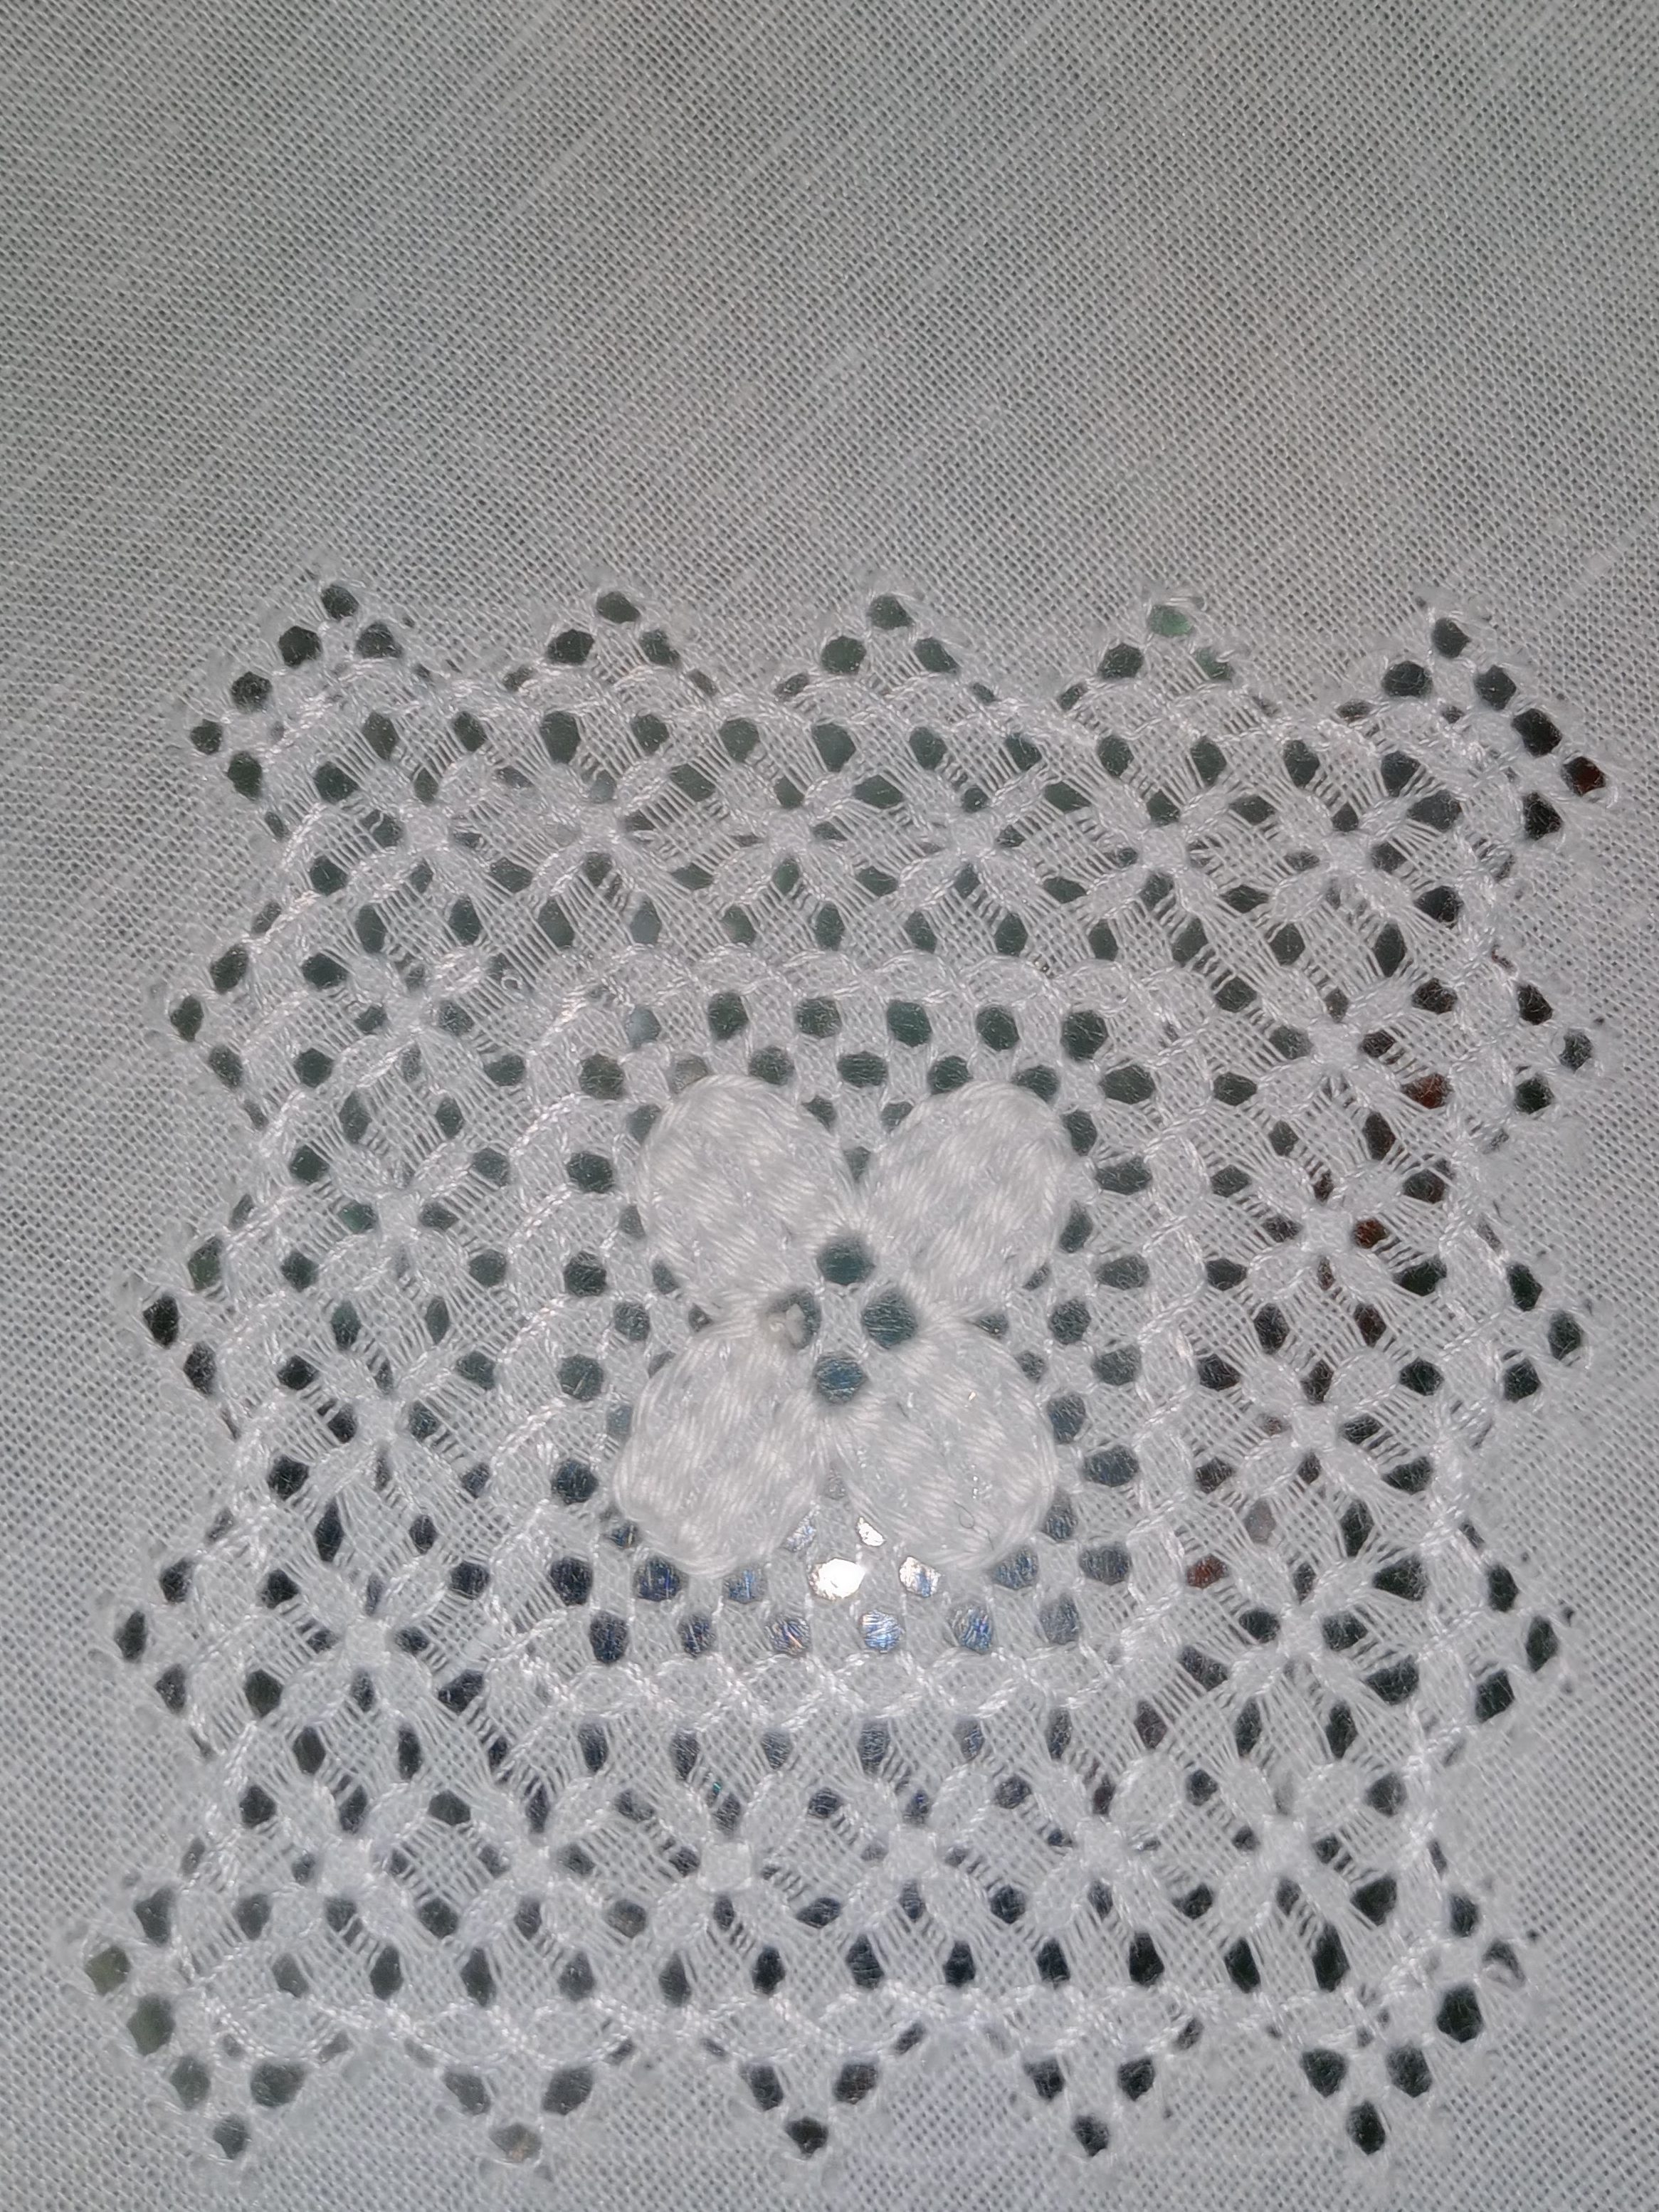
Cartago is a town in southwest Colombia that is considered Colombia’s Embroidery Capital. Cartago’s most traditional style of embroidery is Calado which translates to openwork. Calado is a type of drawn thread embroidery (deshilado) and it also encompasses tape lace (encaje de sesgos.)
Cartago Openwork/Drawn thread (calado de Cartago.)
The best way to get to Cartago from the US is to fly. There is an American Airlines flight from Miami to Pereira’s Matecaña airport almost every day. From Pereira, ground transportation to Cartago can be arranged; it’s roughly 45 minutes away.
The Wow Company offers very interesting tours so I decided to take two of them:
The artisanal experience (Experiencia artesanal)
The courageous city of Cartago (La valiente ciudad de Cartago)
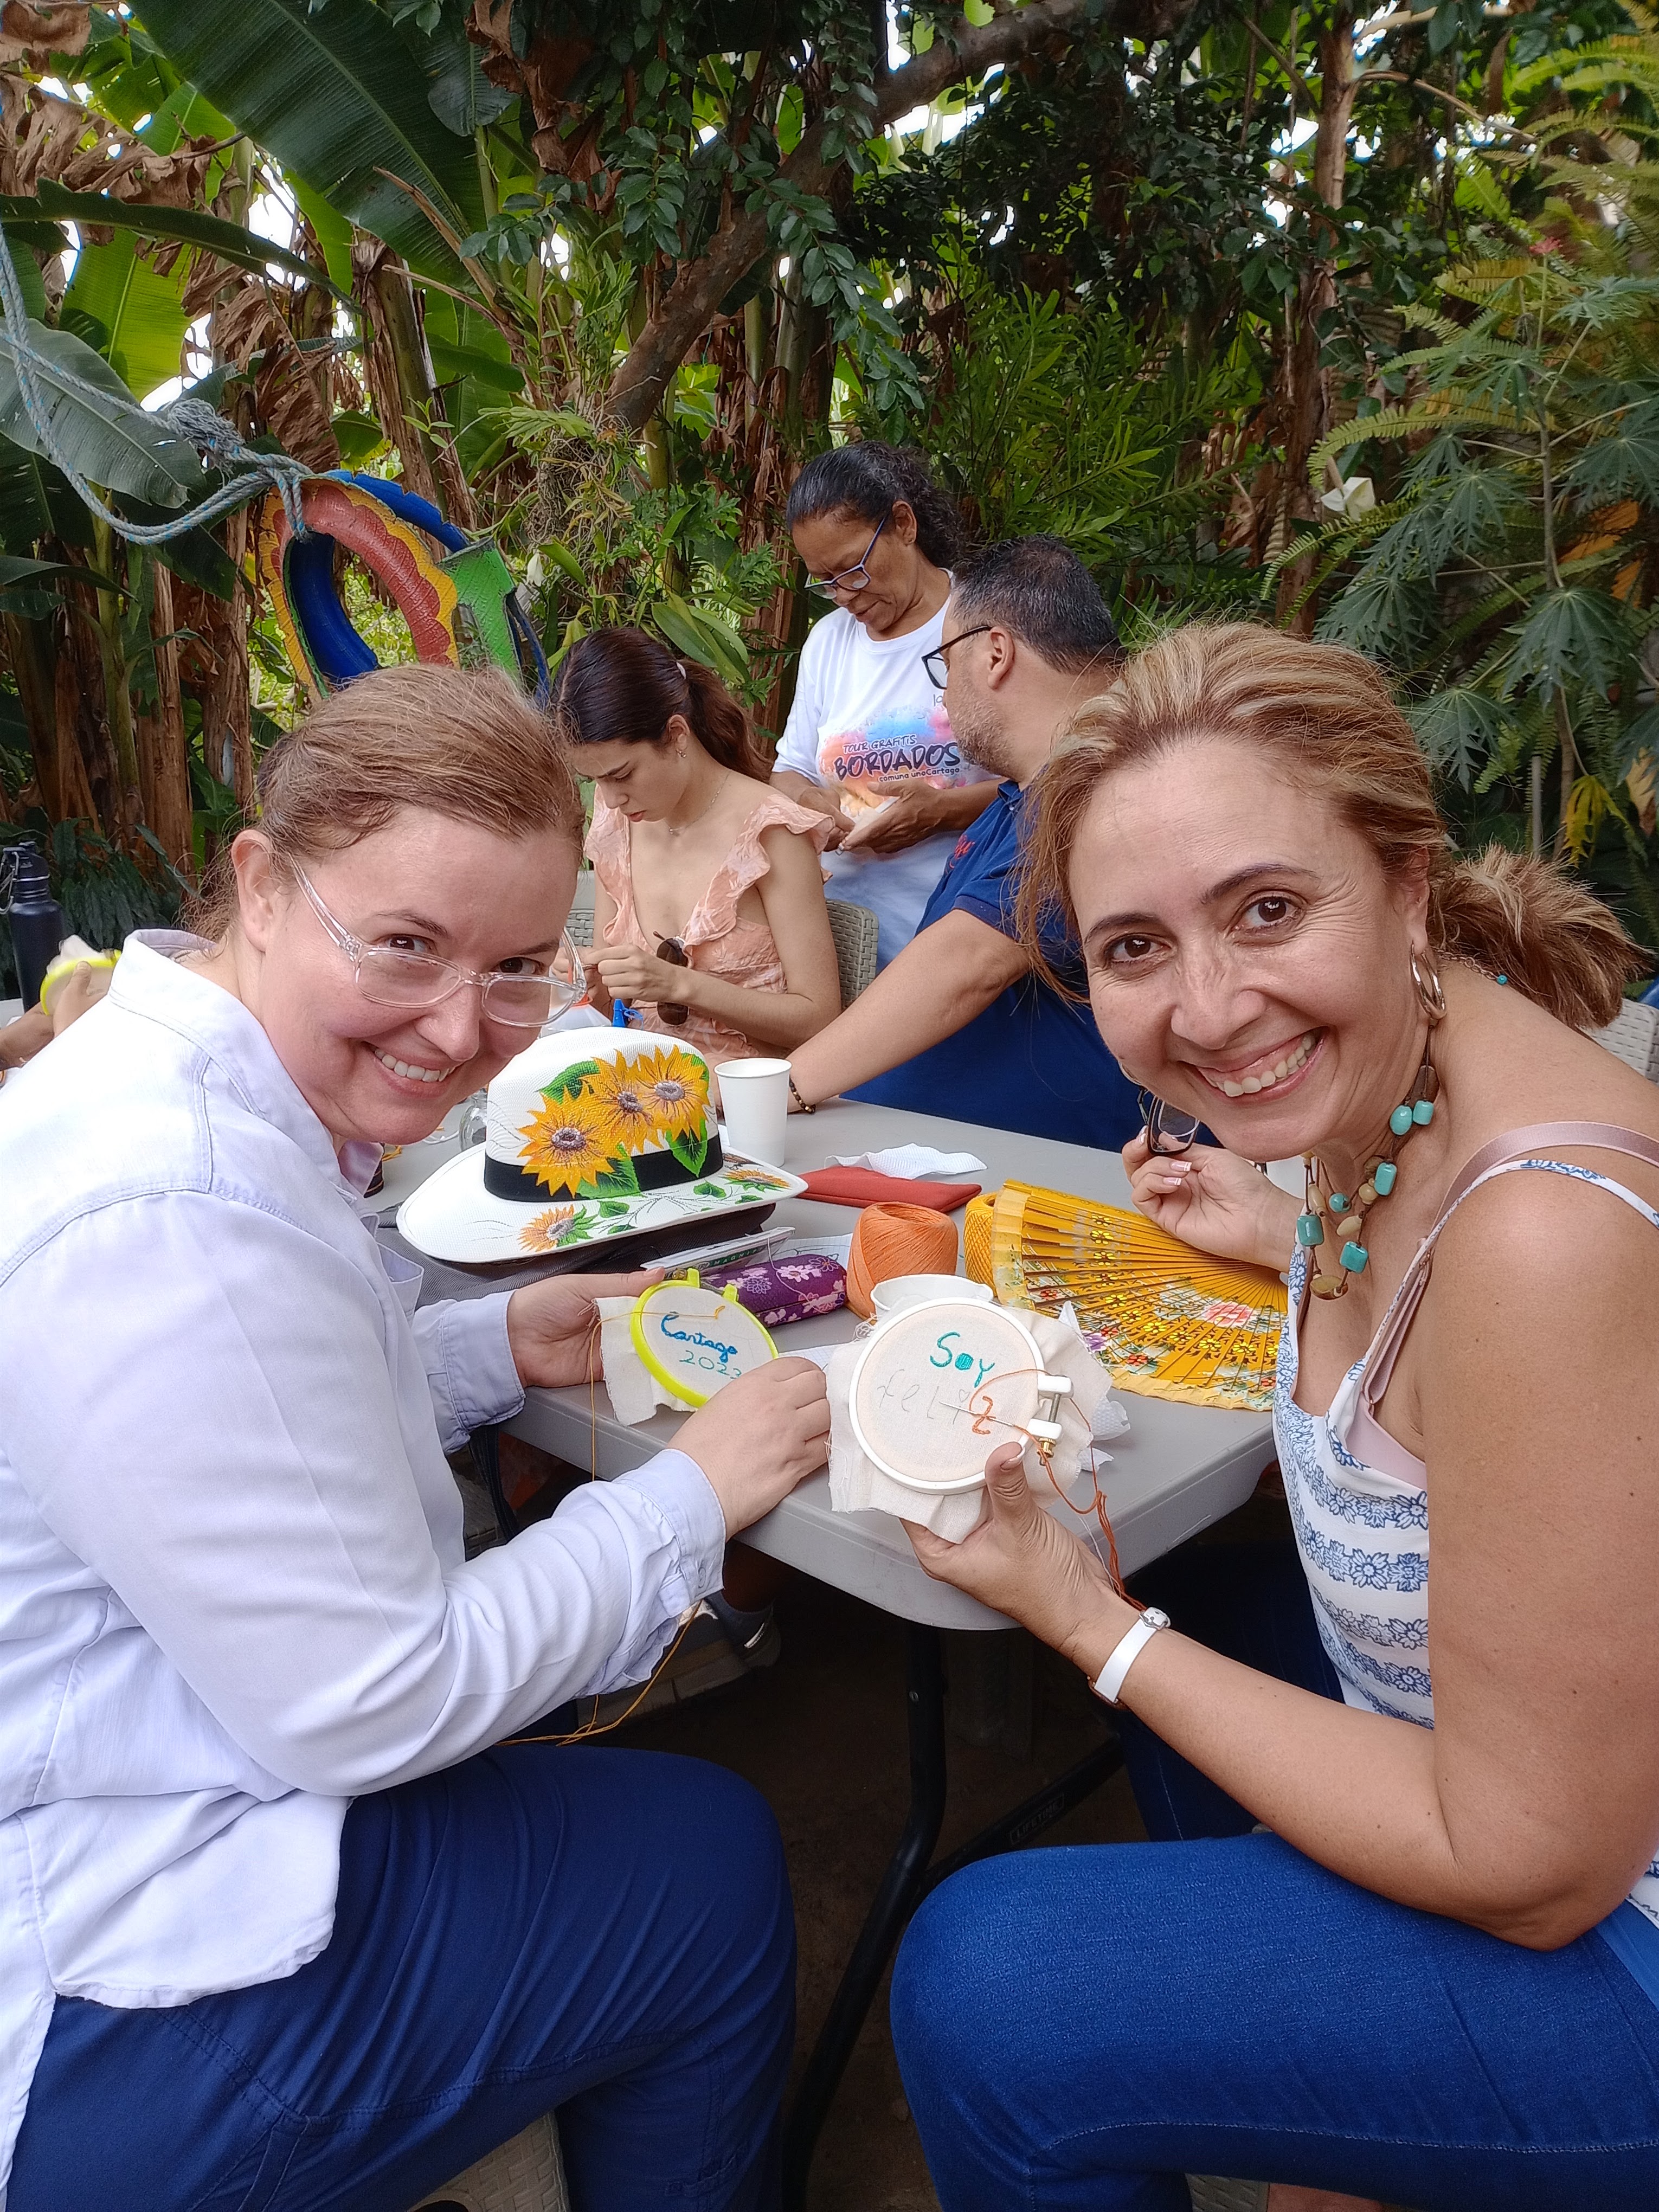
Artisanal Experience
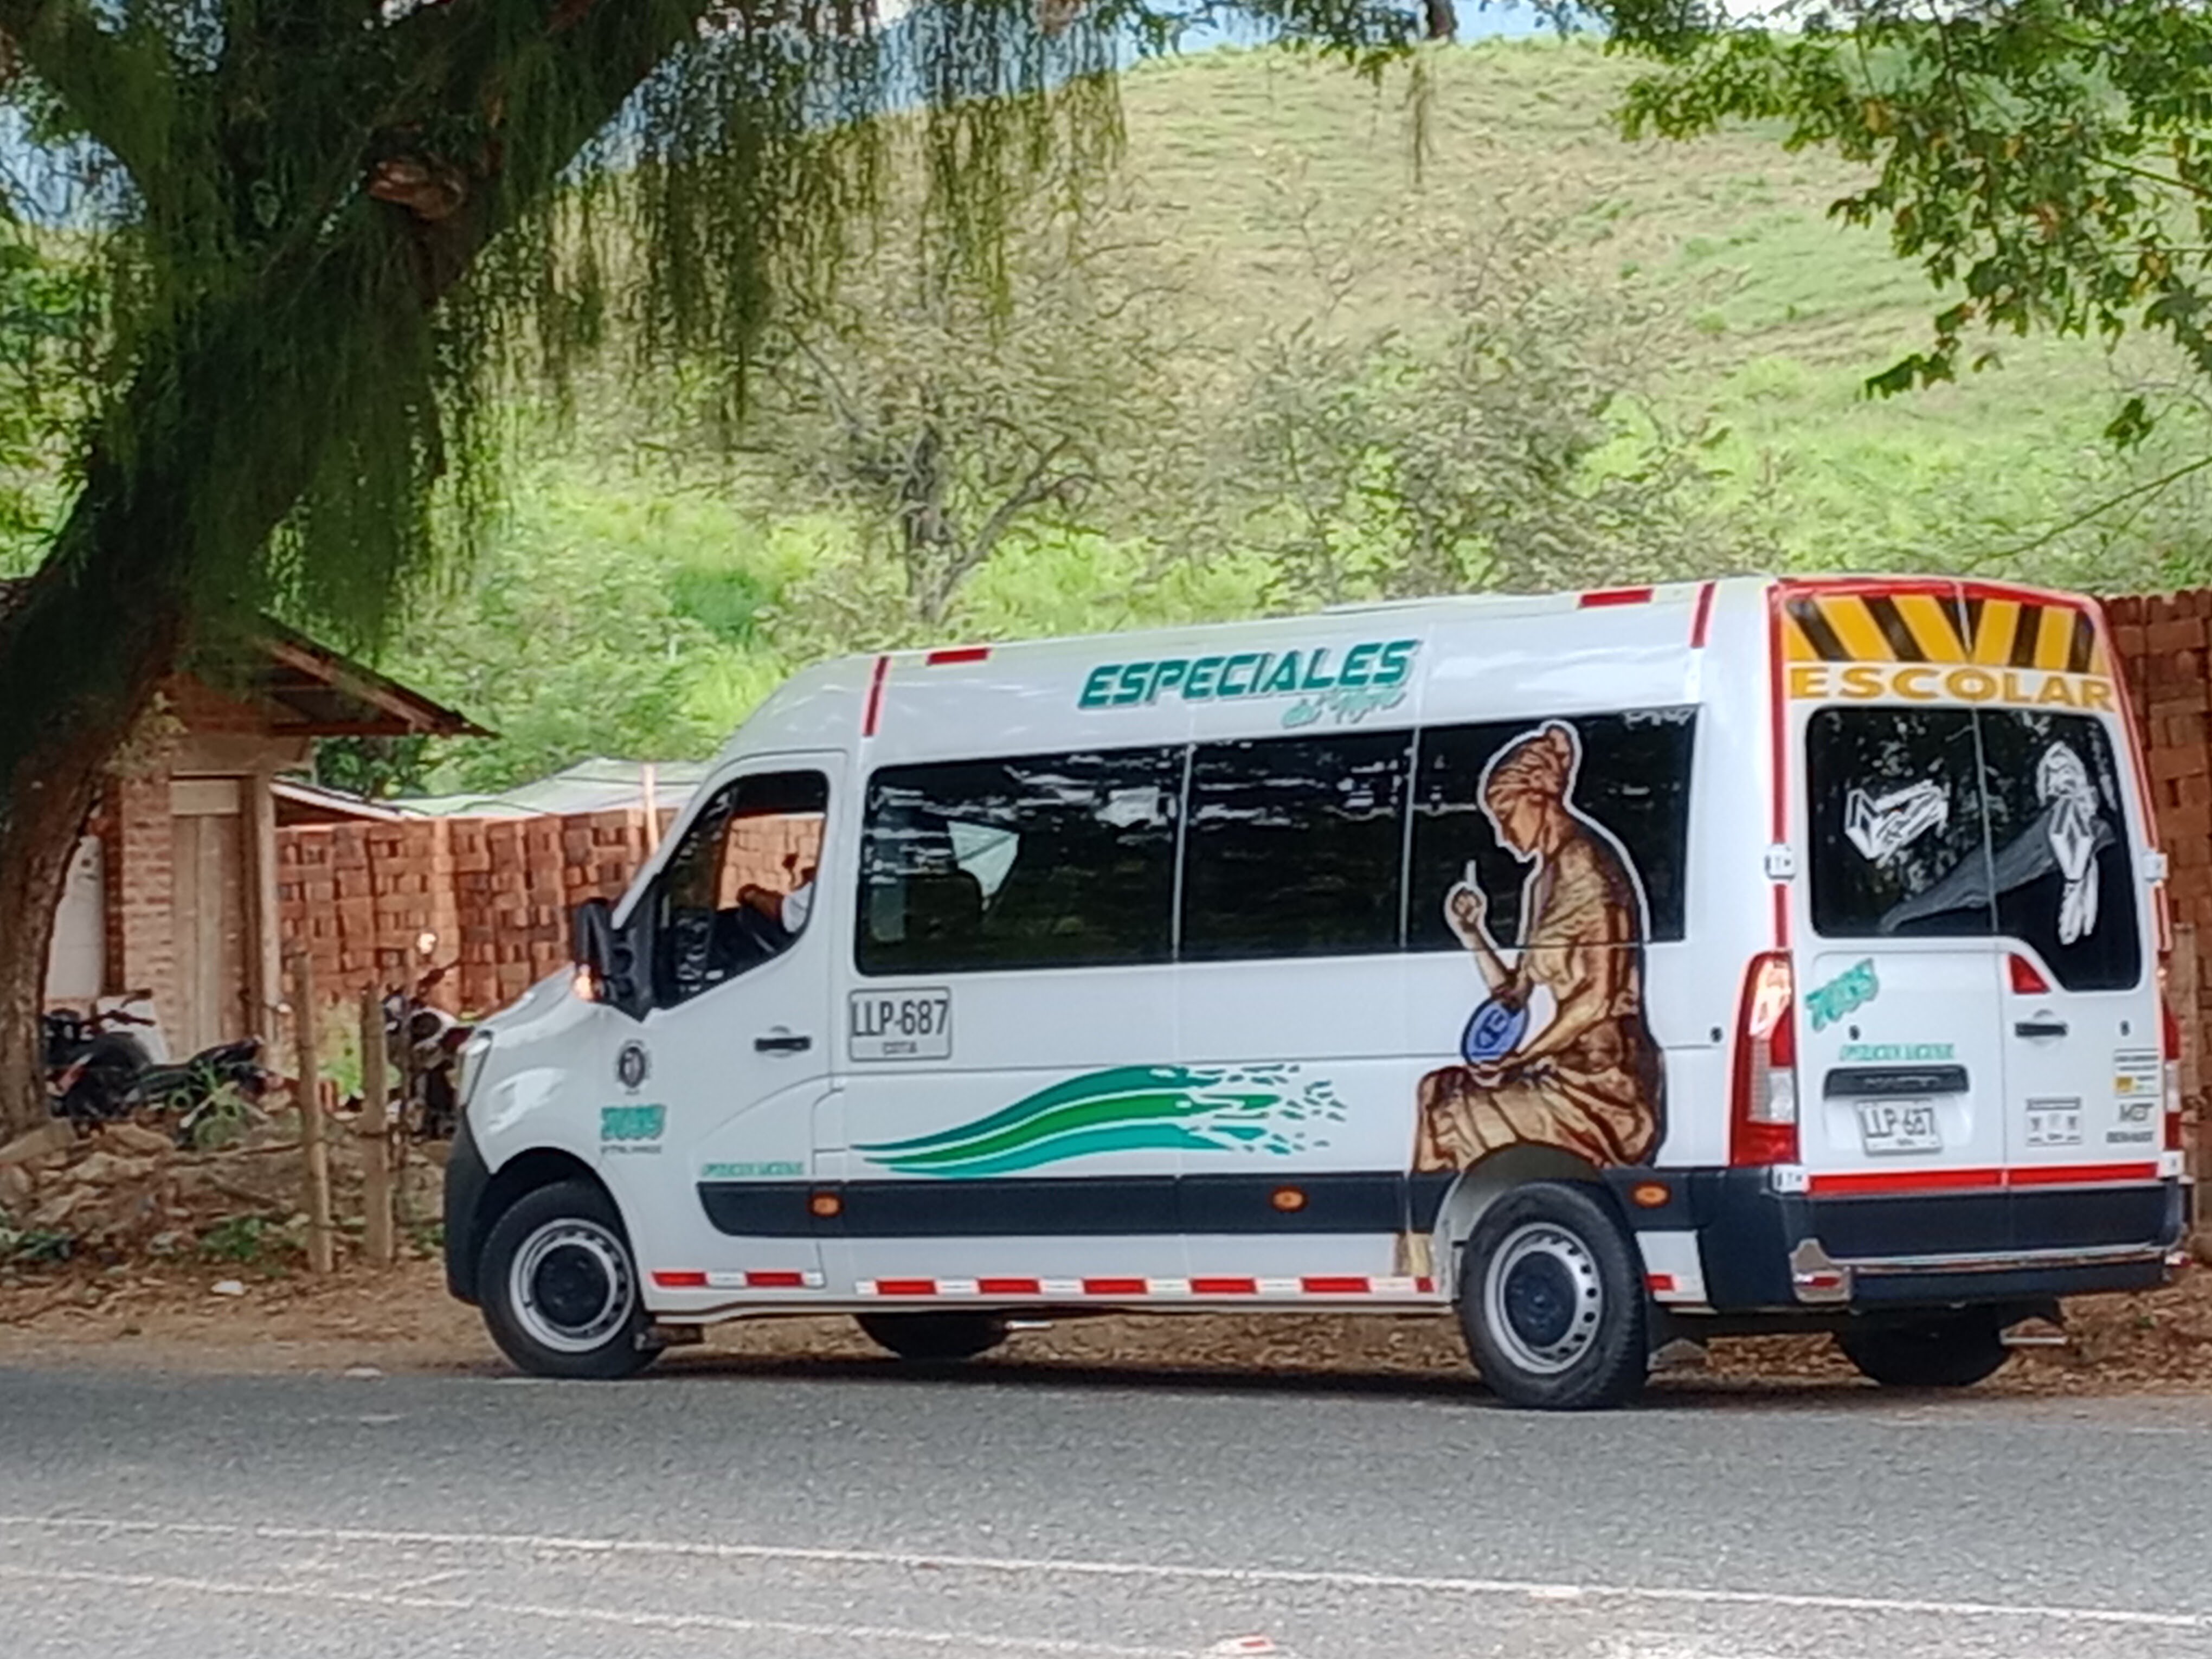
The embroidery tour bus
We were collected in a mini-bus, about 15 of us, bright and early at 8:30 am, and were driven to the nearby town of Ansermanuevo, where most of the embroiderers live.
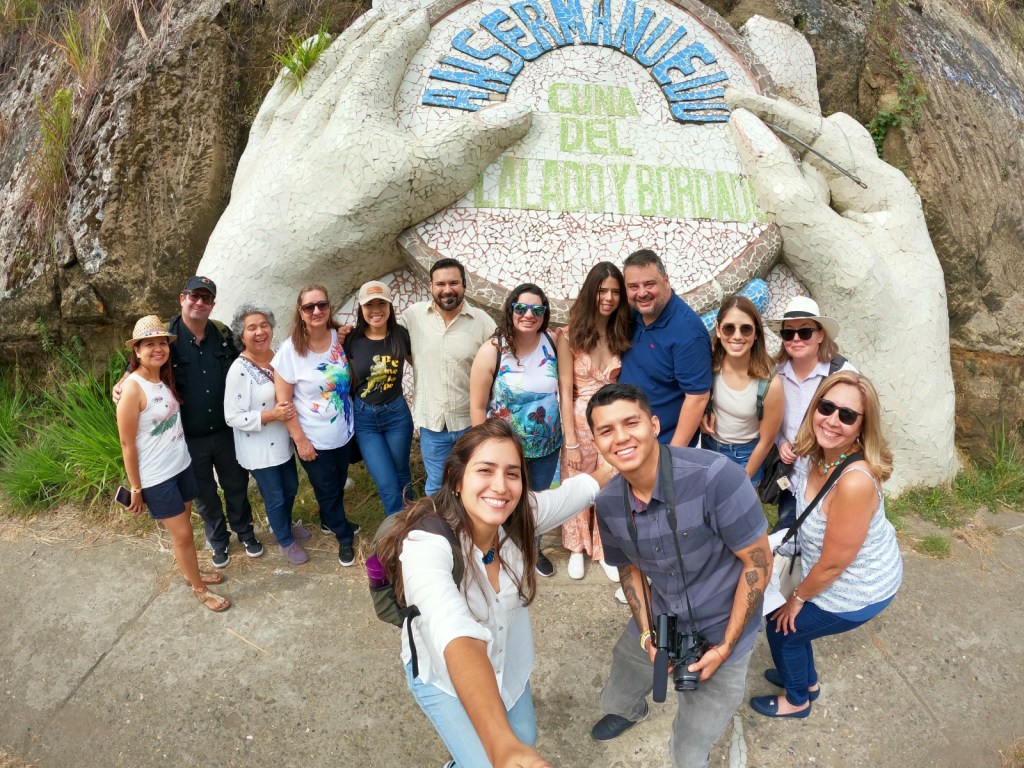
Ansermanuevo, cradle of Drawn thread Embroidery (Cuna del Calado y Bordado.) Sign outside of town: an embroidery frame, hands and a needle.
Ansermanuevo, cradle of Drawn thread Embroidery (Cuna del Calado y Bordado.) Sign outside of town: an embroidery frame, hands and a needle.
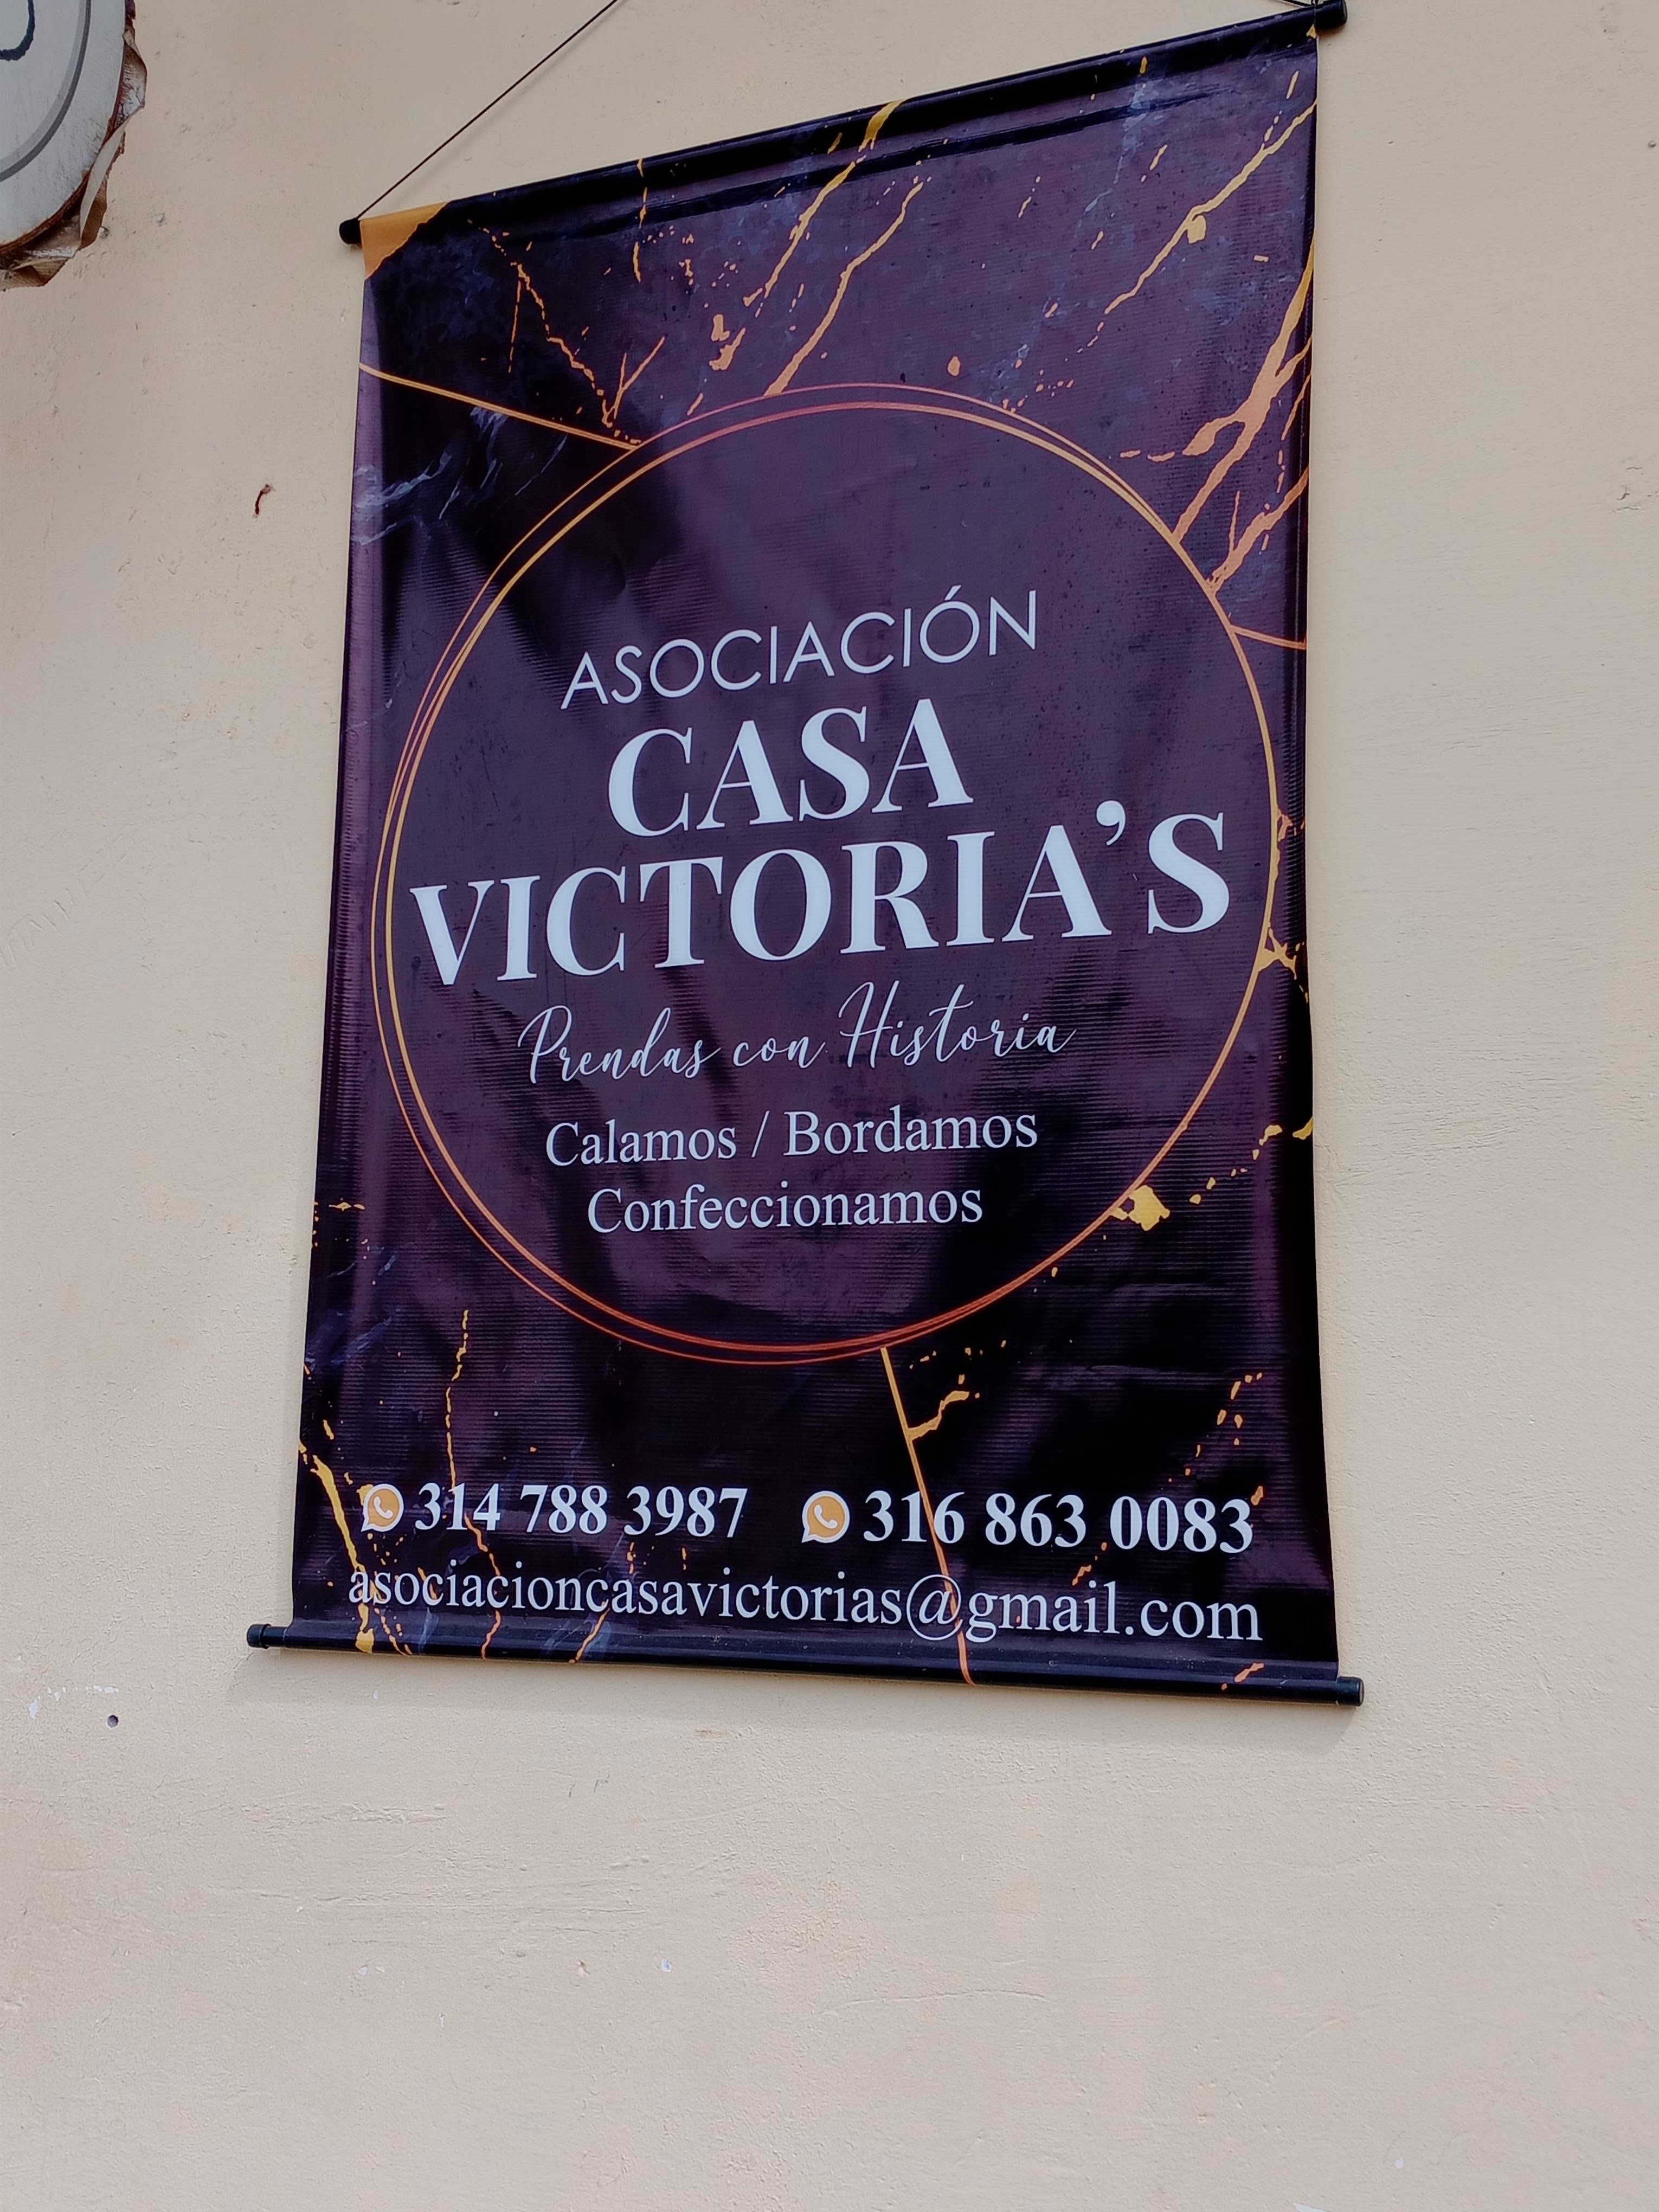
Lina Medina explaining Casa Victoria’s mission and teaching us how to draw threads from fabric using a piece of jute.
Casa Victoria is an association by embroiderers, for embroiderers.
Lina told us that the typical embroiderer only makes about $250,000 pesos a month (US $62.50 as of 8/5/2023) from embroidering.
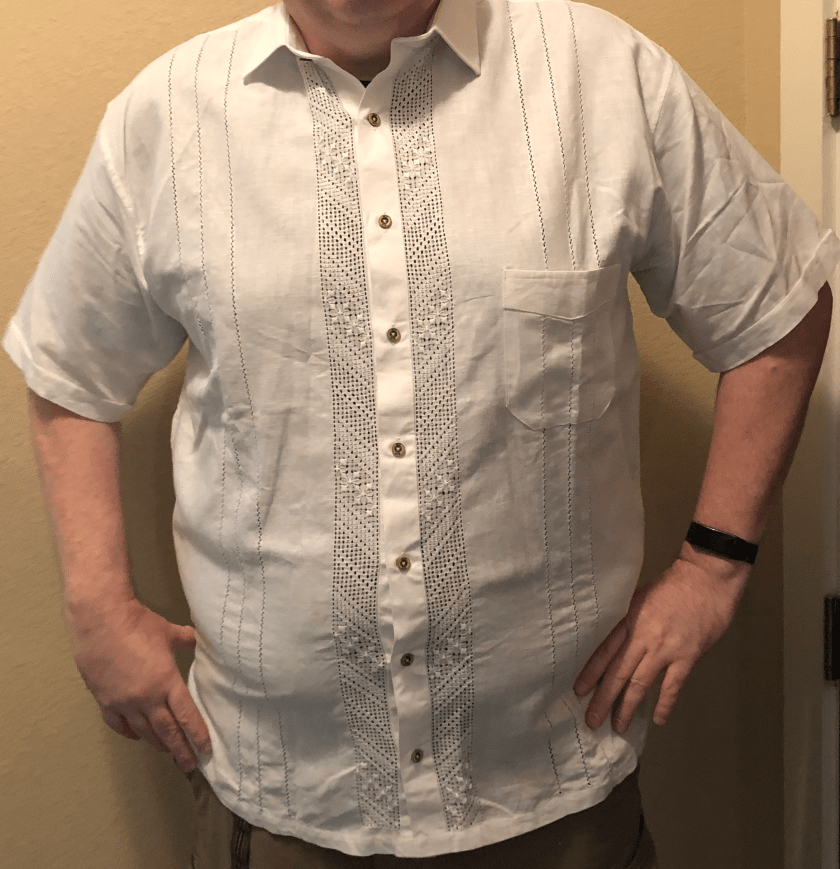
The typical guayabera (Caribbean/Cuban shirt)
The typical guayabera (Caribbean shirt) costs $250,000 pesos at a shop in Cartago. The embroiderer only makes $18,000 pesos for embroidering the side panels (both of them!) of the guayabera. That is three days worth of effort that net the embroiderer only 7.2% of the final cost of the shirt.
Average Embroiderer’s Income
Colombian Pesos
US Dollars
Monthly income
$250,000
$62.50
Income from one embroidered shirt
$18,000
$4.50
Time taken to embroider panels for shirt
3 days
Percentage of sale price that goes to the embroiderer
7.2%
Casa Victoria aims to make sure their embroiderers get paid at least $30,000 pesos (US $7.50) per shirt.
Learning to draw threads from a piece of jute fabric.
Ansermanuevo Culture House
The next stop was at the Ansermanuevo’s Culture House.
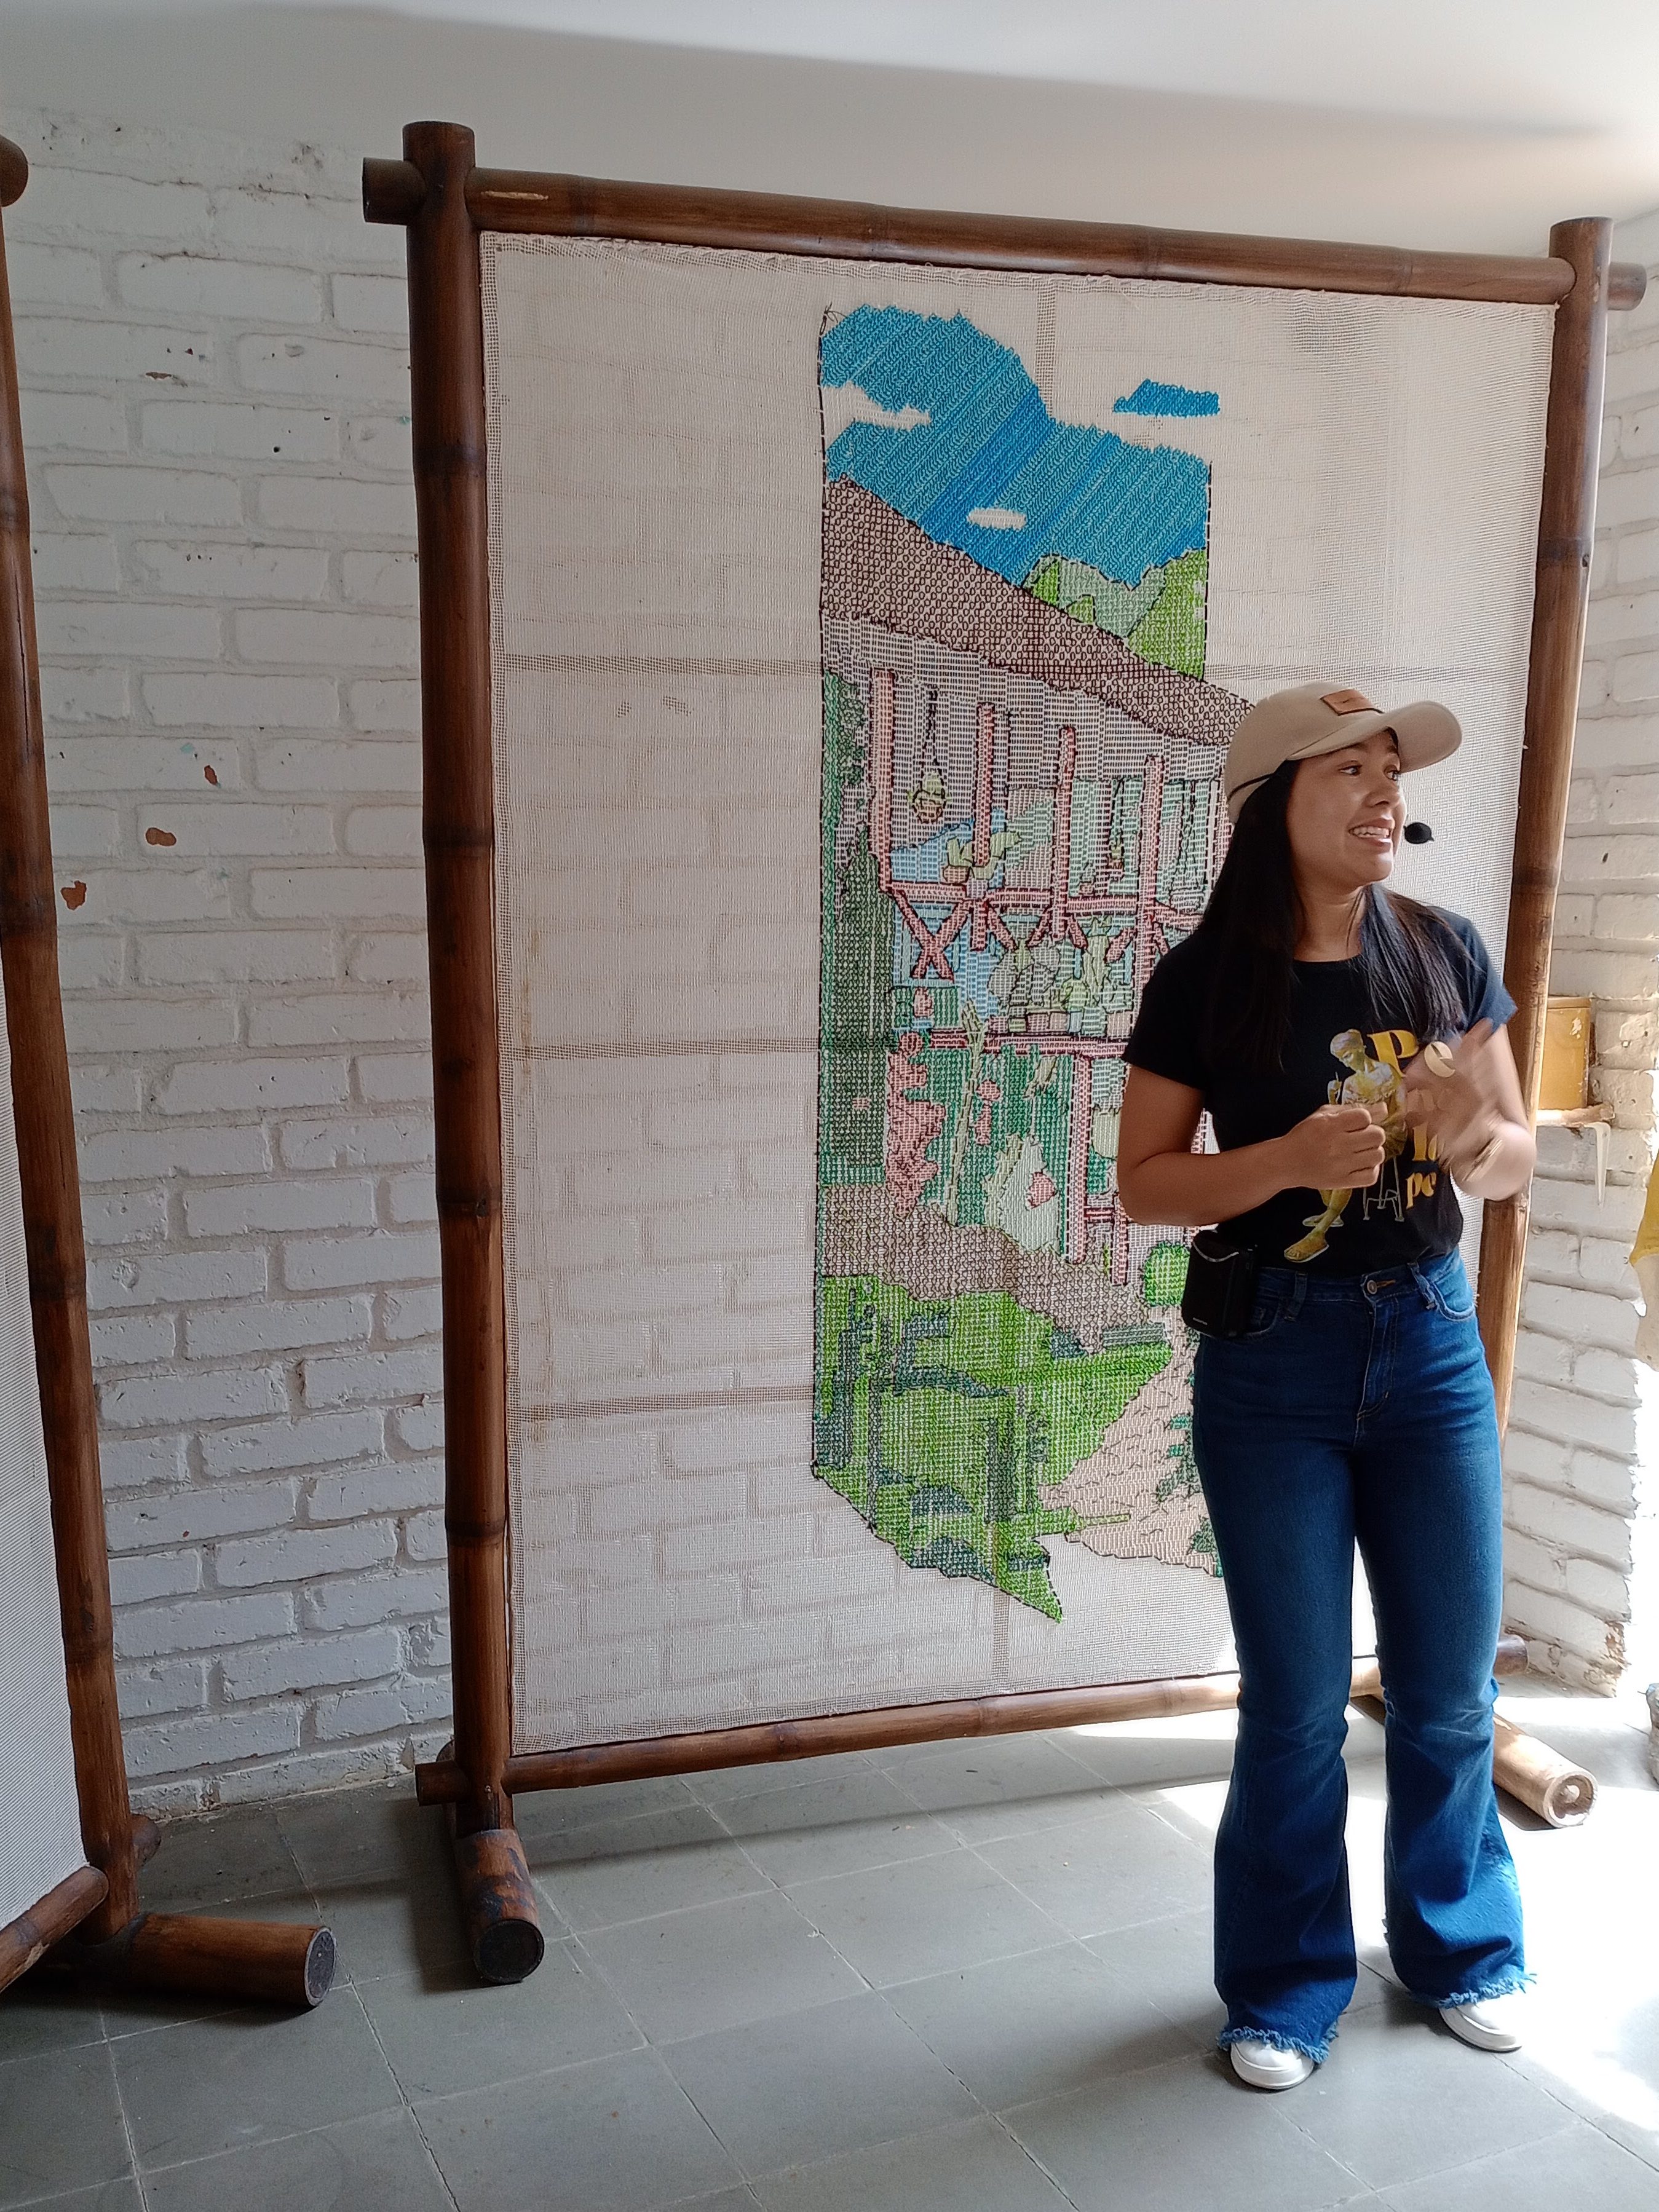
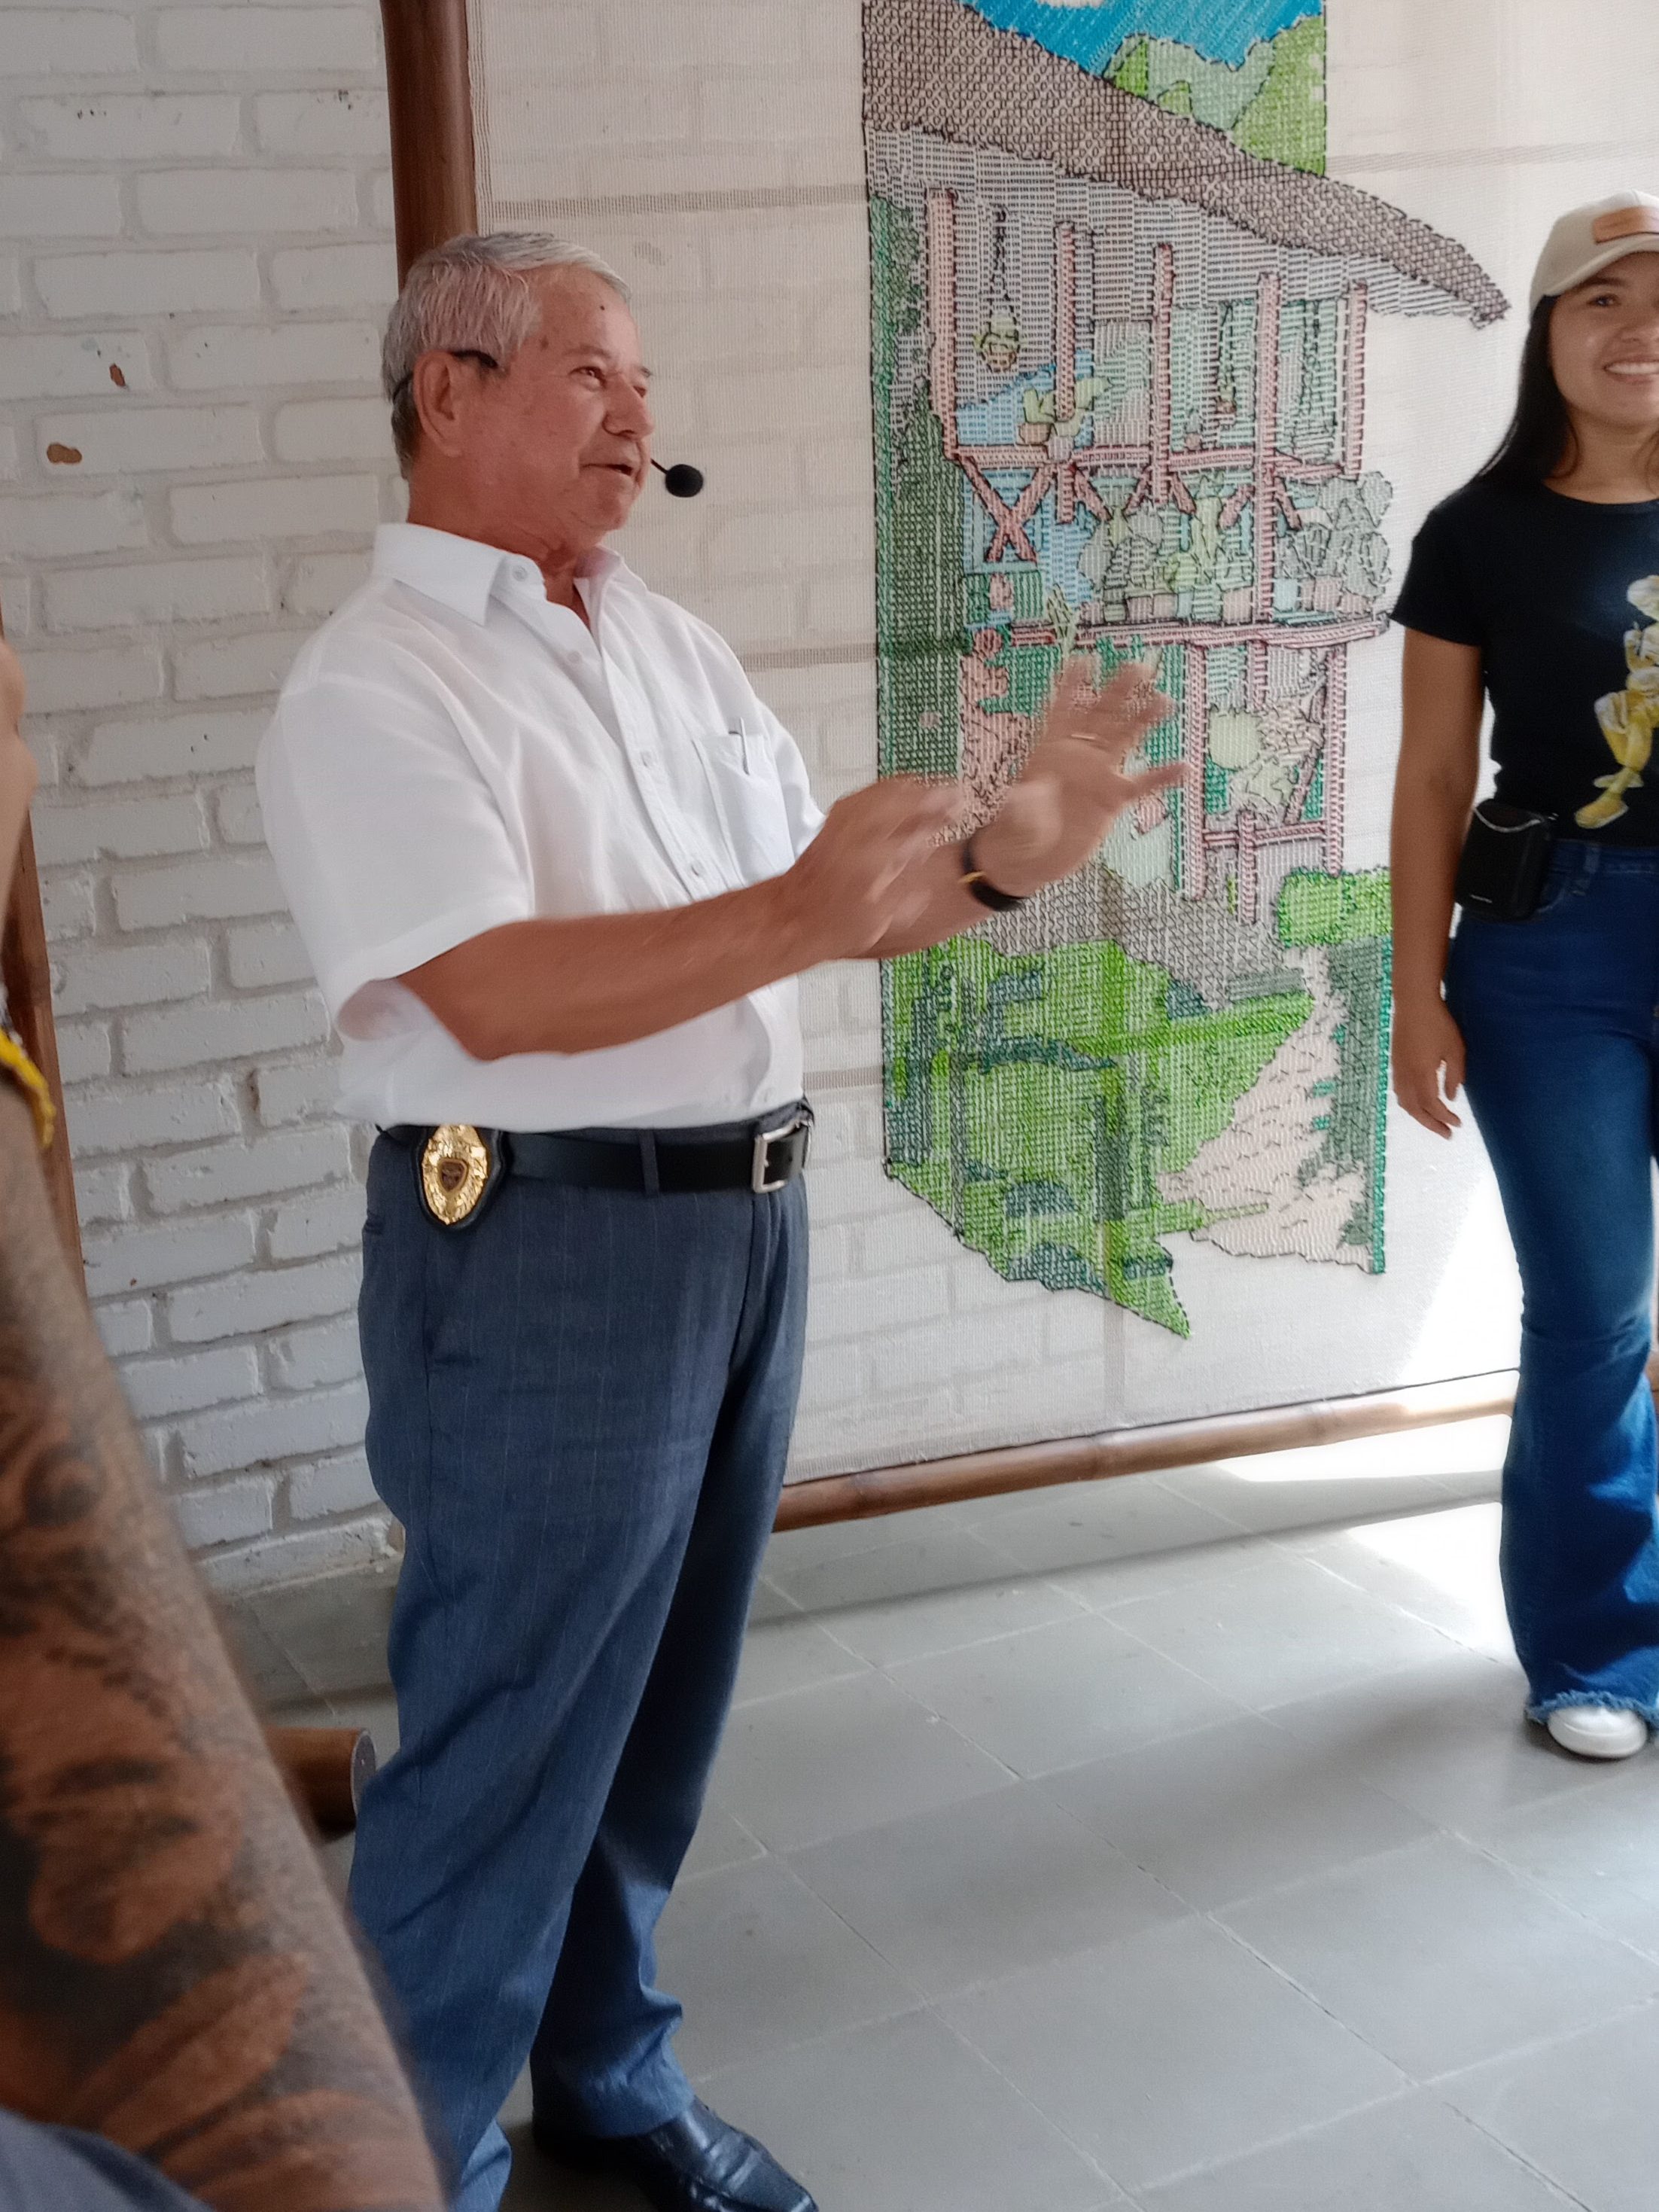
Carolina Restrepo at the Ansermanuevo Culture House.
Carolina Restrepo told us about her work teaching the local children to embroider and make embroidered murals on chicken wire.
Given how poorly paid the embroiderers are, many mothers do not encourage their children to learn. Carolina wants to make sure the next generation does not stop embroidering. This is their town’s tradition, and even if they choose not to pursue it as a source of income, they could still practice it as a traditional pastime and artistic endeavour.
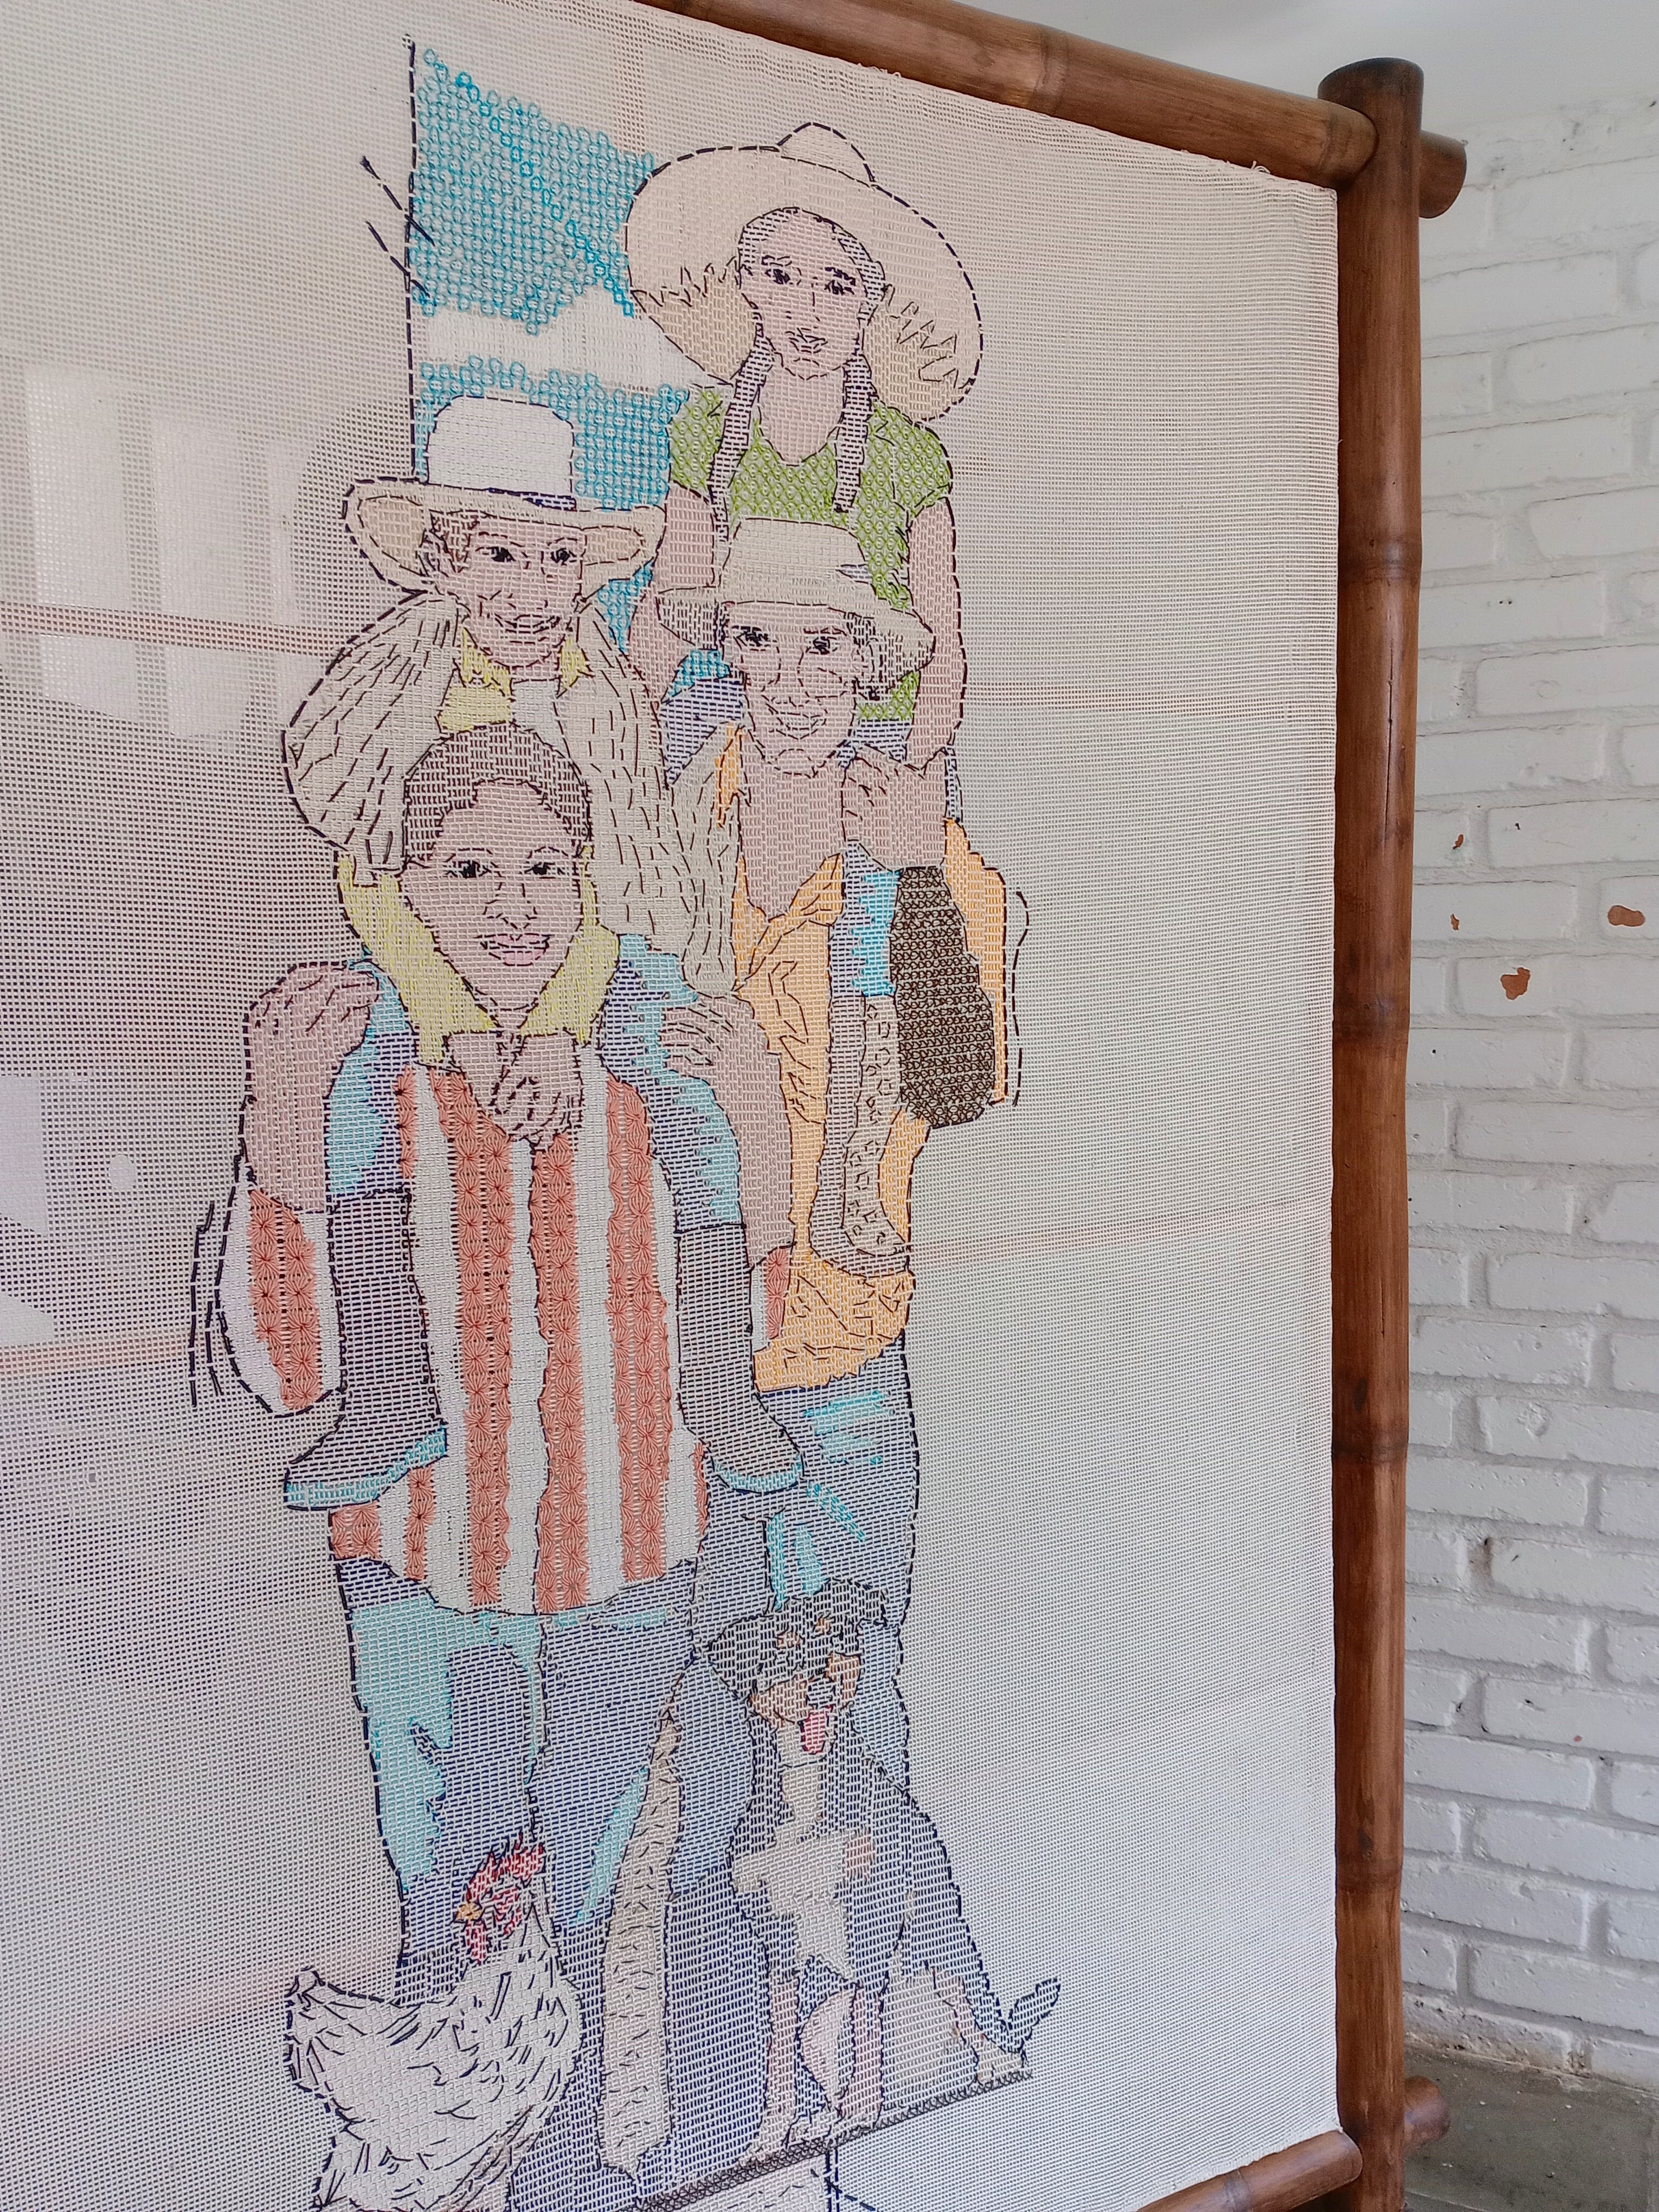
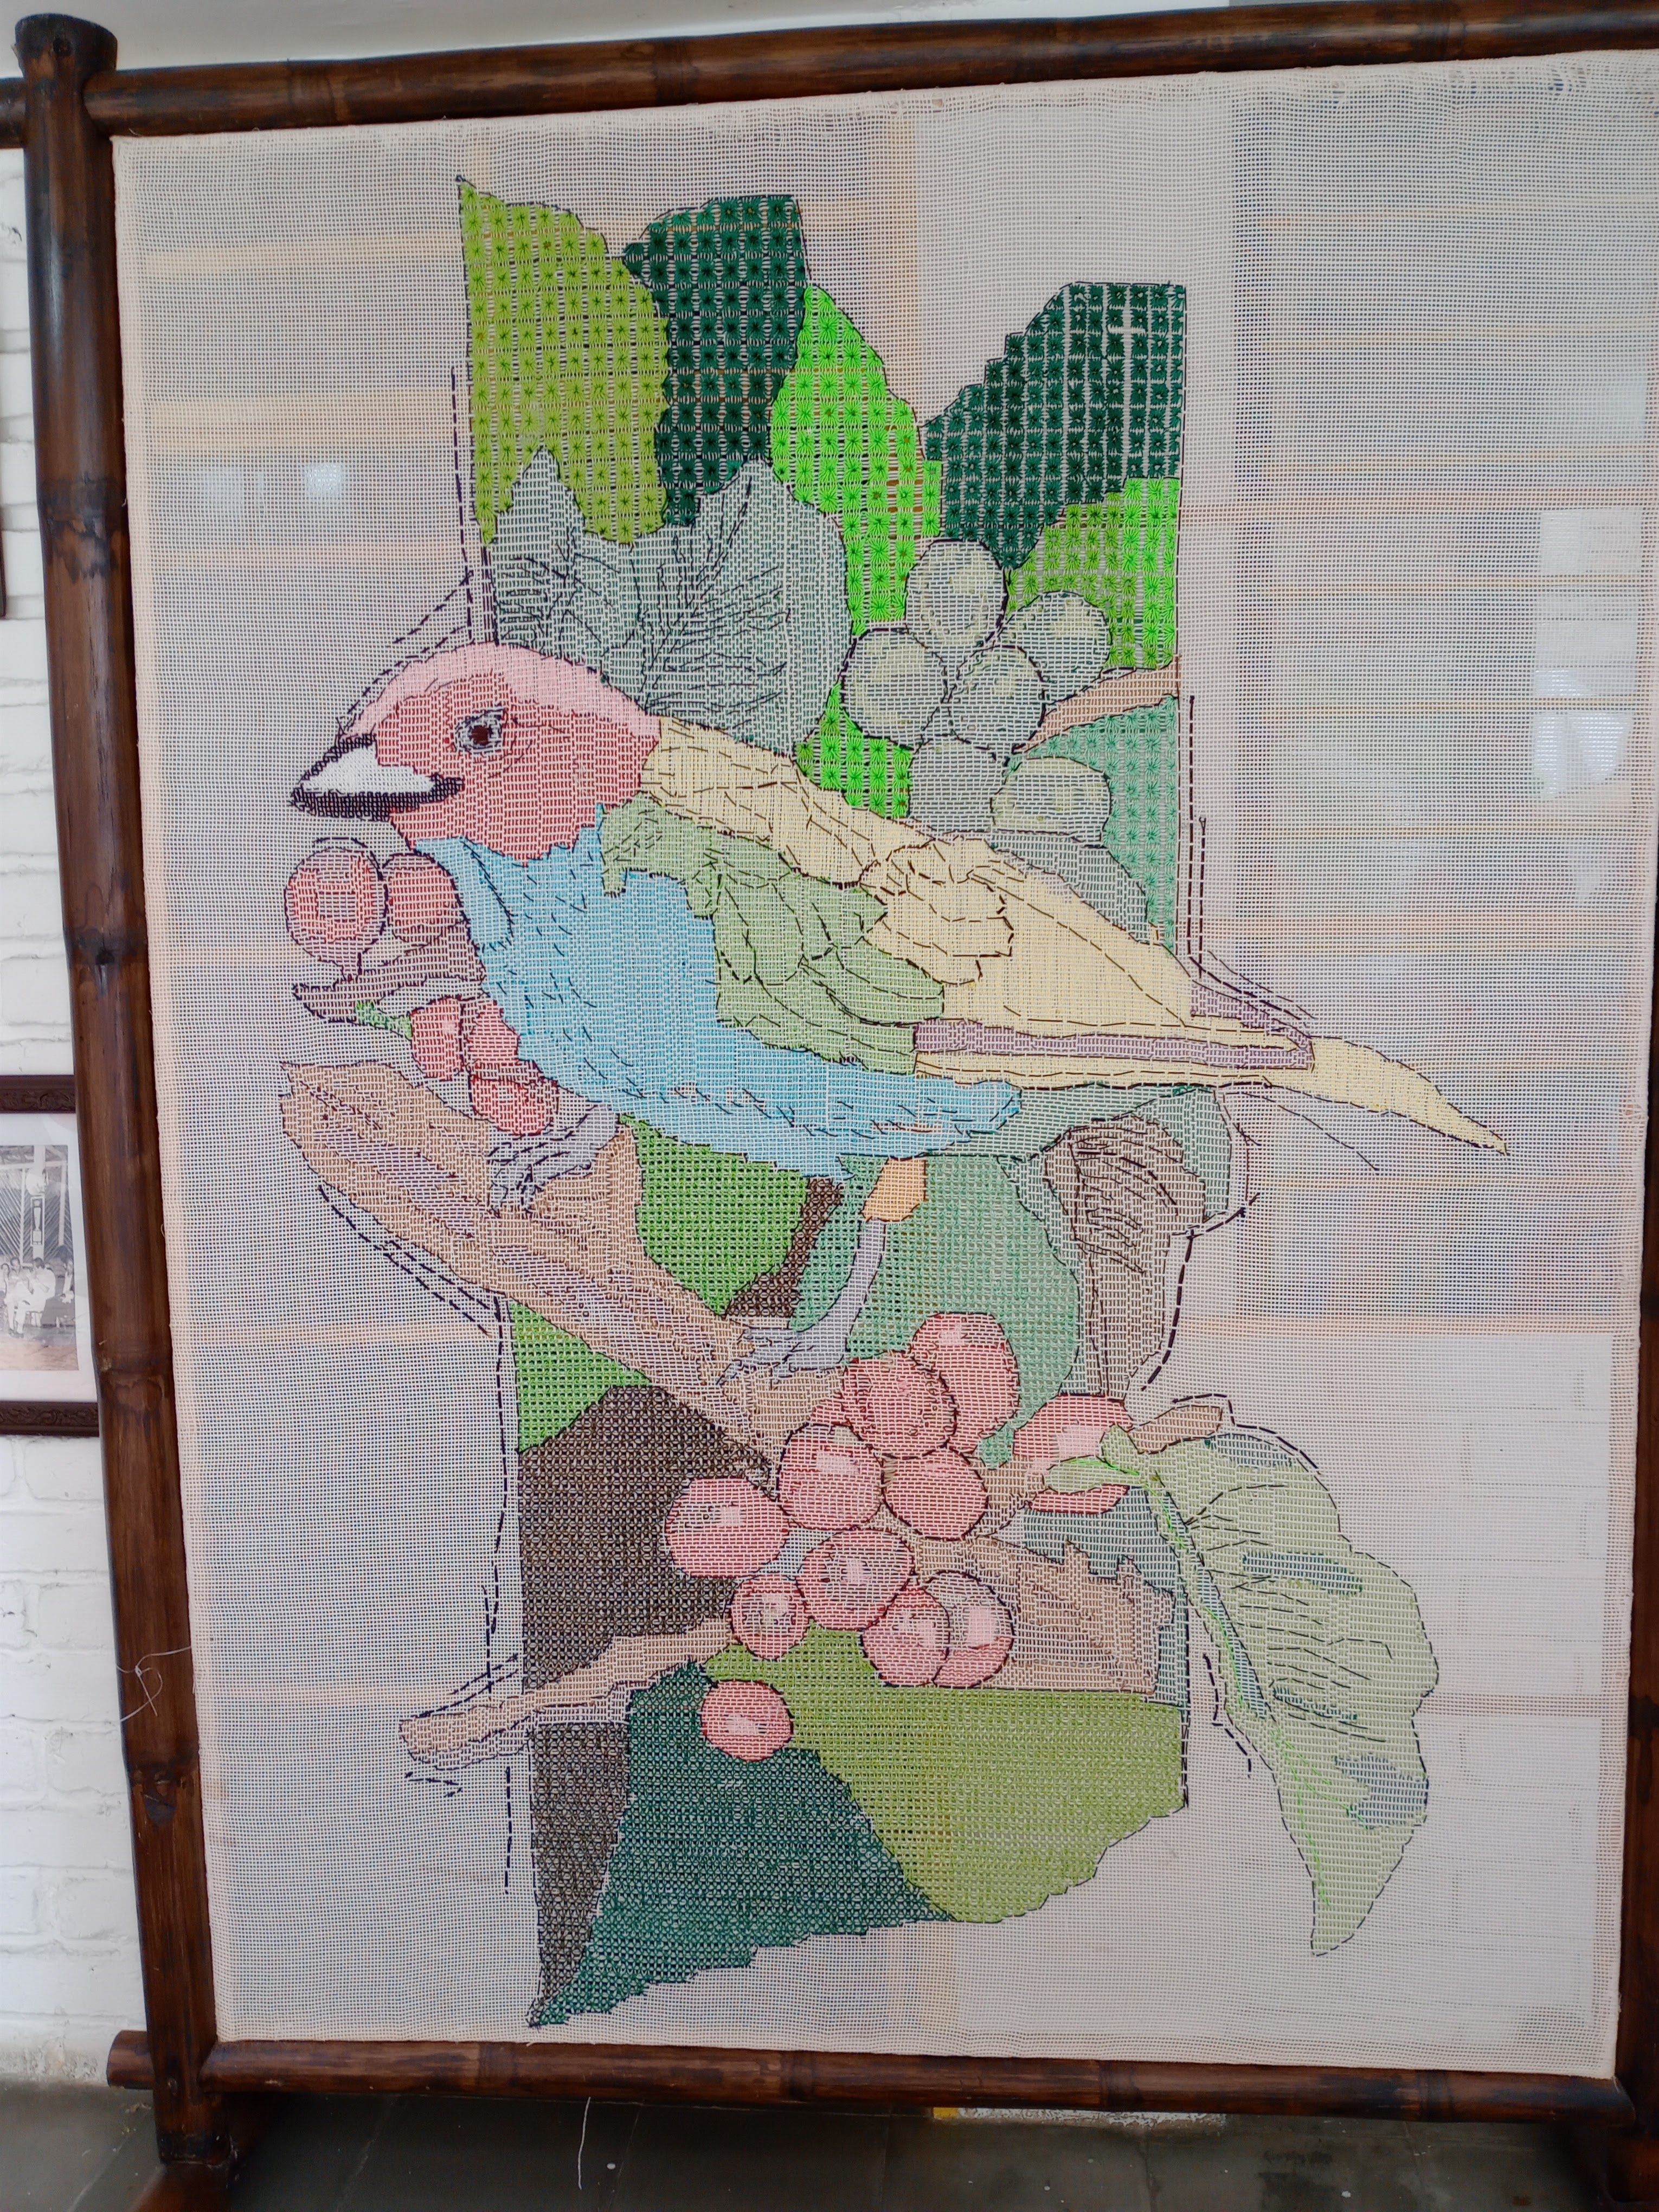
Embroidered murals on chicken wire.
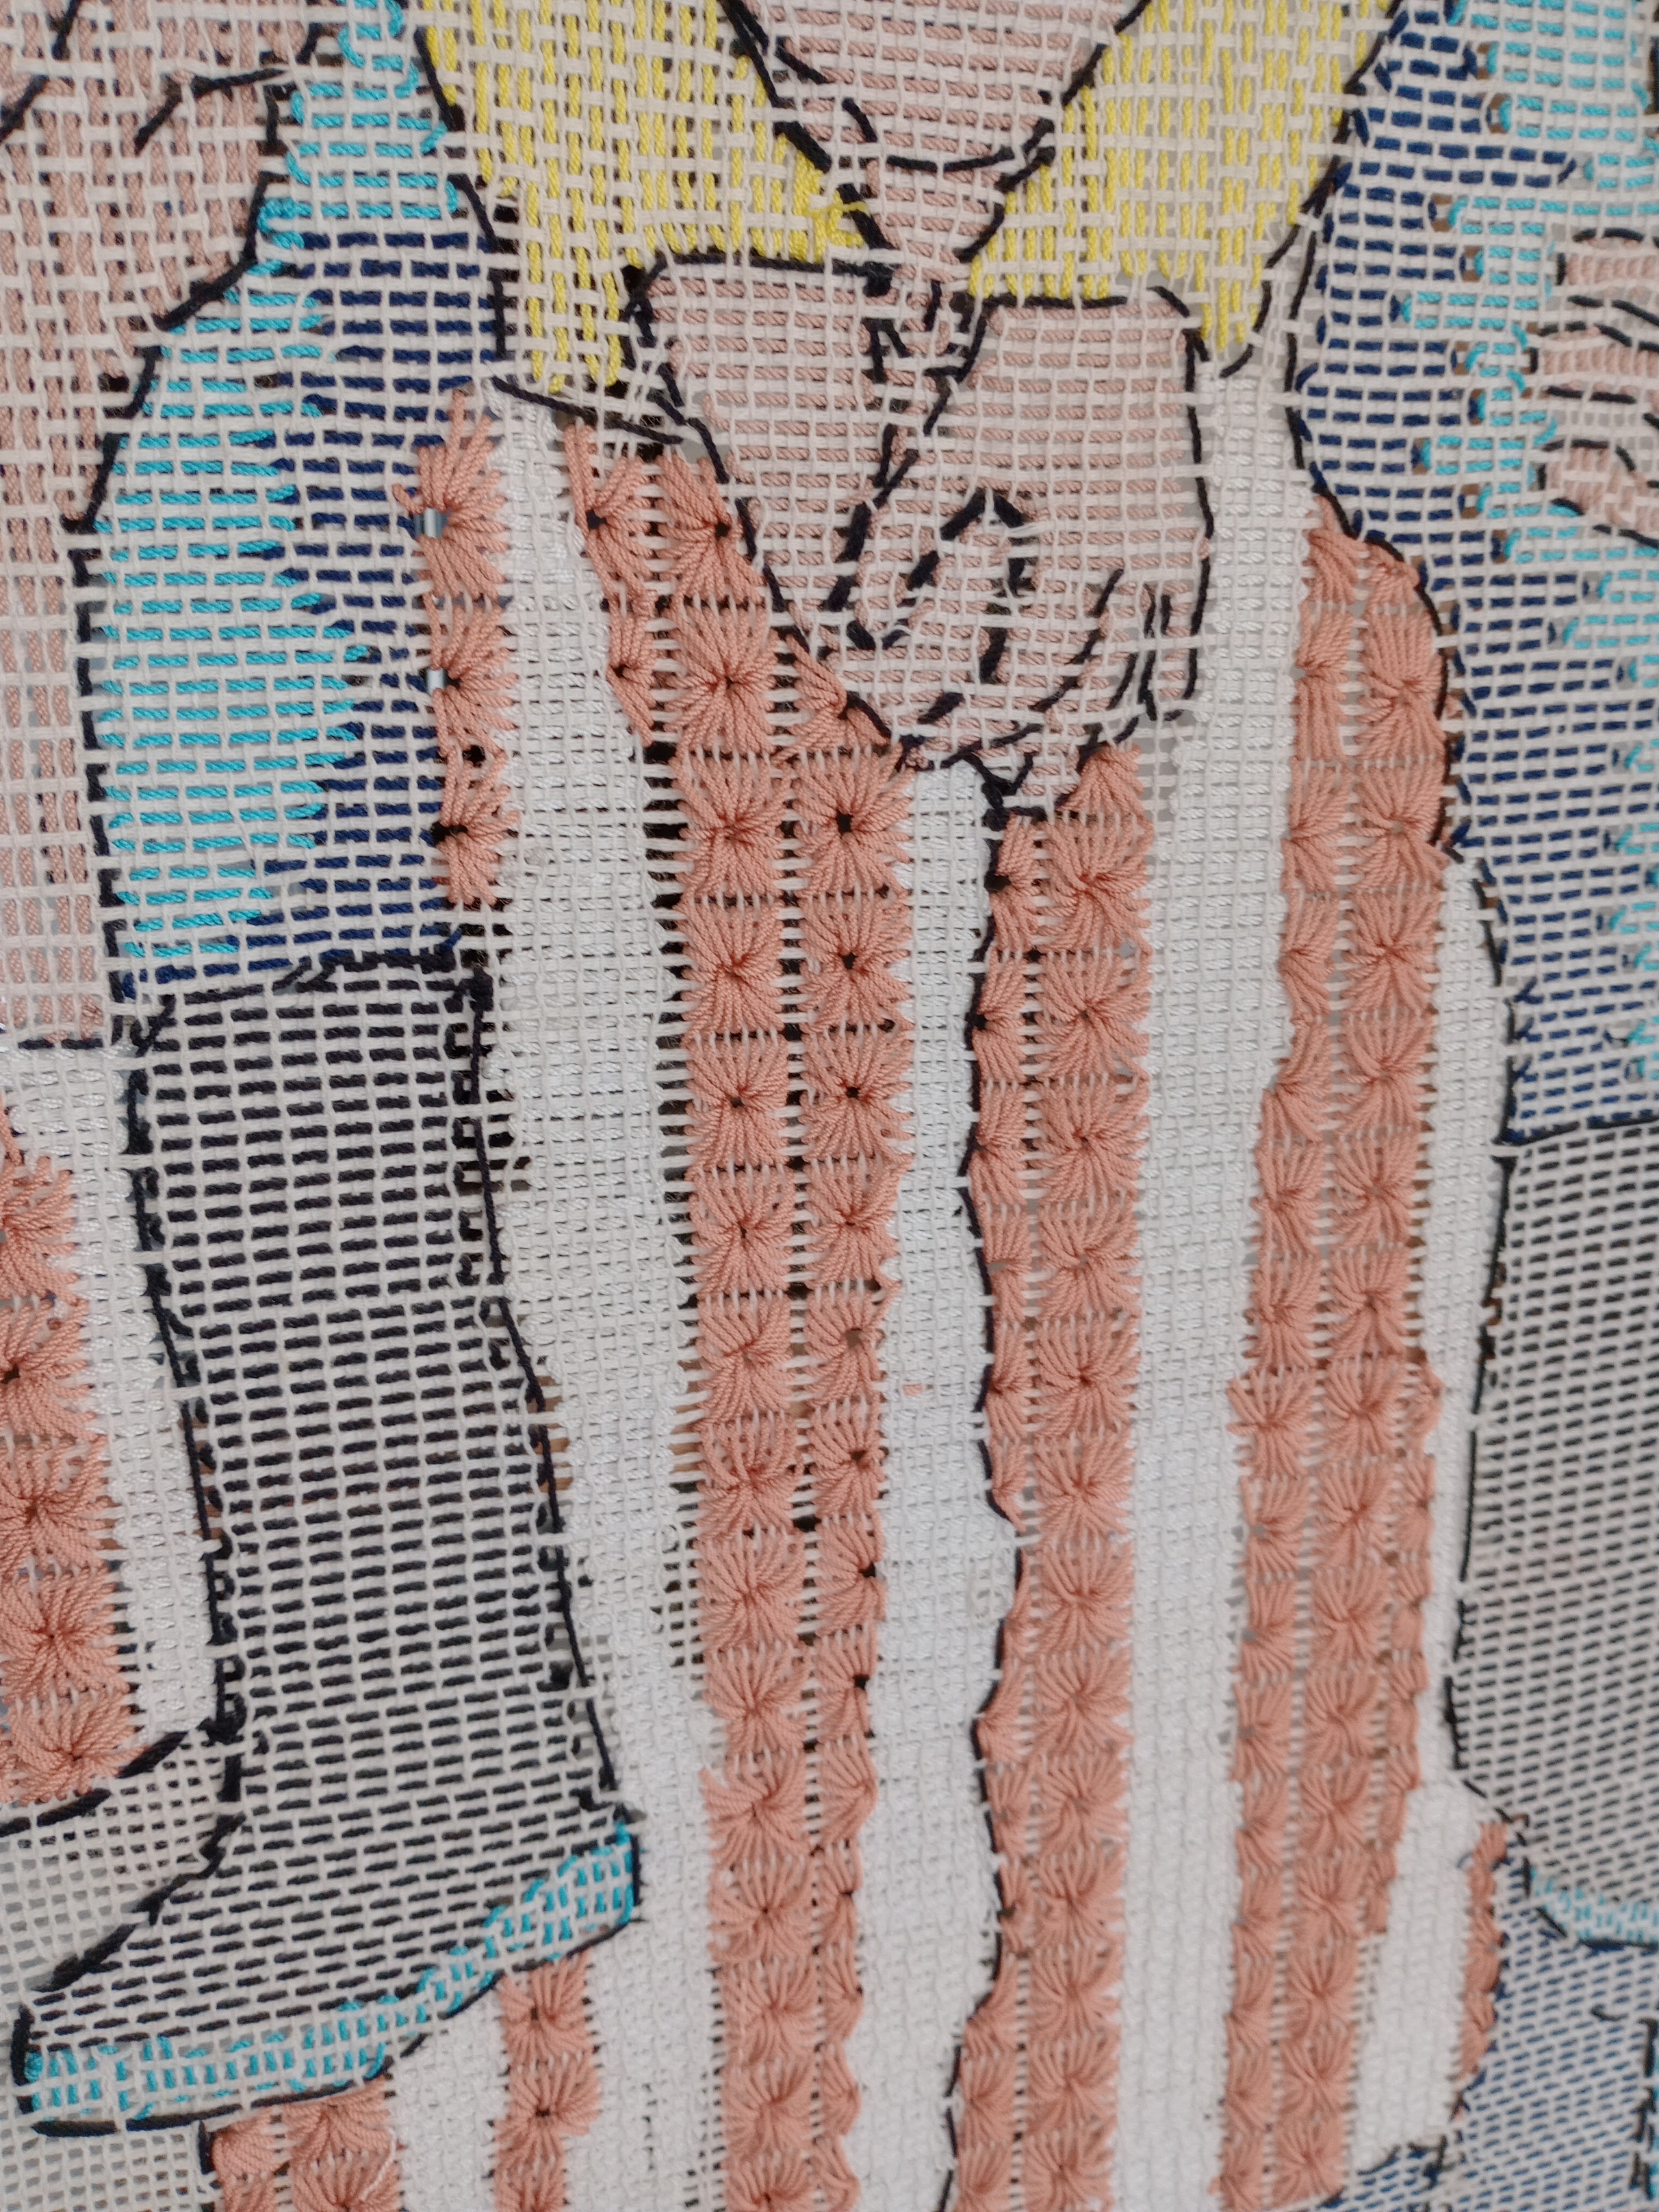
Close-up of one of the embroidered murals
Embroidered mural of a local bird, a troupial (Icterus icterus), on a coffee plant.
Captain Córdoba, from the local fire department, regaling us with his poems about Ansermanuevo and its embroiderers.
Calado Lesson at Fatima School
The next stop was at the Fatima parish school for a lesson in embroidery history.
Embroidery was introduced to the region by the Vicentine and Franciscan religious communities in the late 1800s (19th) century when they arrived to open schools for girls.
The sisters made sewing part of the curriculum. Calado (drawn thread) was part of the course so they could make household and church linens.
With time, the Cartago and Ansermanuevo women developed a unique style which was then sold to others outside their households.
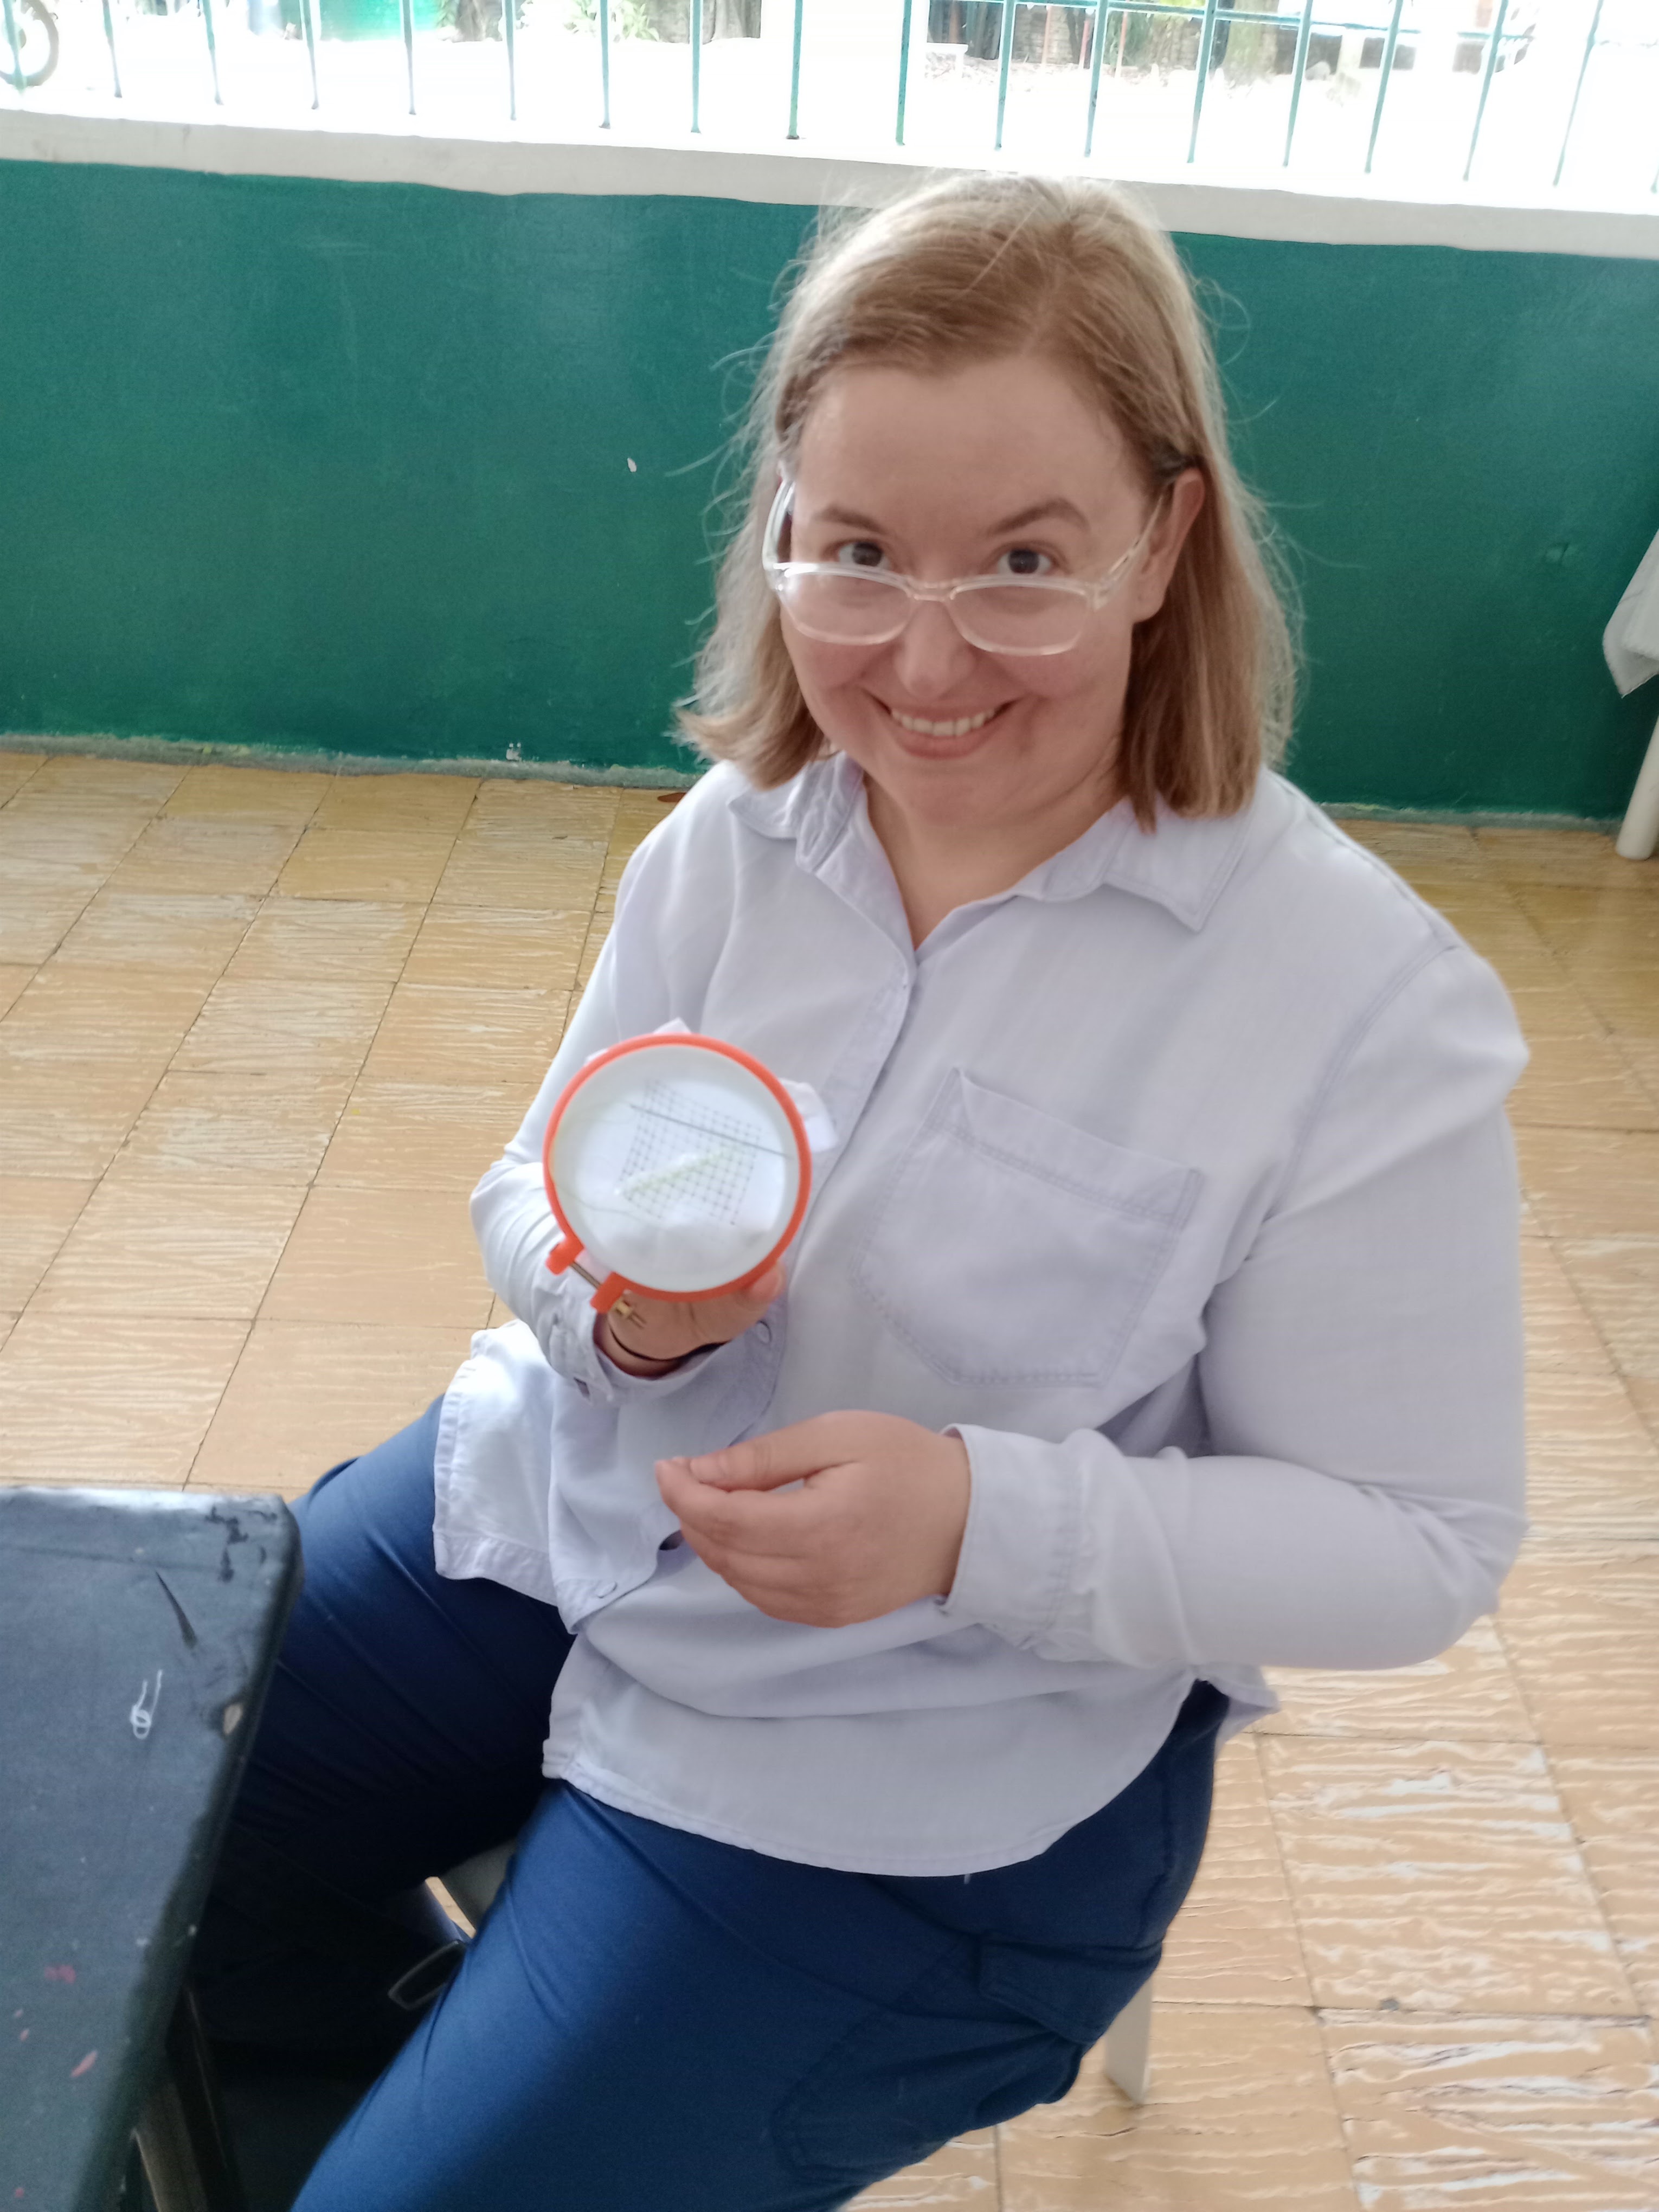
Calado lesson
We were taken to a classroom with embroidery frames containing fabric with the threads already removed forming a grid. We were taught some basic stitches (grid and cross.) We were given very nice coffee and snacks.
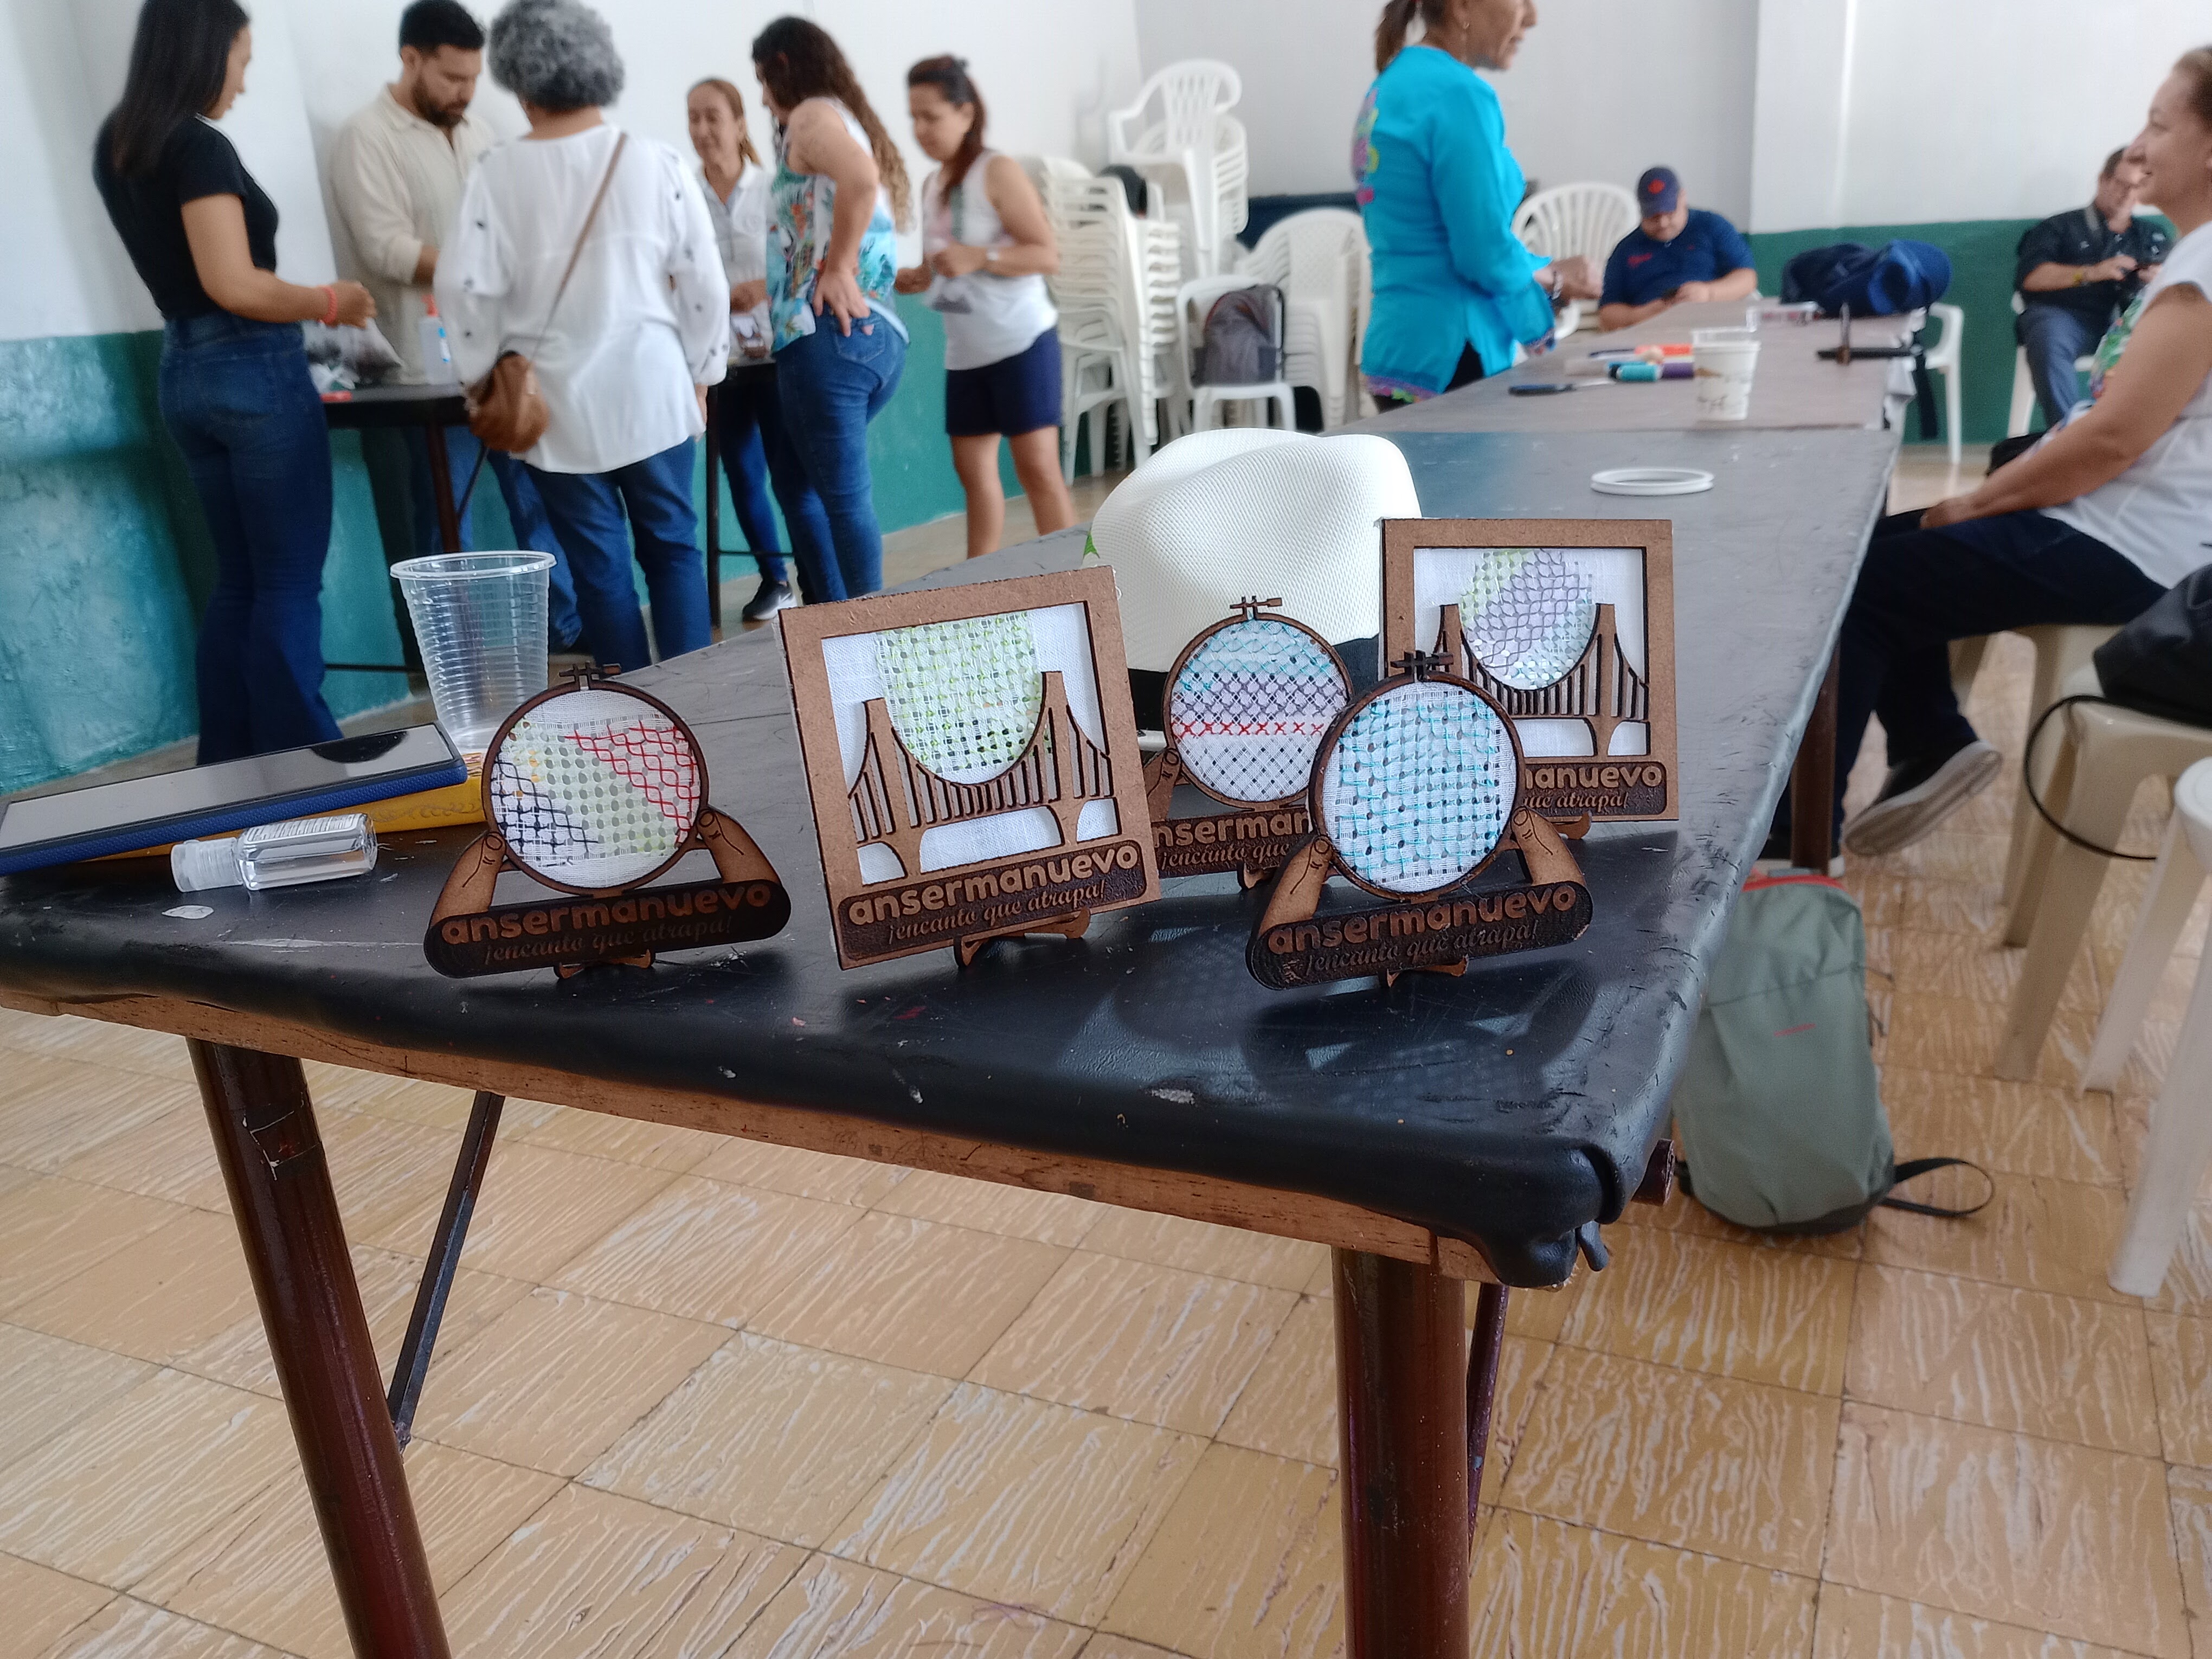
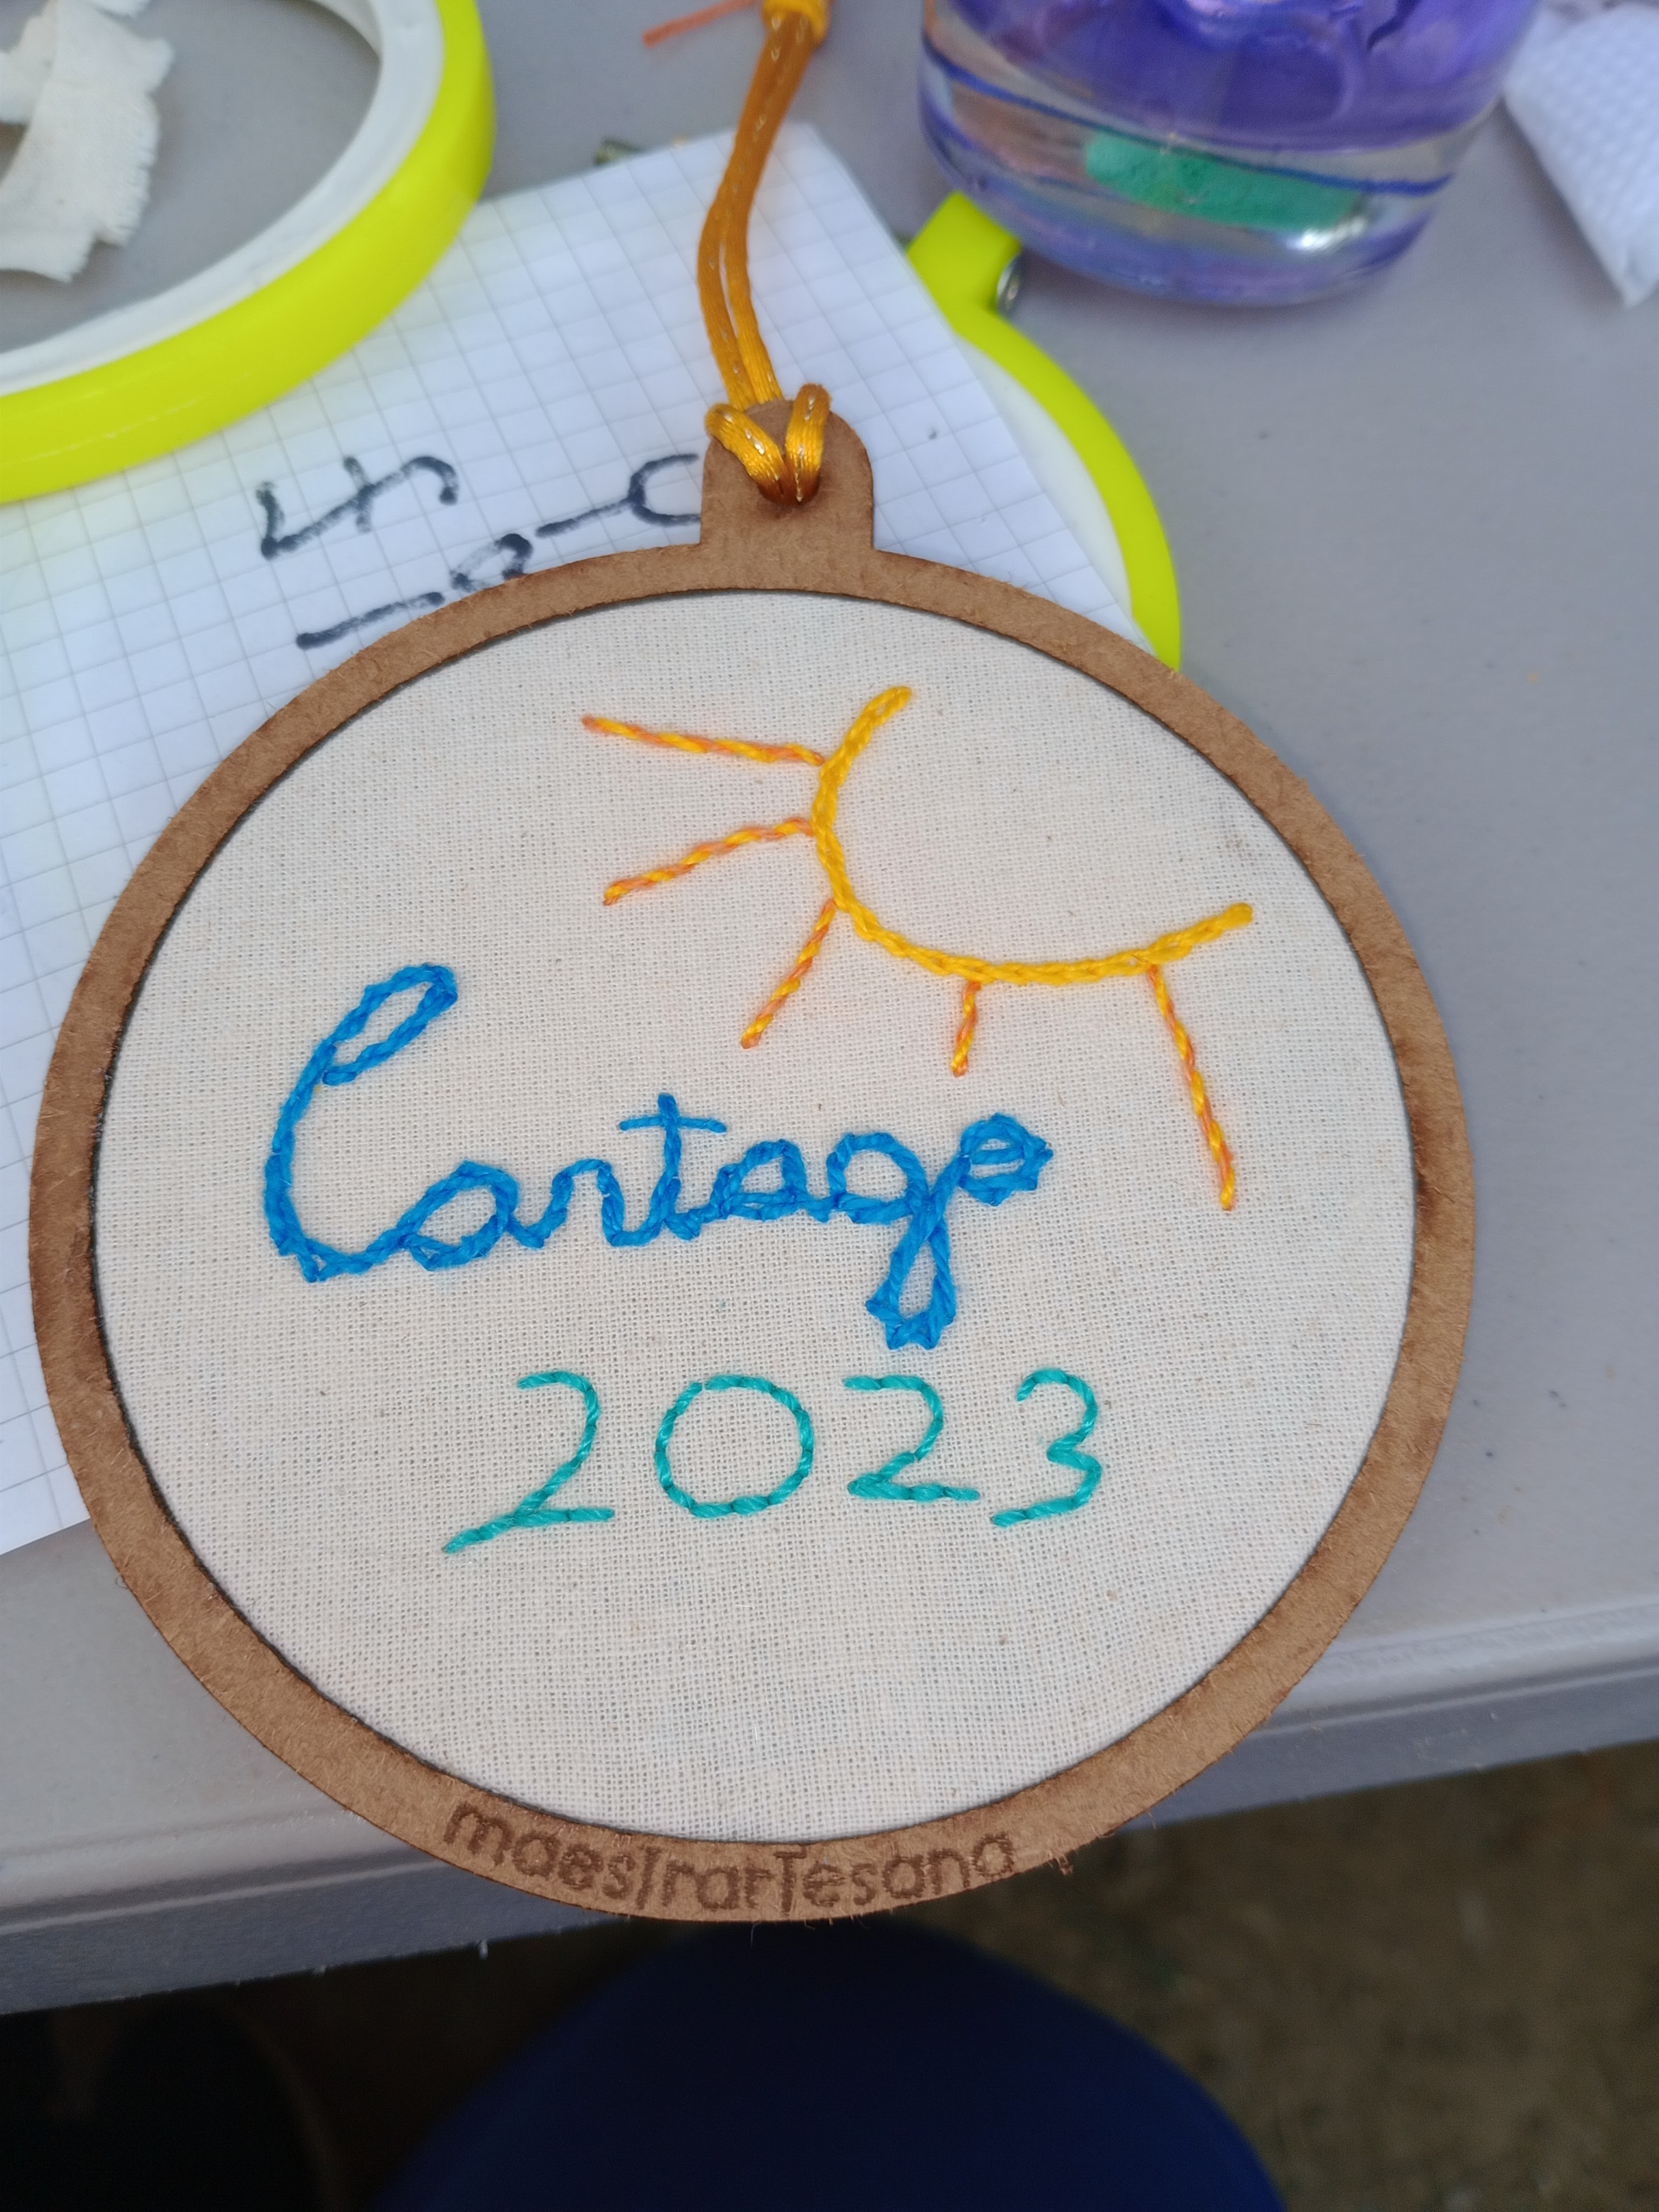
My calado effort was put into an ornament. Great souvenir.
Class members’ finished ornaments.
Back to Cartago and Lunch
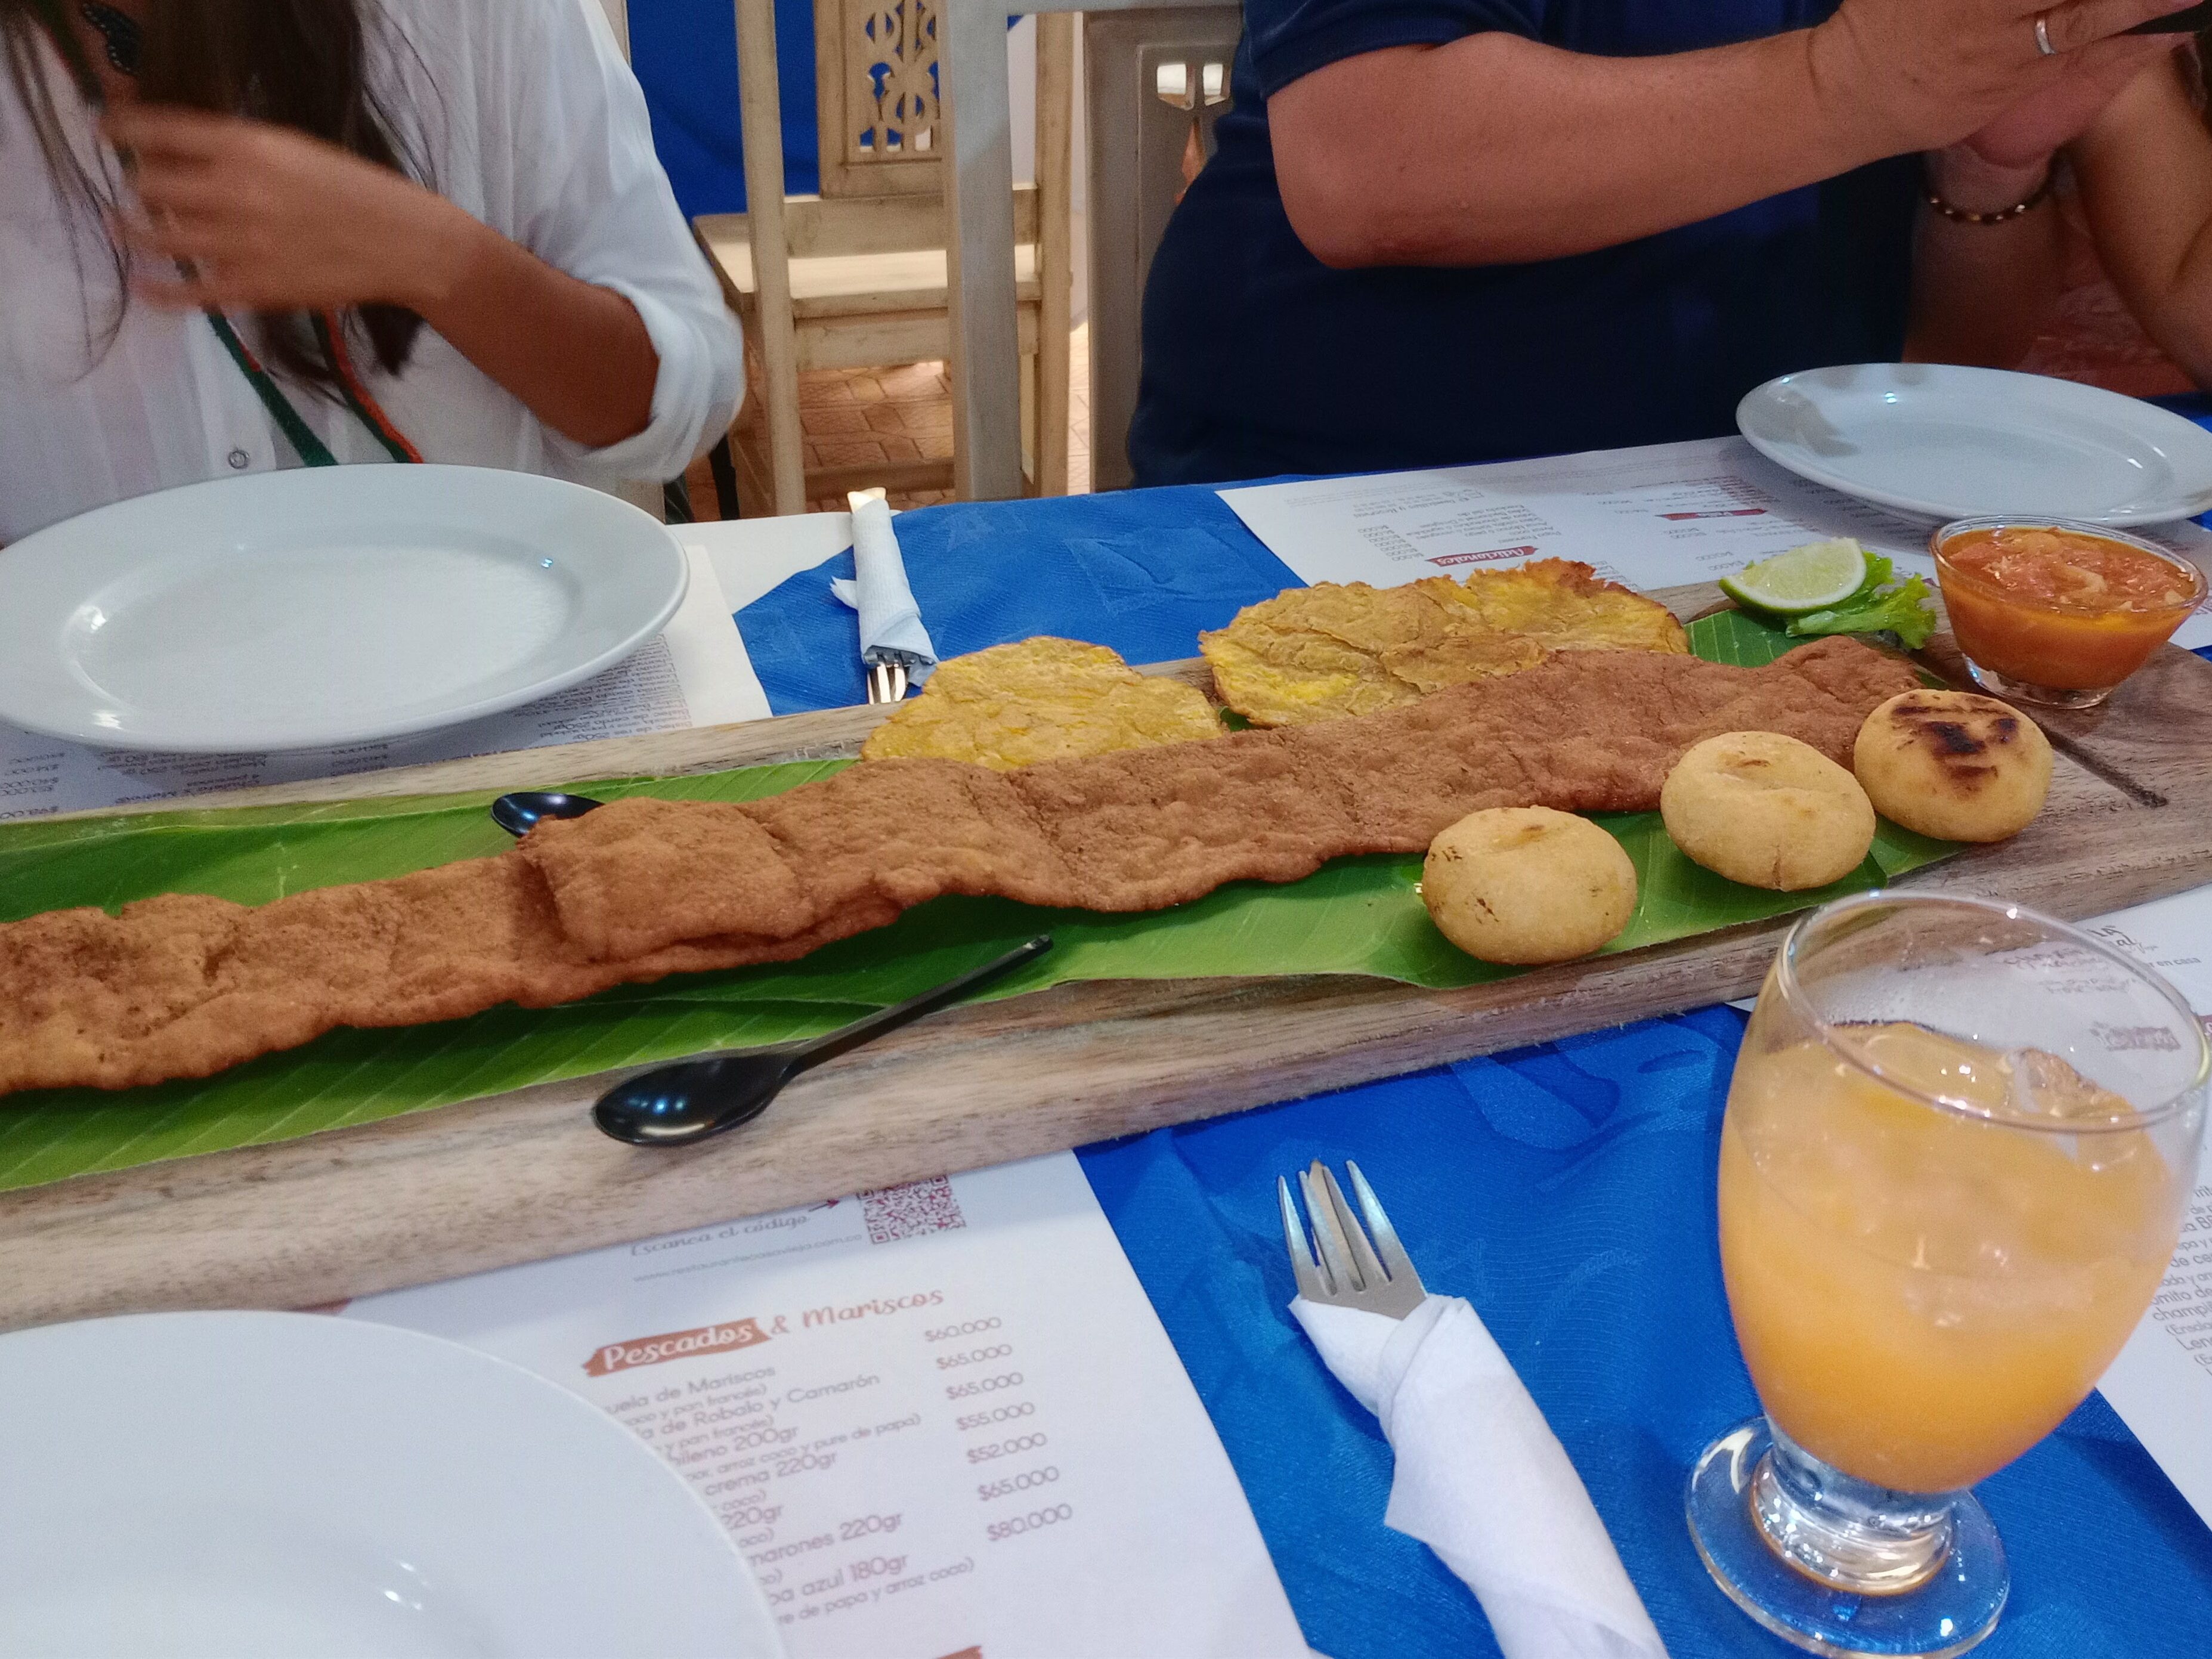
We were then driven back to Cartago in the embroidery bus and taken to Casa Vieja restaurant where the specialty is pork cutlet by the meter (three feet.)
Cutlet by the meter (chuleta por metro) at Casa Vieja in Cartago.
Visiting Penelope
We went to visit Penelope next.
Penelope is the name given to the statue made by Carlos Tulio Suarez and Margarita Gamboa (the tape lace) to honor Cartago’s embroiderers. She resides in front of city hall.
Monument to the Embroiderer
Her name comes from the character in Homer’s Odyssey. The queen of Ithaca would weave during the day and undo her work at night in order to delay having to marry one of the many suitors requesting her hand thinking her husband dead.
Embroidered Graffitis
On to the Comuna One, commonly called the Sandpit (la Arenera.) This working class neighborhood was founded by sand extractors (sand to be used for construction) and embroiderers.
Embroidered Graffitis Tour
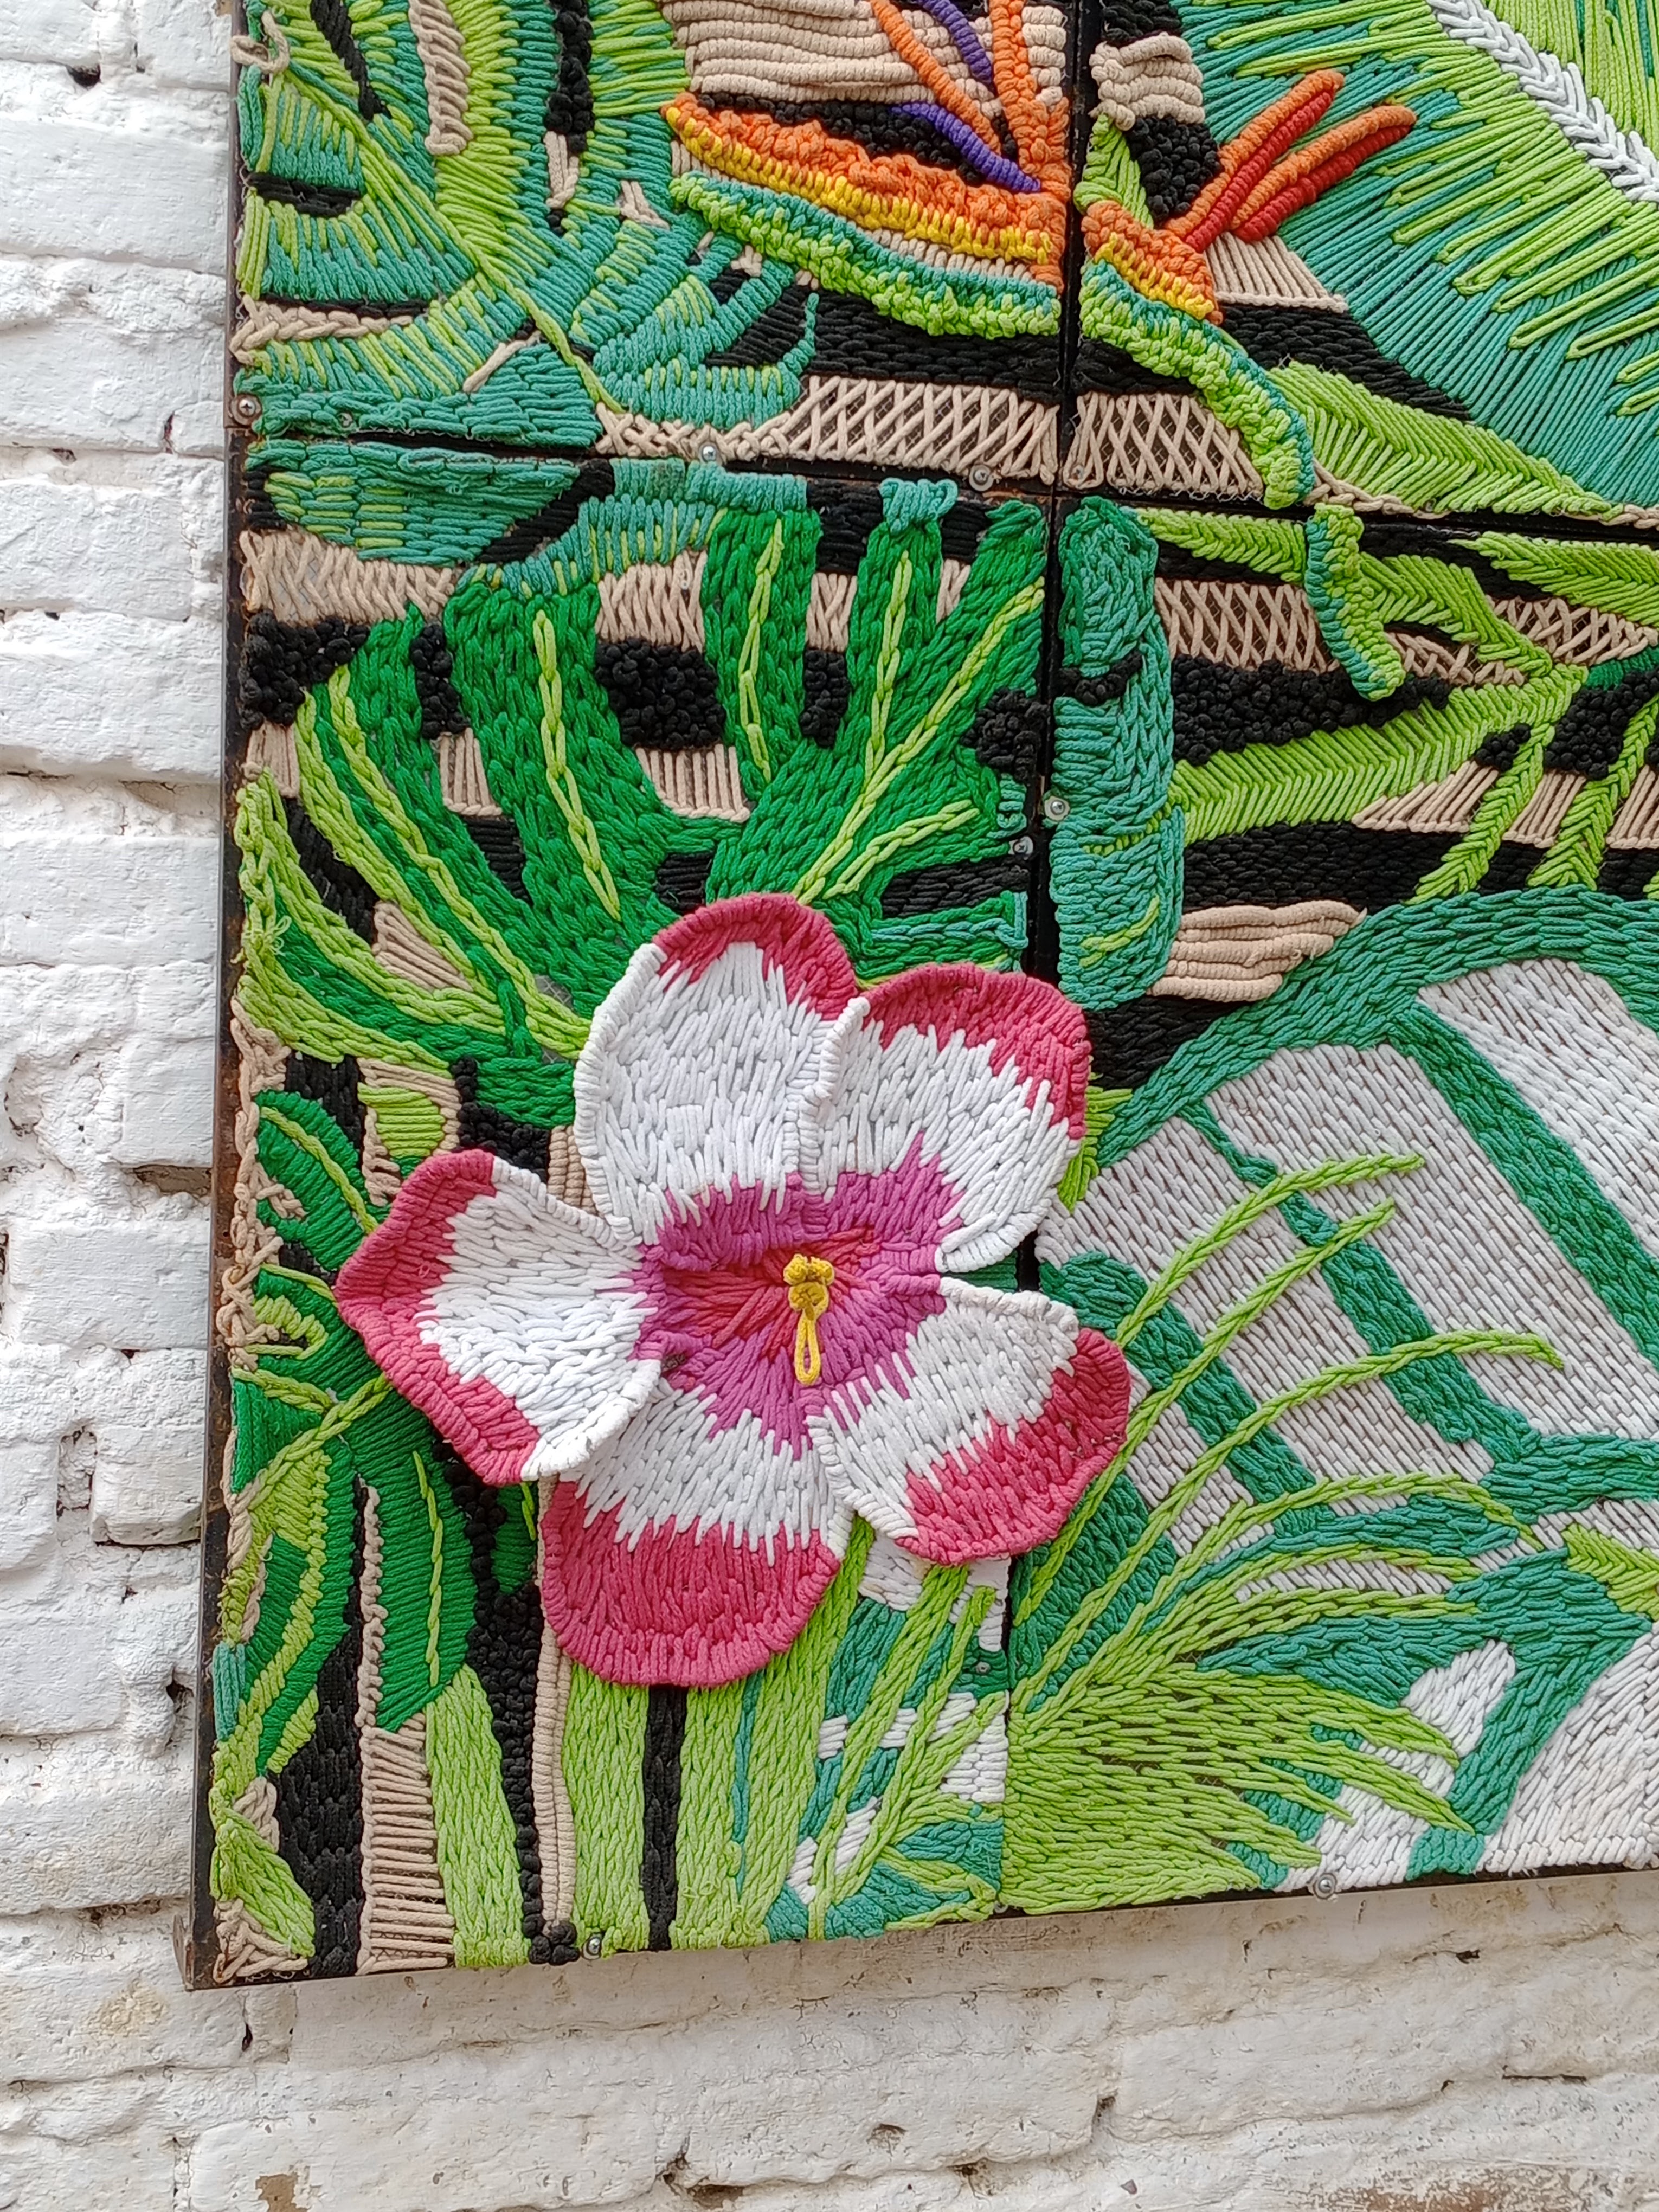
Carolina Restrepo took us through the streets and showed us the embroidered graffitis made by the neighborhood’s children.
Embroidered graffiti with a stumpwork flower.
Tribute to Leo Graff
One of the big graffitis is a tribute to local musician Leo Graff. One of his songs celebrates the culture of the Arenera neighborhood by mentioning that in every house there is at least one embroiderer (en todas las casas por lo menos una borda.)
After his death, his son made a music video of his song, Arenera, showing the local embroiderers.
Music video by Leo Graff’s son – tribute to the Arenera neighborhood.
Another embroidered graffiti.
Surface Embroidery Class
We then went to Nancy Zúñiga’s house (Carolina Restrepo’s mother) for a class on surface embroidery.
Her house is by the river with lots of plants. We were offered coffee and snacks.
Surface embroidery class at Nancy Zúñiga’s house
My project turned into an ornament.
The embroidery tour was great! We learned a lot about the history of the area, its embroidery culture and the embroiderers. It was very well organized and safe.
It is definitely geared towards textile newbies. One person did not know the difference between weaving and embroidery and he walked away with self-made projects using drawn thread (calado) and surface embroidery.
But seasoned embroiderers will enjoy the history and the embroidery culture. There are references to embroidery everywhere in both towns. In the embroidered graffitis tour, a lady opened her door as we were passing by and we saw her embroidering a shirt. We said hi to her and her dog and she sold us yummy fruit ice creams. Mine was lulo fruit (Solanum quitoense.)
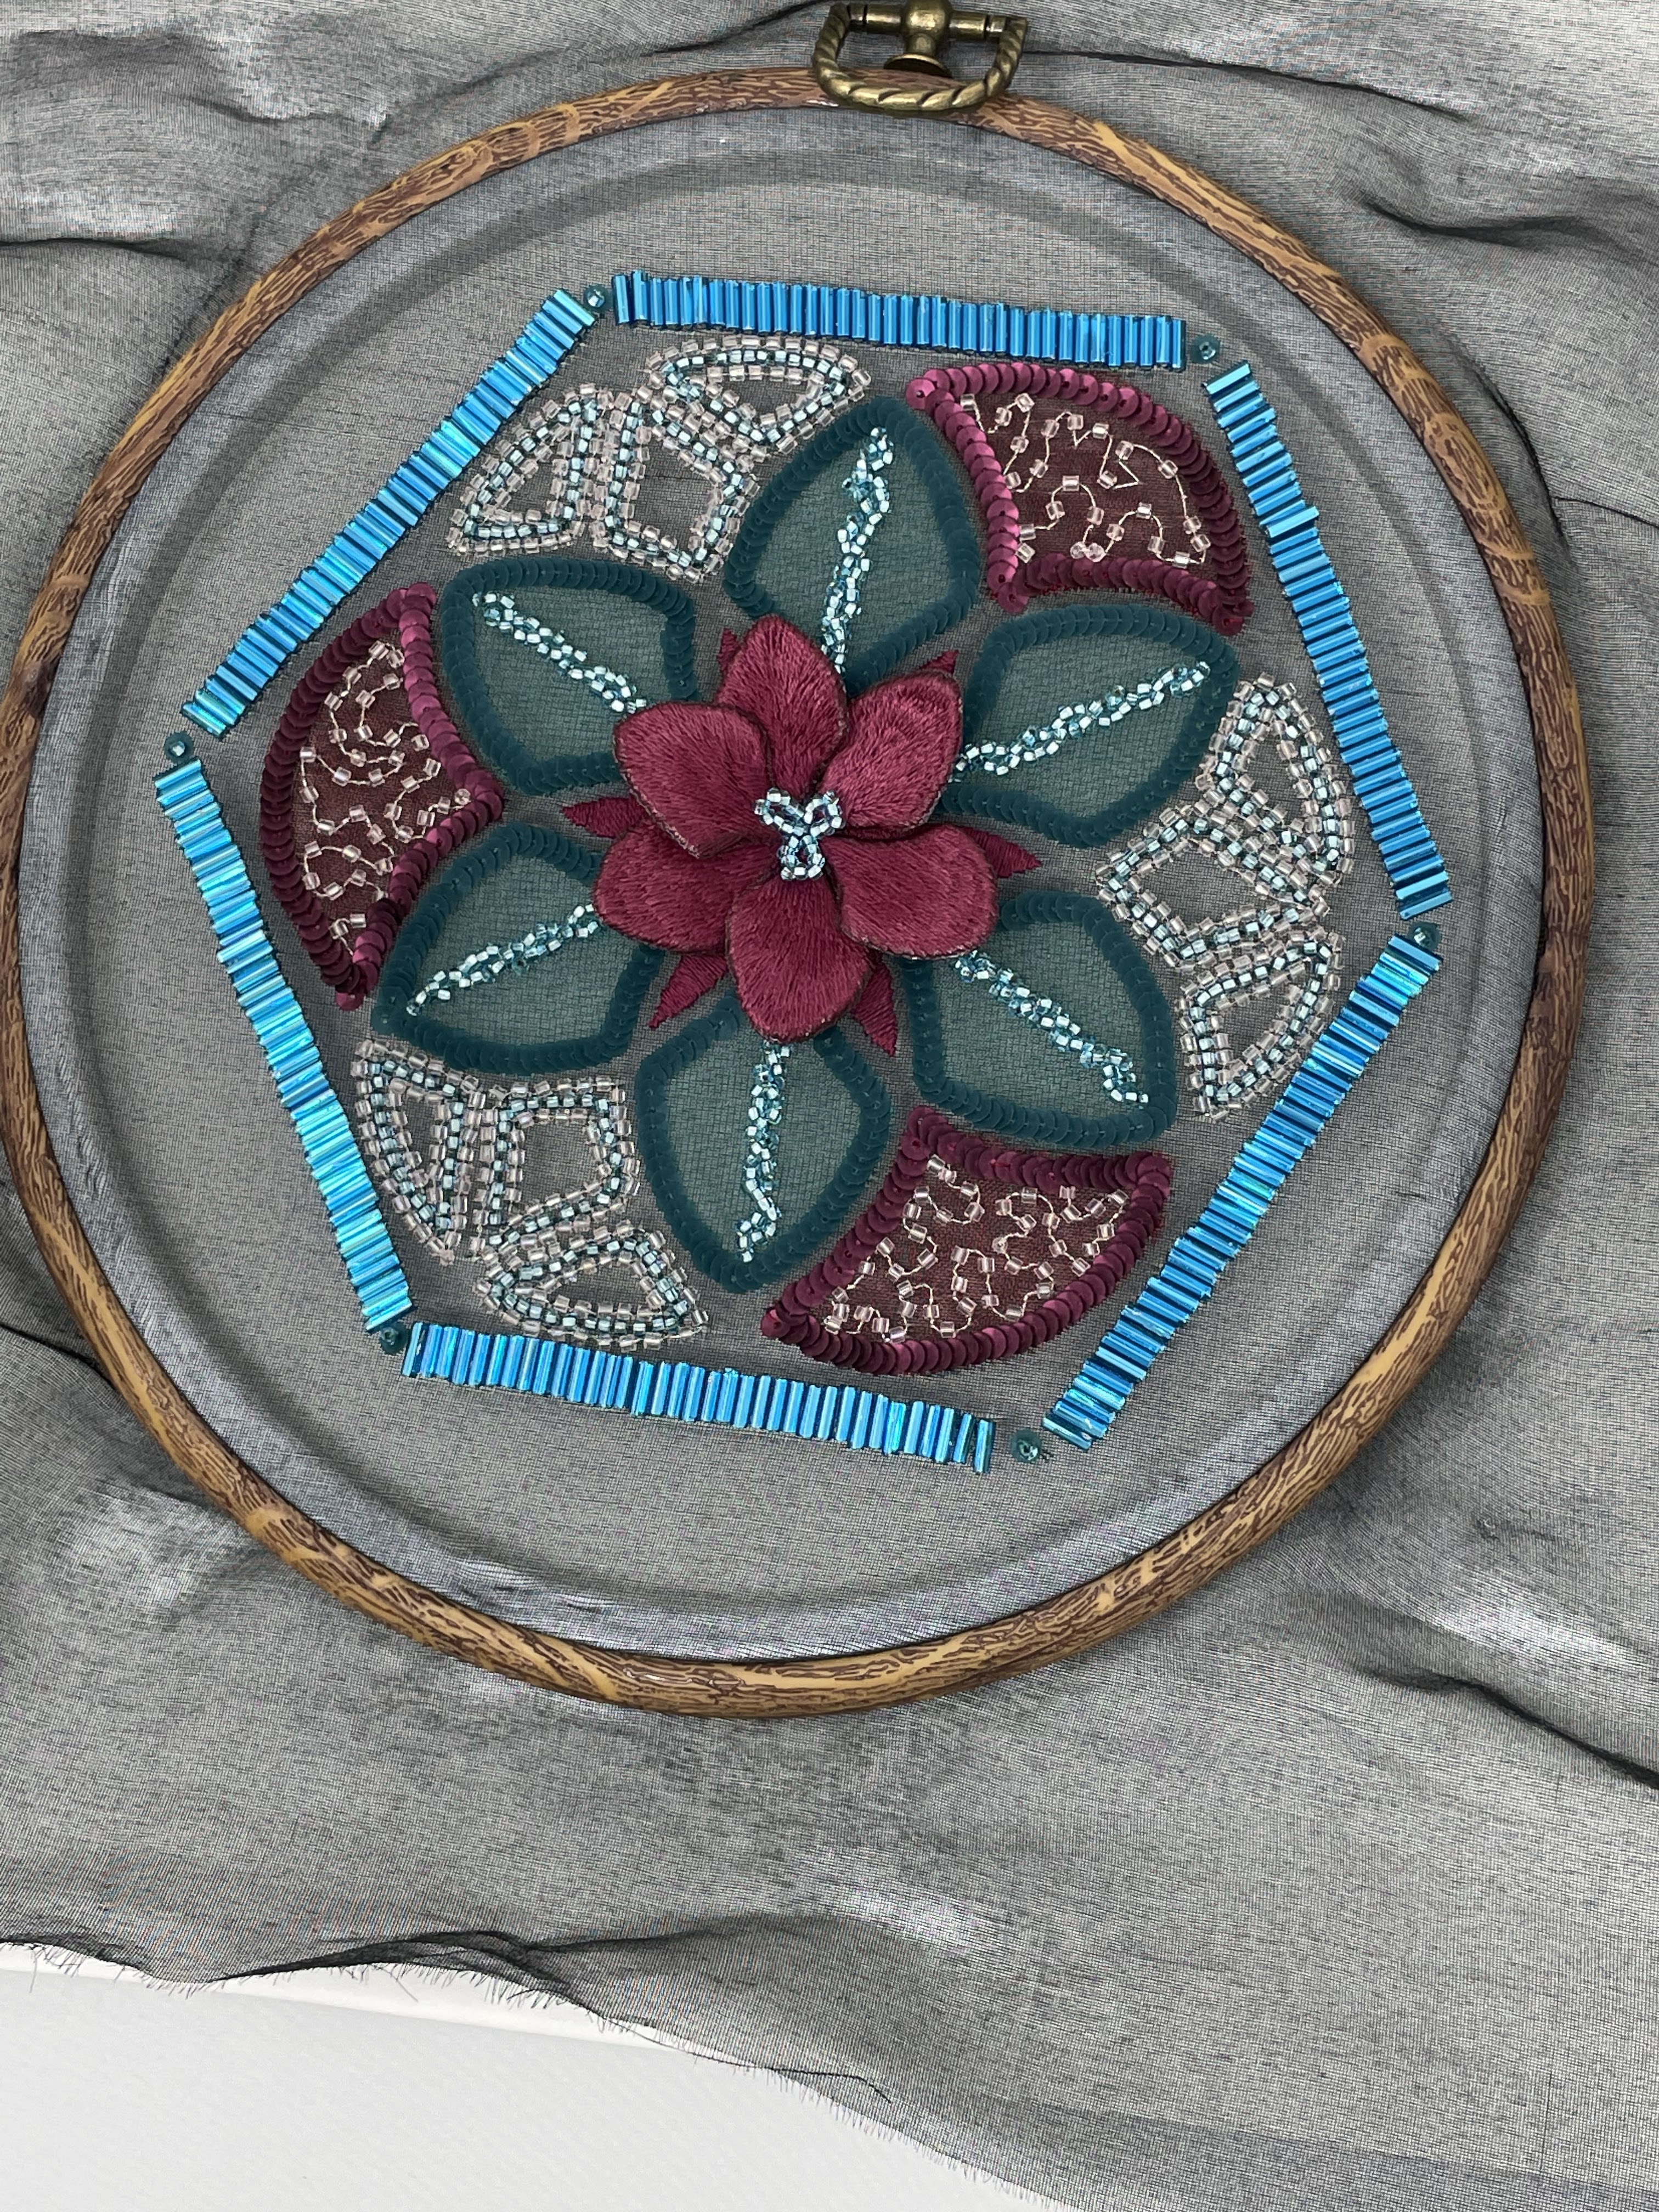
En 2021, tomé la clase de Baldosa Marroquí enseñada por Sarah Rickards, que fue parte de la escuela de verano internacional de la Real Academia Británica del Bordado (RSN Royal School of Needlework.)
Fue mi primera vez con este tipo de bordado. Creo que fue algo ambicioso de mi parte. ¡Quizás eso explica porque me demoré 2 años en terminarlo!
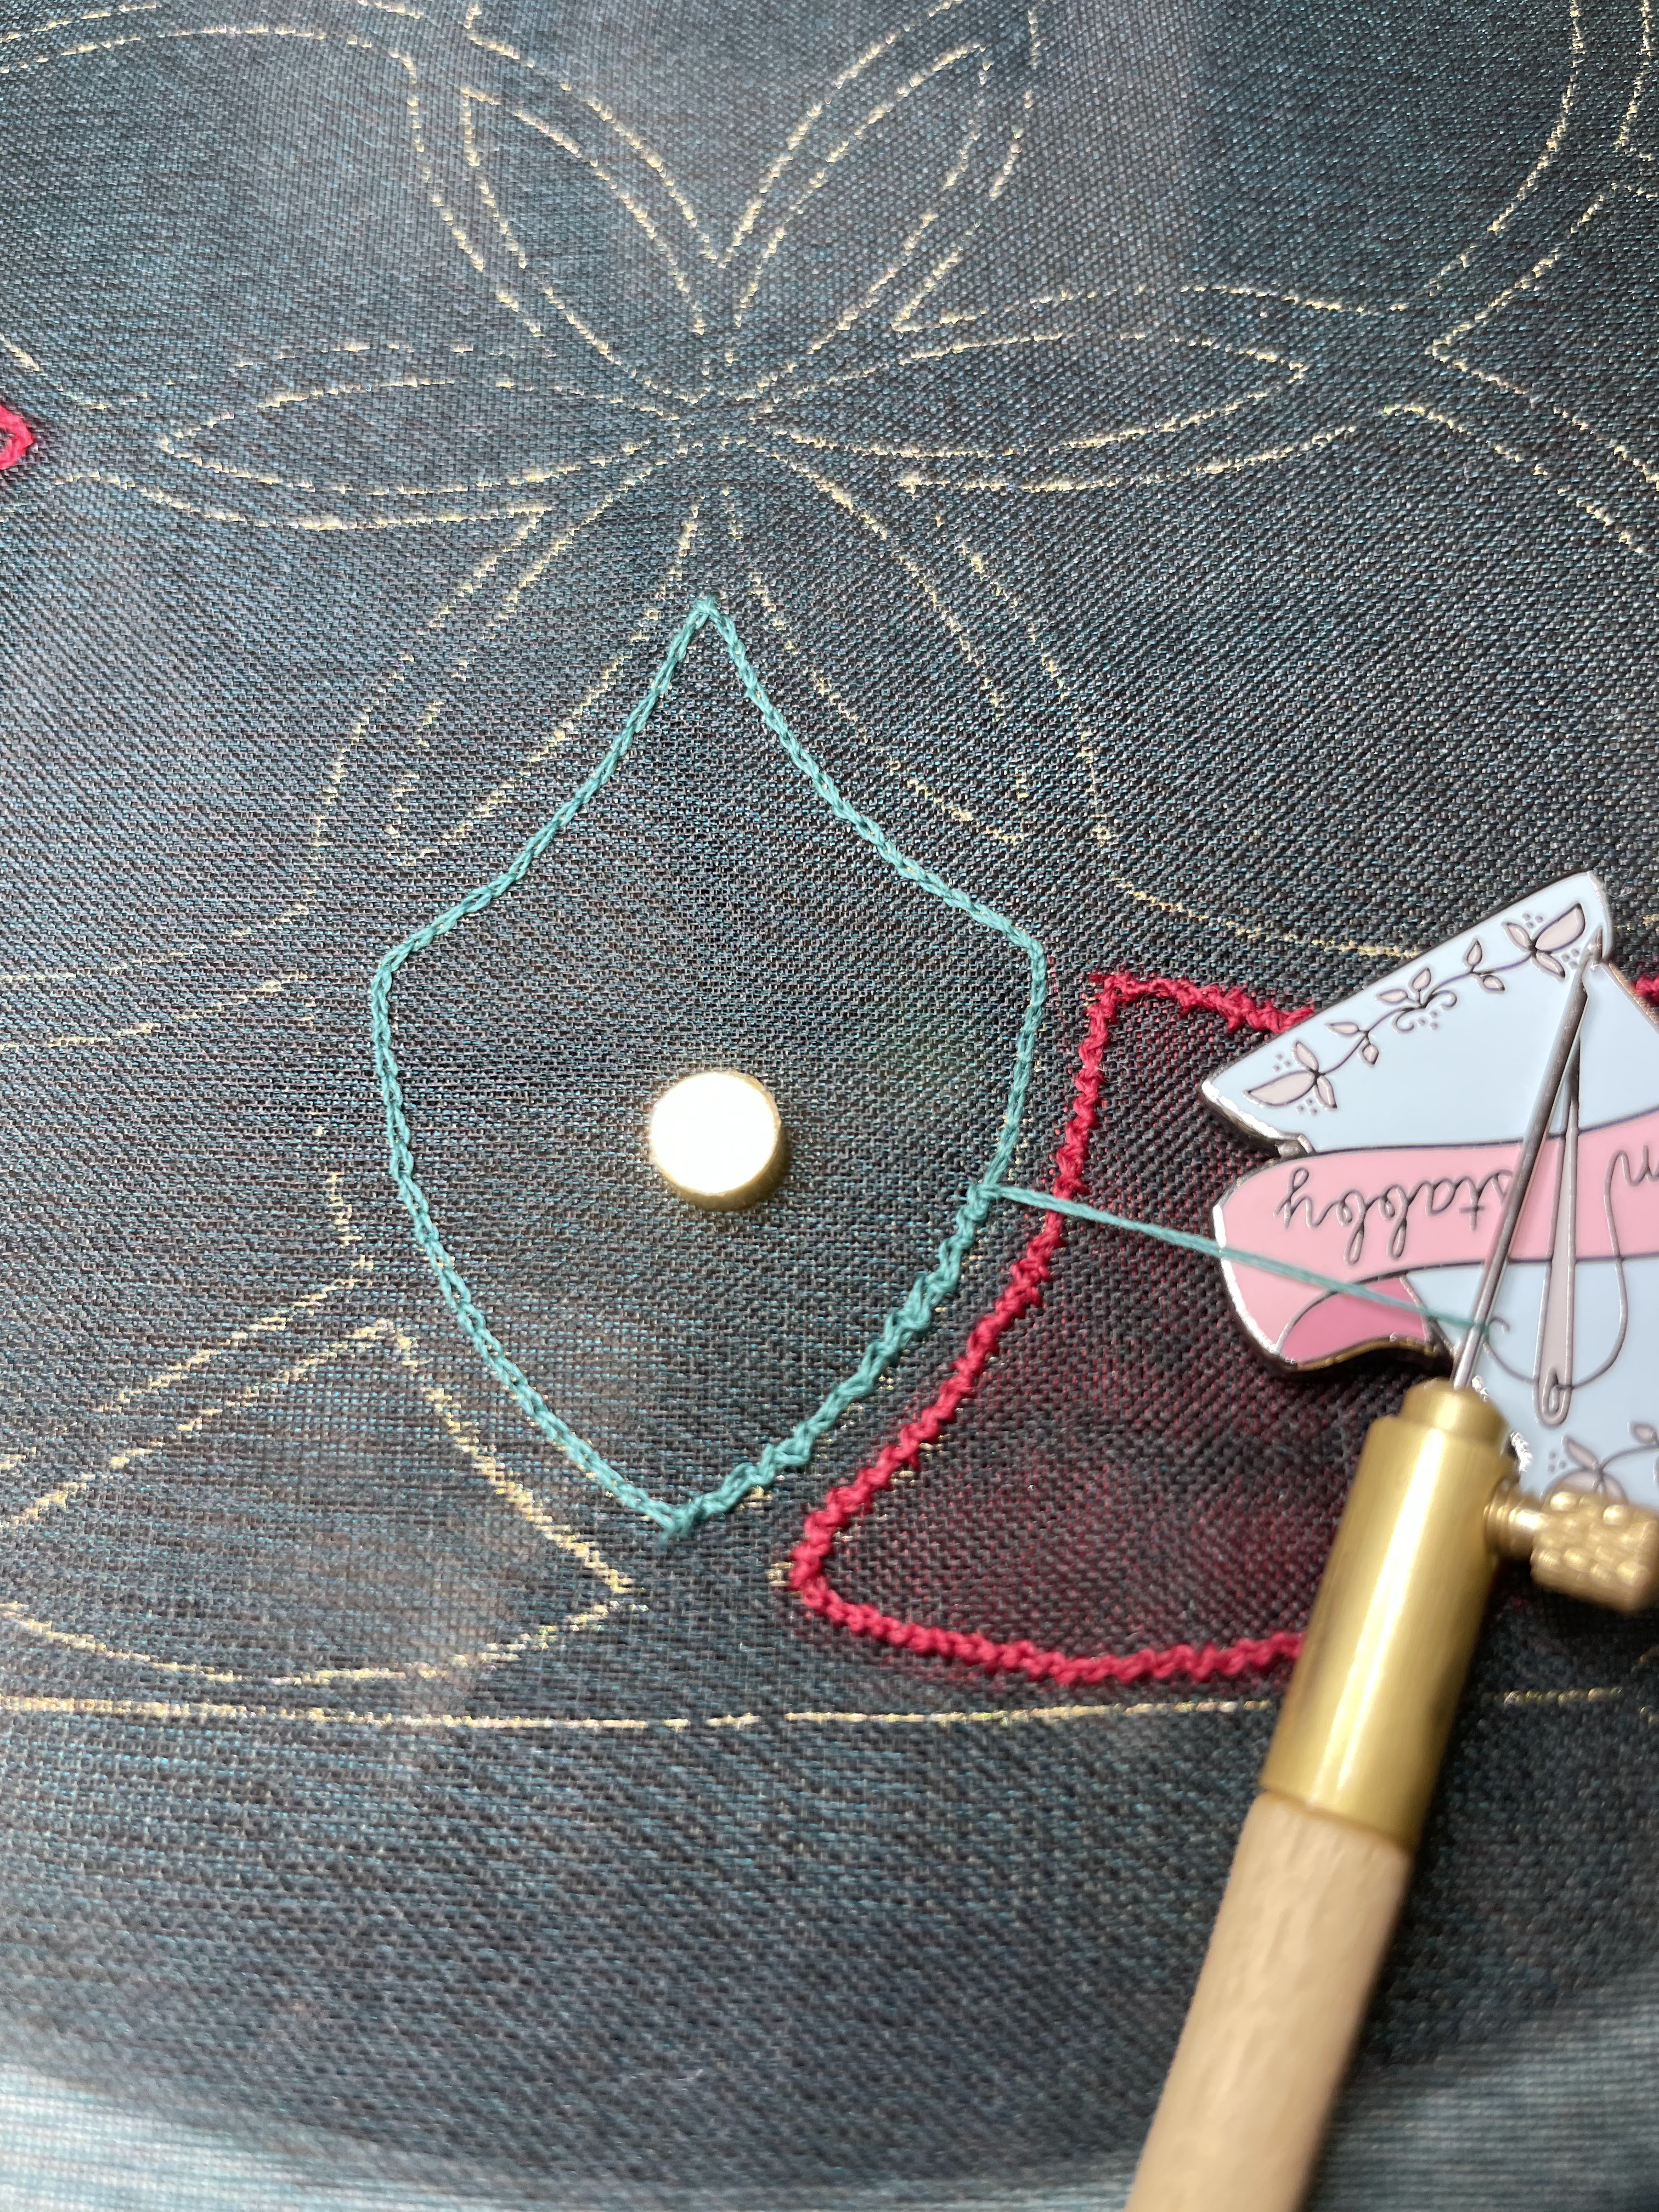
El tambour de Lunéville, que también se conoce con otros nombres, no se hace con aguja regular sino con un ganchillo especial. Se hace sobre tul de organdí (la tela casi transparente) y se cose por el revés de la tela.
Tambour de Lunéville
Crochet de Lunéville
Bordado de tambour
Ganchillo de Lunéville.
El ganchillo de Lunéville
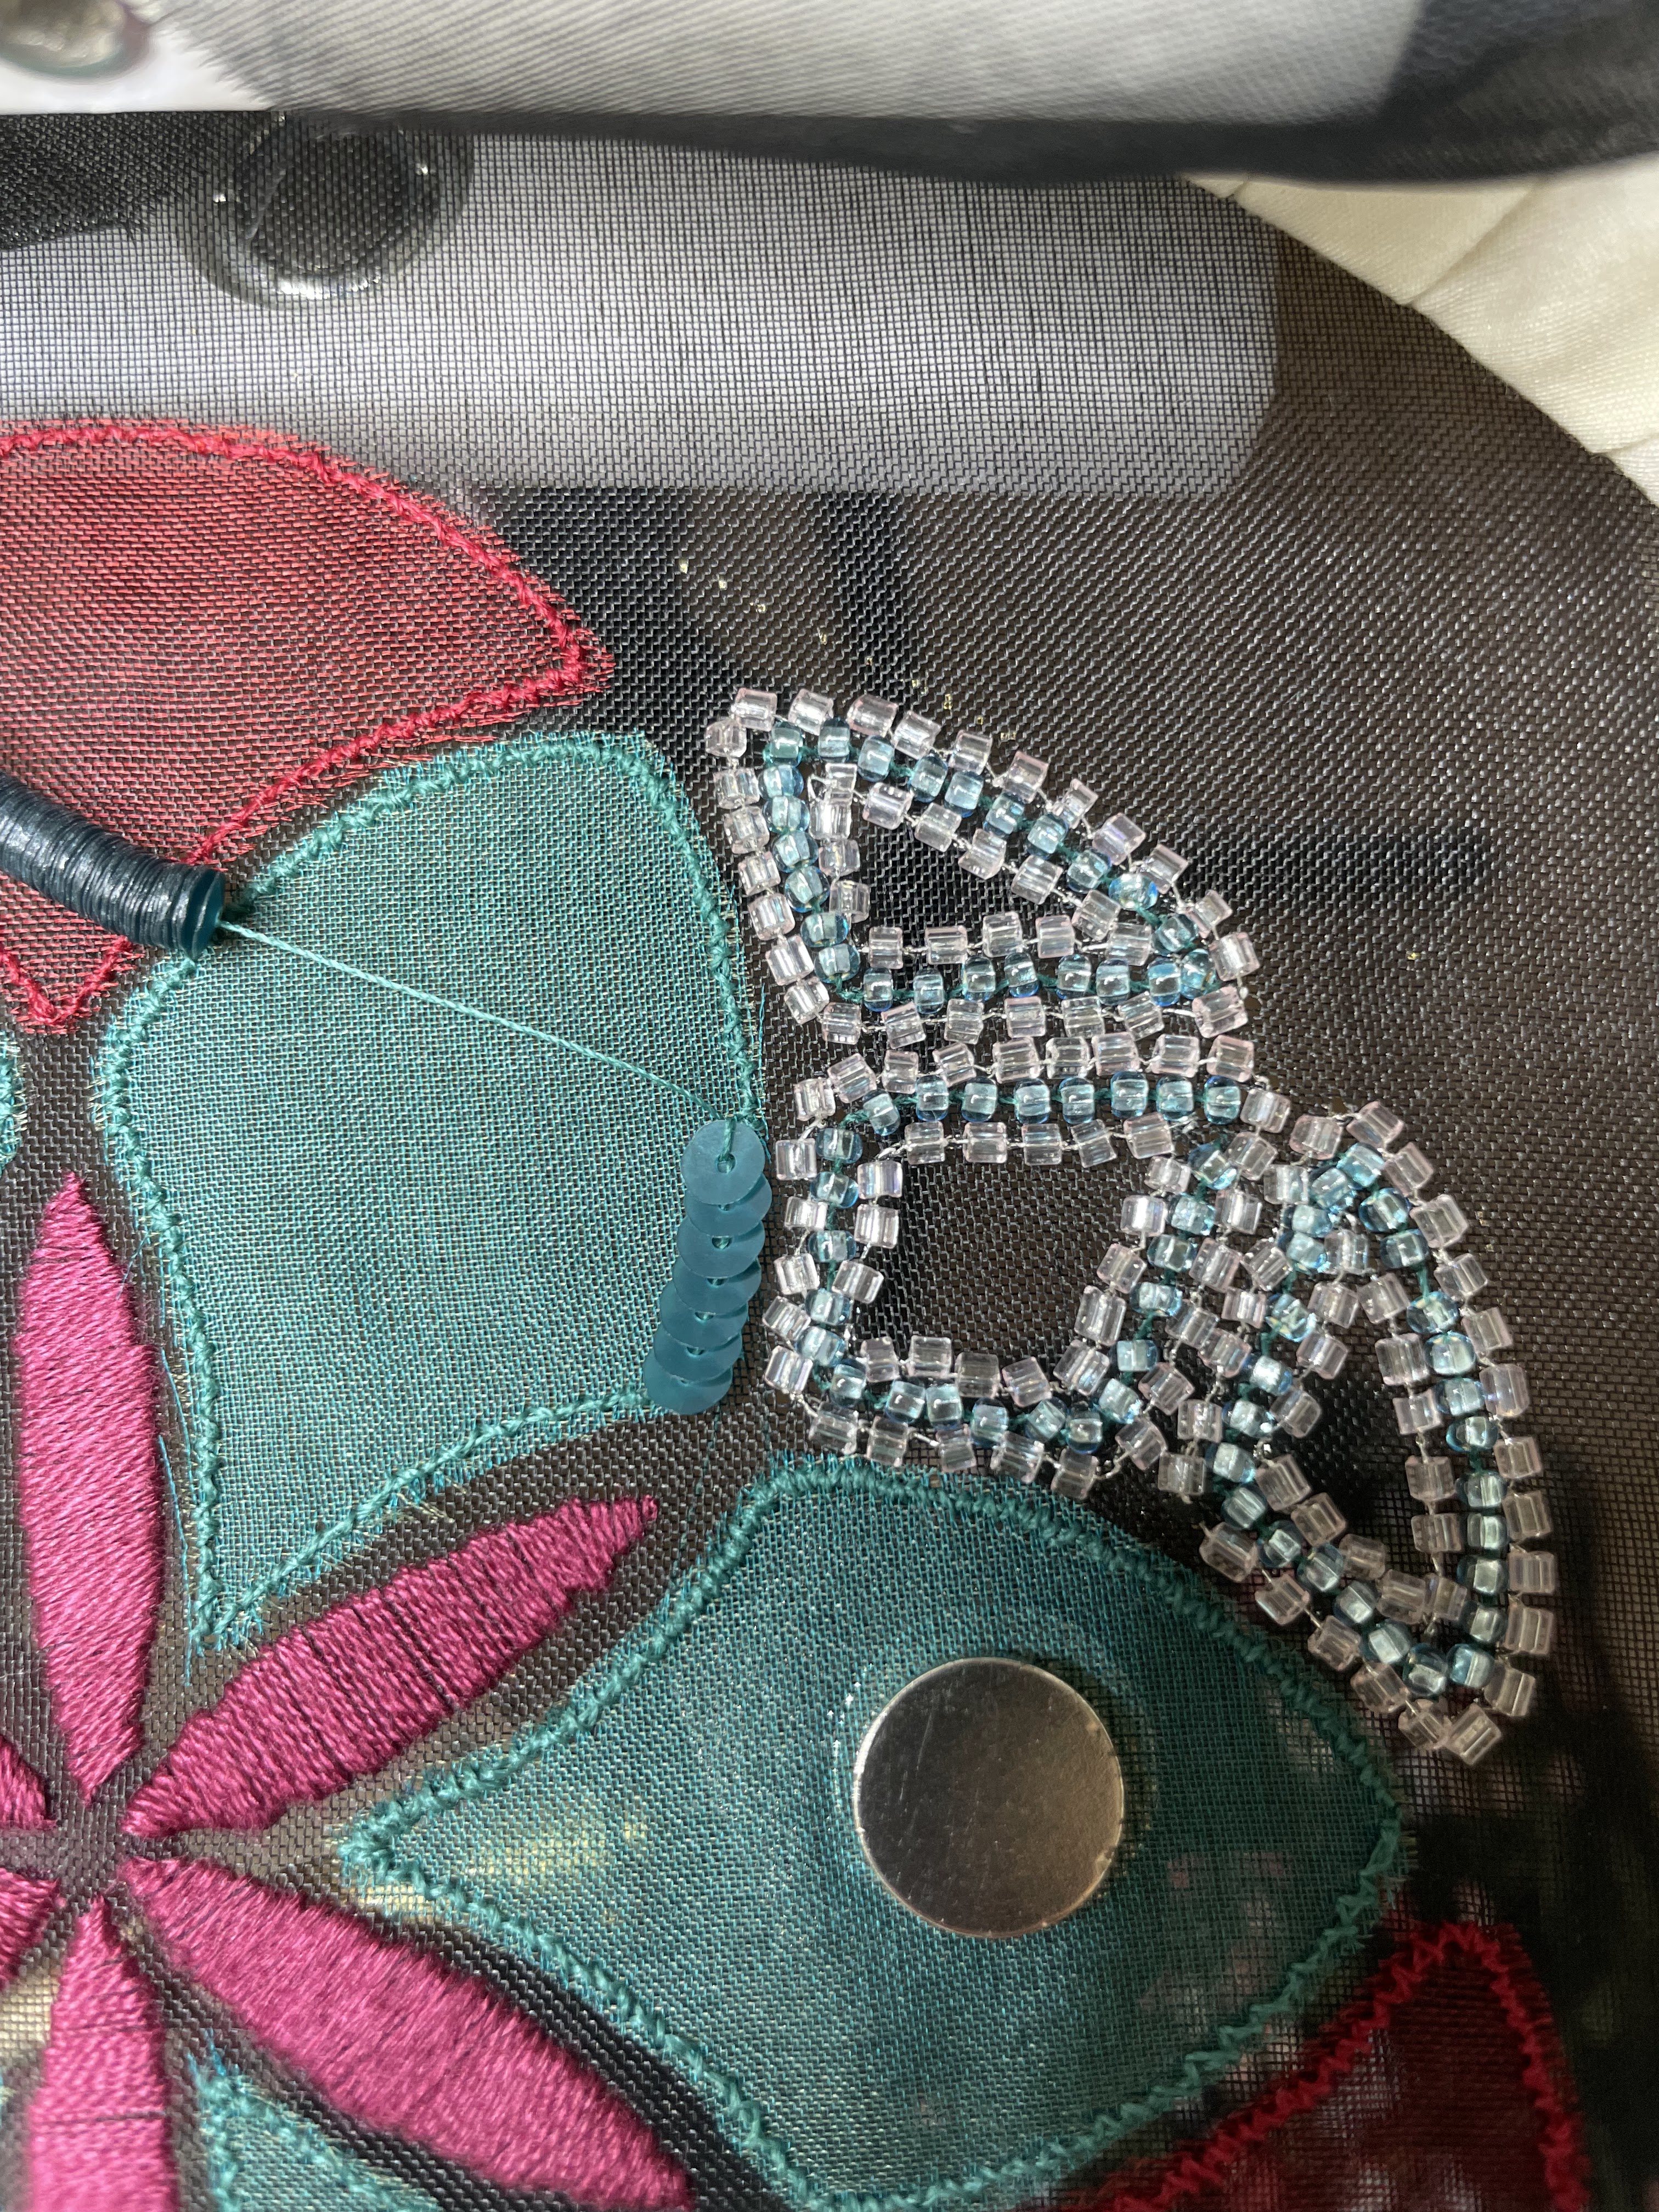
Los pétalos van en appliqué. Se cosen por el revés.
Foto del derecho de la tela. Las lentejuelas van alrededor del borde de los pétalos para cubrir la costura.
Porque se cose por el revés, hay que ensartar todas las cuentas o las lentejuelas en el hilo. La punta del hilo se asegura a la tela y el resto va enroscado en un carrete o bobina.
Bordé los pétalos del centro con una aguja regular usando puntada pasada. No pude hacer que las puntadas de cadeneta del ganchillo me quedaran lo suficientemente planas.
Fue un proyecto muy hermoso. Me tomó mucha práctica aprender a hacer la puntada básica, la cadeneta. Pegar las cuentas y las lentejuelas también fue difícil: toca sujetar la lentejuela o cuenta contra la tela mientras se enrolla el hilo en el ganchillo–mucha práctica.
Este tipo de bordado es el que se usa en la alta costura (haut couture.) Son esos vestidos vaporosos con faldas y corpiños de tul que brillan con cuentas y lentejuelas.
Back in 2021, I took the Moroccan Tile tambour class with Sarah Rickards, which was part of the RSN (Royal School of Needlework) 2021 International Summer School.
It was my first time with tambour embroidery. Perhaps it was a little ambitious for my first time. Maybe that’s why it took me 2 years to finish it!
Tambour embroidery, which is also known by the names below, is performed with not a needle but a hook. It is done on organdy (the see through fabric) and stitched from the wrong side (the back.)
Tambour de Lunéville
Crochet de Lunéville
Tambour embroidery
Hook for tambour de Lunéville embroidery
The petals are appliqué. The stitching is done on the wrong side.
Picture of the right side. The sequins are attached around the appliqué petals to cover the edge.
Because it is done from the wrong side, all the beads or sequins are threaded through the working thread. The end is secured to the fabric and the rest of the thread is in a spool.
I stitched the center petals in satin stitch using a regular needle. I could not get the tambour stitches to look flat.
It is a beautiful project. Learning to make the basic chain stitch was hard work, it took lots of practice. Taking the chain stitch to attach sequins and beads was also very hard: I had to learn to keep the sequin or bead against the fabric while I twisted the thread around the hook–lots of practice.
This type of embroidery is what is used in haut couture gowns, the ones that look frothy because of the tulle or organdy skirts and bodices with the shimmering beads and sequins.
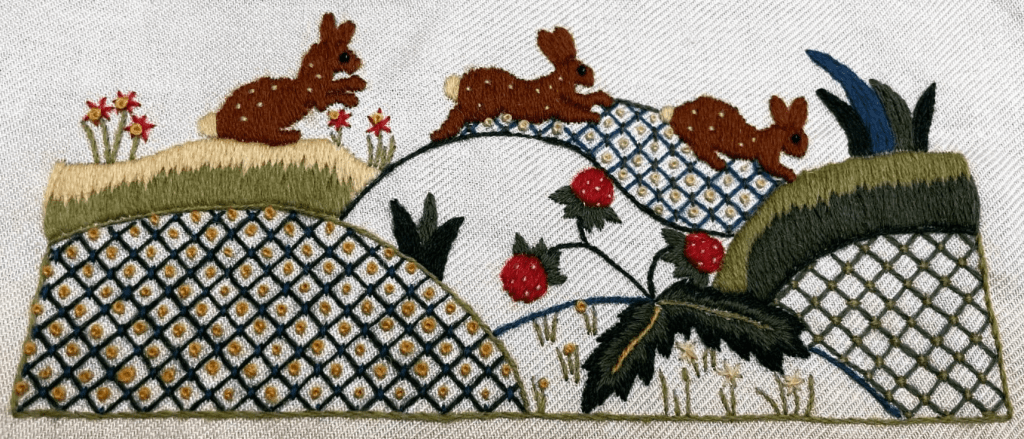
Conejos al amanecer (Rabbits at Dawn), diseño por Crewelwork Company
A mi marido le encanta la compañía de Crewelework (Crewelwork Company.) No es que él quiera bordar los kits, los quiere comprar para que yo los haga.
Entonces después de decirle que tenía mucho que hacer por la mayor parte del año 2,022, finalmente le di la luz verde para que me comprara un kit de esos en noviembre.
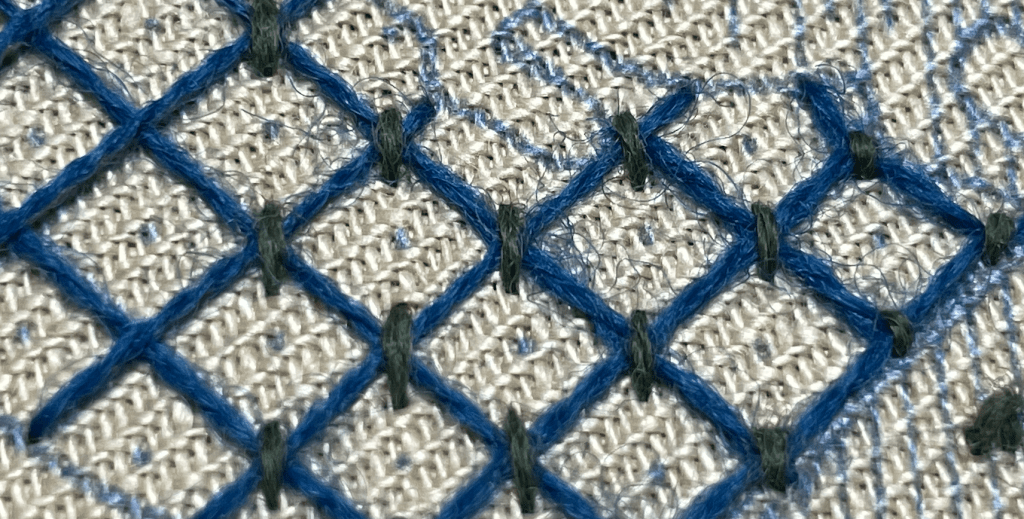
Acabé de bordarlo a mediados de diciembre, un proyecto bonito y pequeño. Usé puntadas como cordoncillo, mordida, pasado, nudo francés, enrejado. La tela venía con el diseño impreso, entonces no había que calcular el enrejado (¡genial!)
Enrejado
Crewel es un estilo de bordado muy bonito. Se usan hilos de lana (en este caso de Appletons) sobre tela de sarga de lino.
La Crewelwork Company tiene muchos diseños en el estilo jacobeo inglés, como el siguiente:
Cortina de cama de Muncaster por la Crewelwork Company.
Lo que lo hace jacobeo inglés son los elementos del diseño: el árbol de la vida, el enrejado, los montes, las flores estilizadas, etc. Se podría hacer con hilos de algodón y seguiría siendo jacobeo inglés, pero es más asociado con el crewel.
A mi me parece que la Cortina de cama de Muncaster es el kit más grande/complicado de la Crewelwork Company. Es muy caro, pero uno recibe un diseño de 100 x 145 cm (40 x 57 inches) con todos los hilos, agujas e instrucciones. Sin mencionar todo el trabajo que habrá sido desarrollarlo. Es réplica de una cortina de cama en el castillo de Muncaster en Cumbria, Reino Unido.
Un proyecto así podría demorarse un par de años. Por eso ya le dije a mi marido que ¡ni lo piense!
My husband is a big fan of the Crewelwork Company. It’s not that he wants to embroider the kits himself, he wants to buy them for me to do.
So after me telling him for most of 2022 that I had too much to do, I finally gave him the green light to get me a kit from them in November.
I finished stitching it in mid December, a nice, small project. It uses stem stitch, long and short, satin, padded satin, french knot, and laid work. The fabric came pre-printed with the design, so there was no guesswork (ruler work) for the laid work.
Laid work
Crewelwork is nice style of embroidery, it’s wool threads (in this case from Appletons) over linen twill fabric.
The Crewelwork Company has many designs in the Jacobean style, like the one below:
The Muncaster Bed Hanging from the Crewelwork Company.
What makes it Jacobean is the design elements: the tree of life, the laid work, mounts, stylized flowers, etc. It could technically be made in cotton threads and still be Jacobean, but it is closely associated with crewelwork.
I think the Muncaster Bed Hanging is the Crewelwork Company’s largest/most complex kit. It is very expensive, but you are getting a large piece of fabric 100 x 145 cm (40 x 57 inches) with all the threads, needles and instructions. Not to mention all the work that went into developing it. It is a replica of a bed hanging from Muncaster Castle in Cumbria, UK.
A project like this could easily take a couple of years. That’s why I already told my husband to not even think about it!
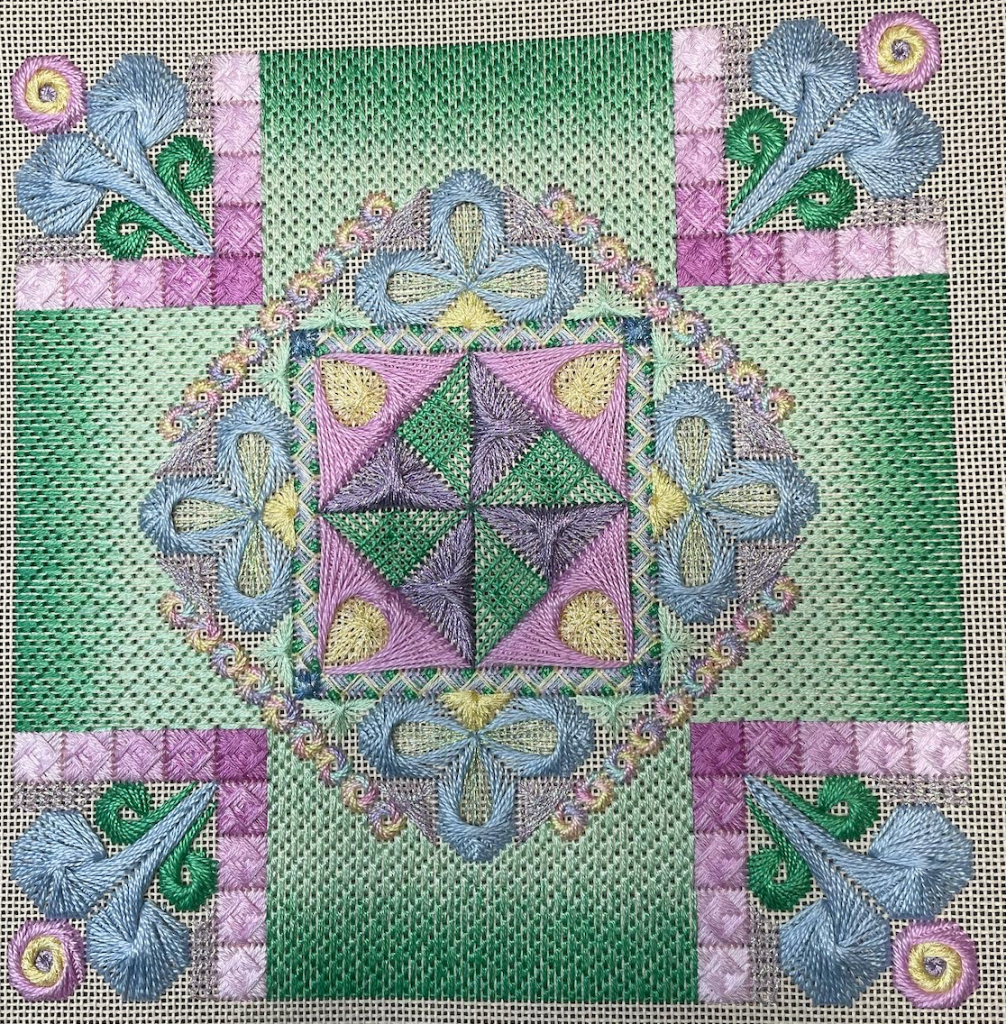
Encanto sureño (Southern Charm), diseño por Debbie Rowley
Nunca había ensayado un proyecto de cañamazo contado (¿puedo incluir los cañamazos del colegio?) entonces cuando vi que Debbie Rowley iba a enseñar una clase especial para la región Sur Central del EGA (Gremio de bordadores de América) me inscribí de inmediato.
Hace rato le tengo curiosidad a esta técnica; Gary Parr de mi podcast favorito, FiberTalk, siempre la menciona y entonces qué mejor oportunidad para ensayarla.
La clase vino con todos los materiales y el librito de las instrucciones con diagramas muy claros. Ya empezada la clase (semanal por cuatro semanas en línea) la profesora nos dió acceso a una página de Groups.io site con todos los papeles y videos para cada puntada.
Debbie es muy buena profesora, muy organizada.
Debbie usa hilos muy interesantes:
Finca Presencia de algodón perlado y de madeja.
Hilos metálicos de Kreinik.
Rainbow Gallery.
Threadworx sobreteñido.
Me encantó que escogiera estos hilos de compañías pequeñas e independientes. Los colores son muy bonitos y las texturas maravillosas.
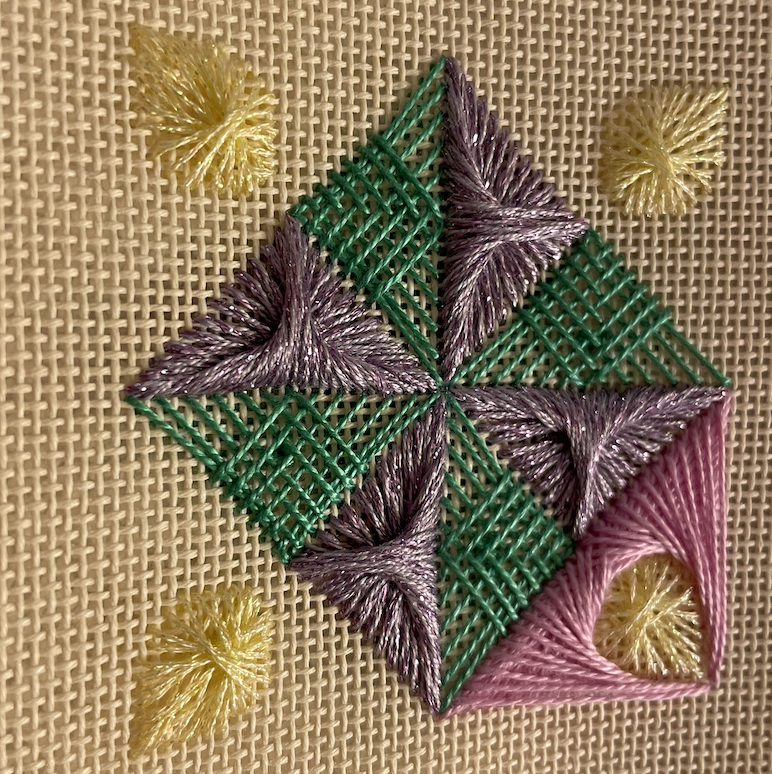
Motivo central en camino
Las puntadas son muy interesantes con nombres como amadeus, jessica, cabeza de pescado, etc.
Una cosa que no me gustó es que no perdona ni un error. Si se comete un error, va a ser evidente en la próxima puntada porque no va a encajar.
Después de acabar las cabezas de pescado del centro, me di cuenta que había contado mal el amadeus anterior en morado. Entonces tuve que sacar todos los hilos y empezar de nuevo.
¡Hay que contar y recontar!
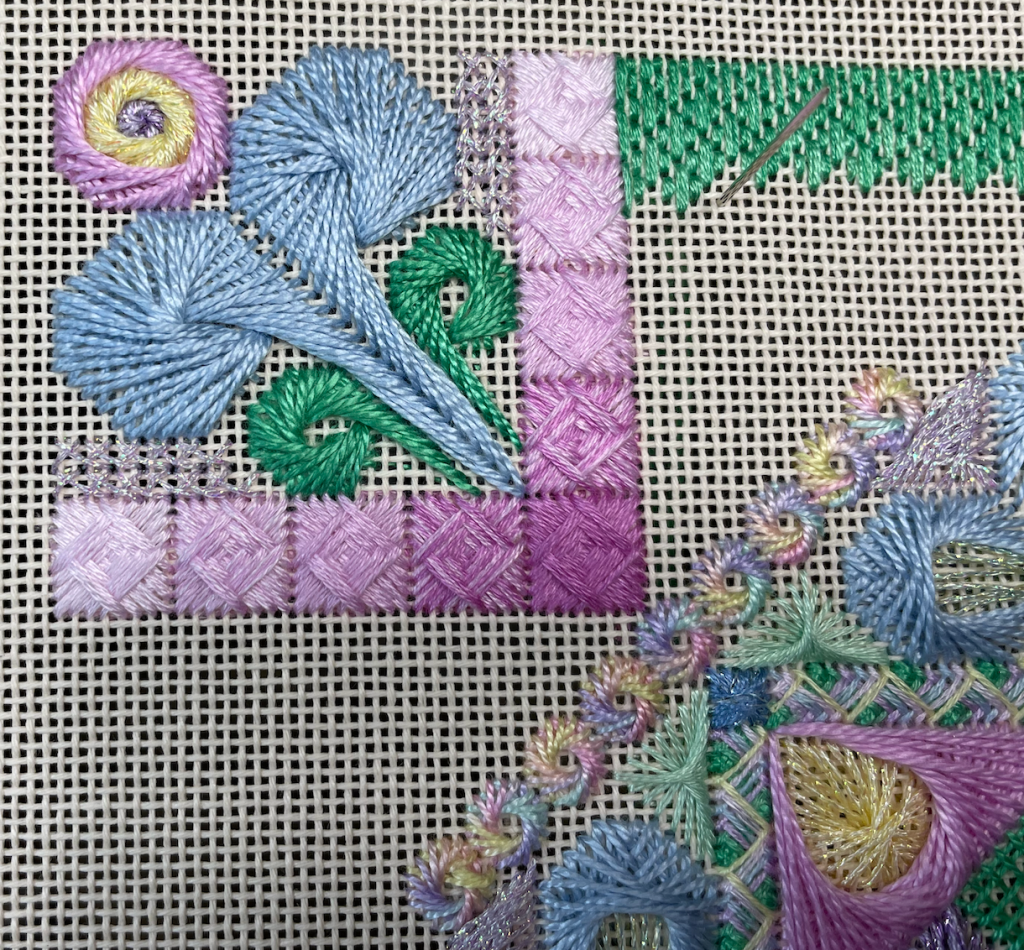
Muchas jessicas
Los remolinos coloridos se llaman jessica y son muy interesantes. Las últimas puntadas van escondidas por debajo de las primeras, para que los remolinos queden bien pulcros.
Usé un colocador para que los cuadrados rosados tejidos quedaran bien lisos. El cambio de matices se logra añadiendo hilos de otro color a manera que los cuadrados avanzan hacia la izquierda y hacia arriba.
Fue una clase muy interesante, ¡la disfruté mucho!
I had never done a counted canvas project before (does the canvas sampler I did in elementary school count?) so when I saw that Debbie Rowley was doing a special class for the South Central Region of the EGA, I immediately signed up for it.
I’ve been curious about counted canvas for a while. Gary Parr from FiberTalk always talks about it, so what better chance to try it out.
The class came with the kit, all the materials and a very nice instruction booklet with very clear diagrams. Once the class started (once a week over four weeks online) we had access to a Groups.io site with all the handouts, and videos for each individual stitch.
Debbie is a great teacher, very organized.
Debbie uses very interesting threads:
Finca Presencia cotton floss and pearl.
Kreinik metallic threads.
Rainbow gallery.
Threadworx overdyed.
I’m glad she chose these threads from smaller, independent providers. The colors are beautiful and the texture is amazing.
Central motif in progress
The stitches were very interesting with names like amadeus, jessica, fish head, etc.
One thing about counted canvas that I did not like is that it’s not very forgiving. If you make a mistake you will find it in the next set of stitches because they will not fit right. After I finished the green fish heads in the center, I realized that I had miscounted previous purple amadeus in the center, so I had to pick everything and start again from scratch.
Must count and re-count!
Lots of Jessicas
The colorful swirls are called jessicas and they are very interesting. The last few stitches are tucked under the first ones, making the swirls very neat.
I used a laying tool to make the pink woven squares nice and smooth. The color grading is achieved by adding more threads of another color as they advance to the left and to the top.
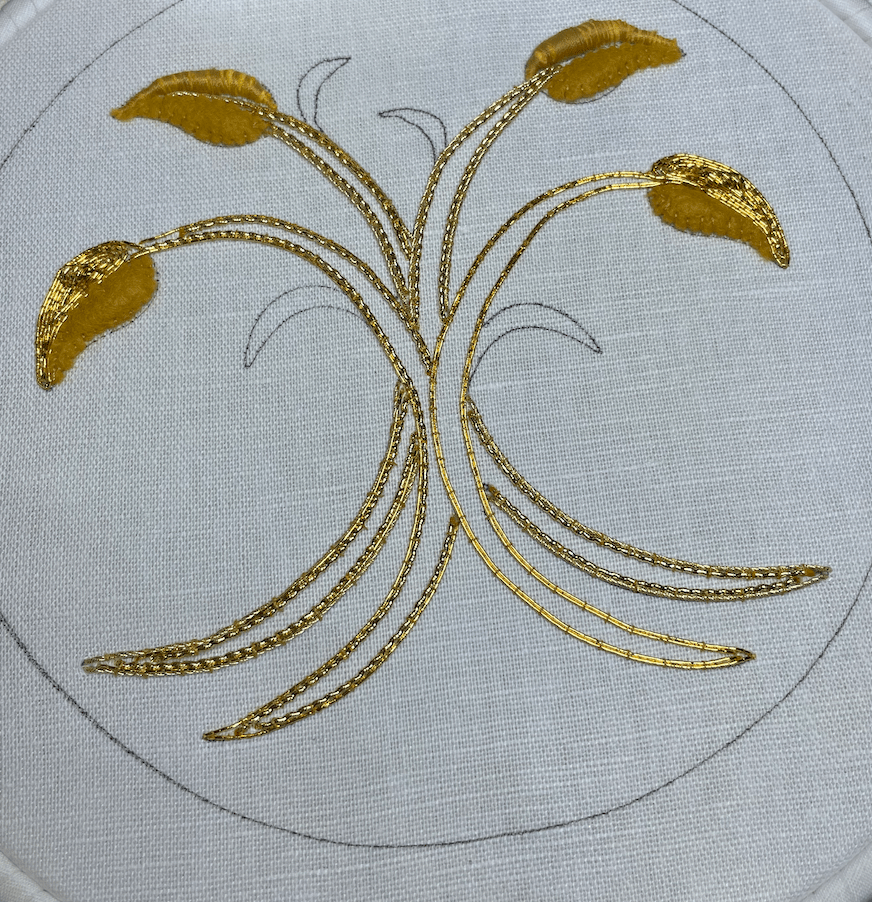
Este verano pasado bordé dos proyectos de bordado en oro:
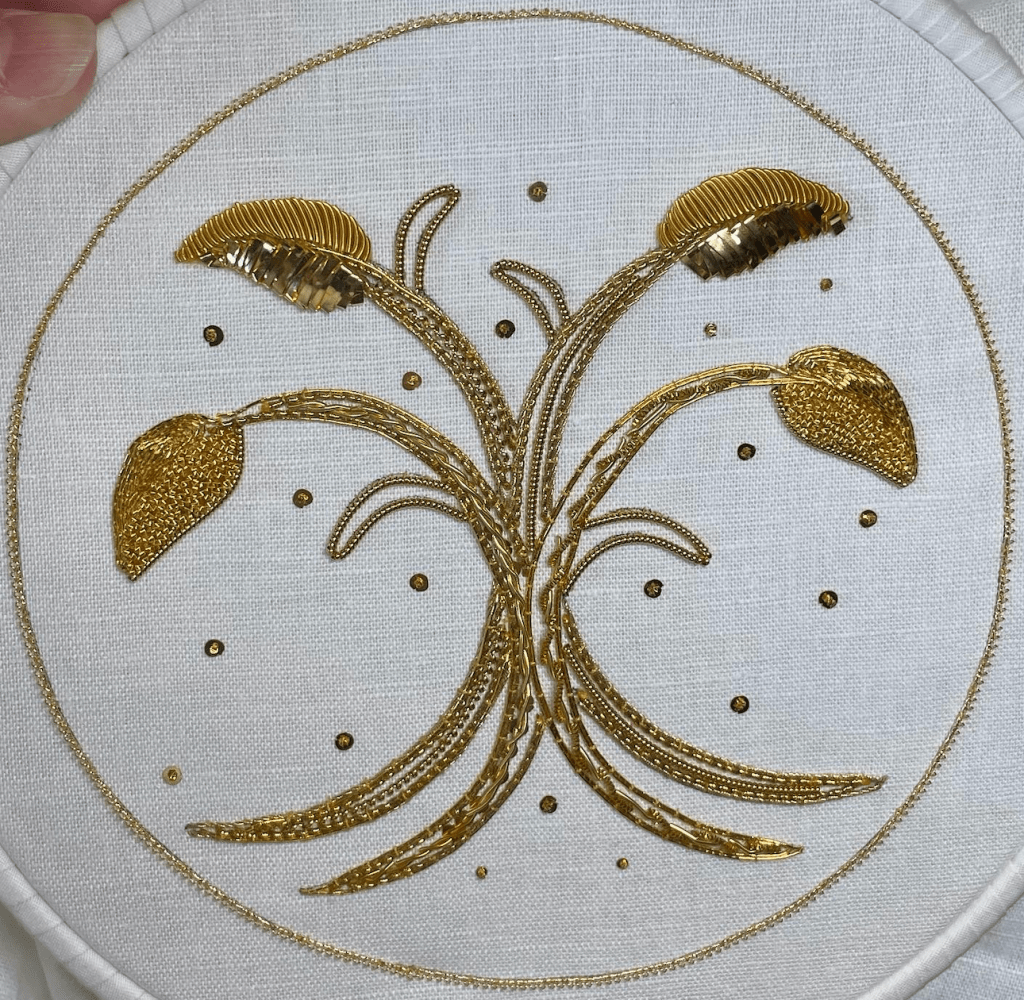
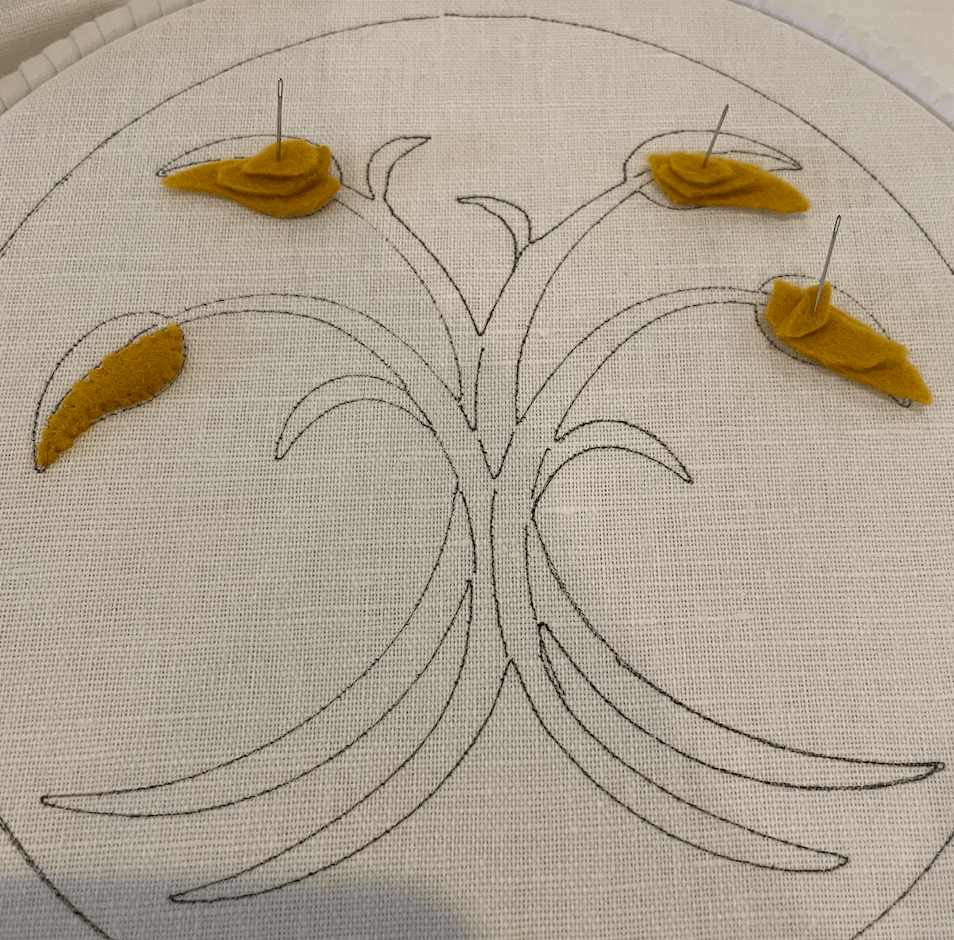
Hojas doradas de Kelley Aldridge durante la clase de verano de la Real Academia Británica del Bordado.
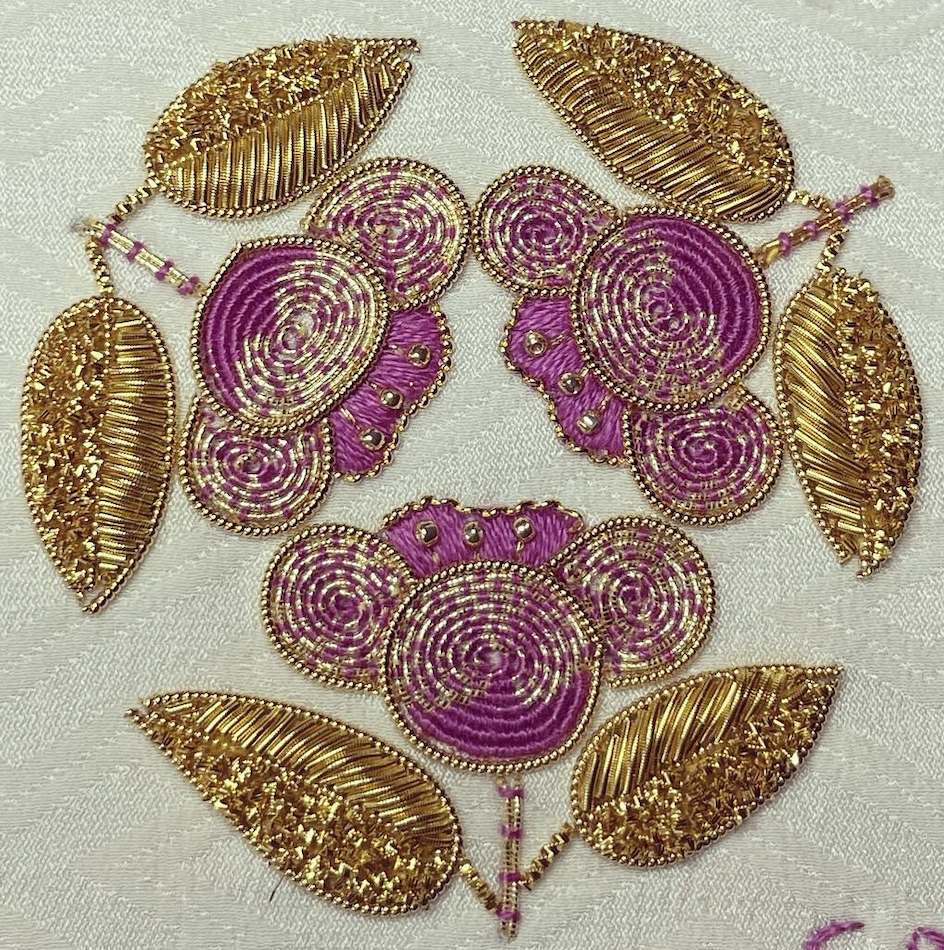
Azahares de ciruela japoneses por Jane Nicholas durante el congreso nacional del Gremio de Bordadores de América (EGA.)
Hojas doradas, diseño por Kelley AldridgeAzahares de ciruela japoneses, diseño por Jane Nicholas
Técnicas del bordado en oro
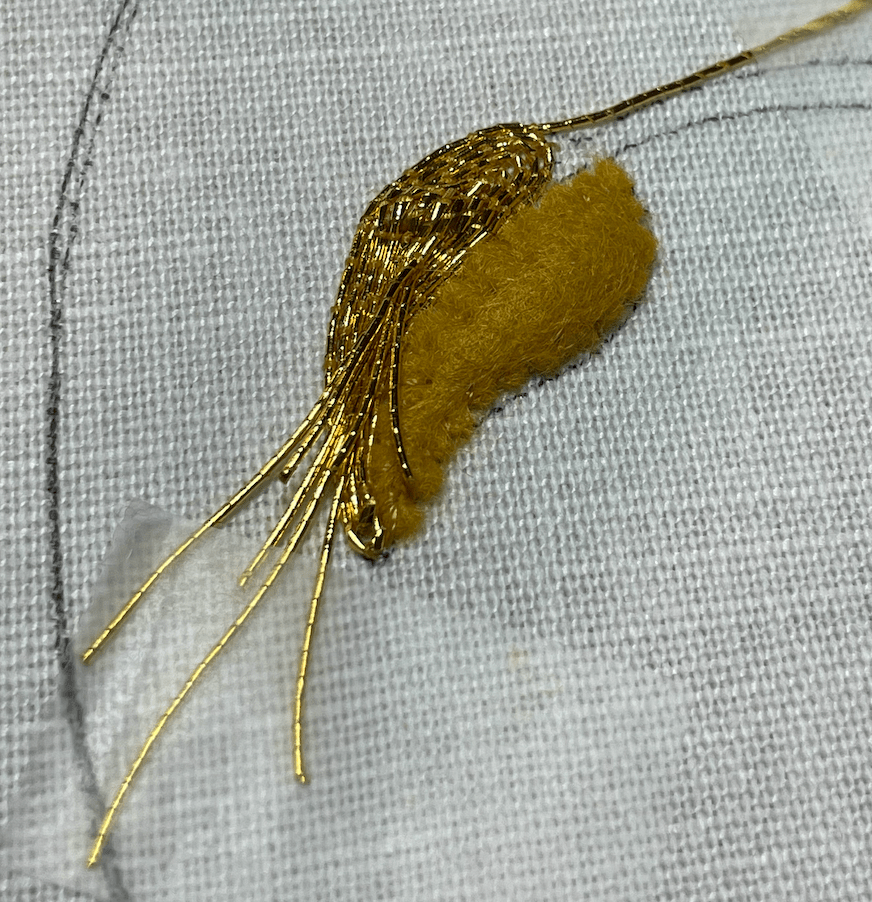
El proyecto de las hojas doradas tenía tres clases de relleno.
He trabajado el relleno de fieltro antes, donde capas de fieltro se usan para lograr una superficie curva y dimensional.
Relleno de fieltro
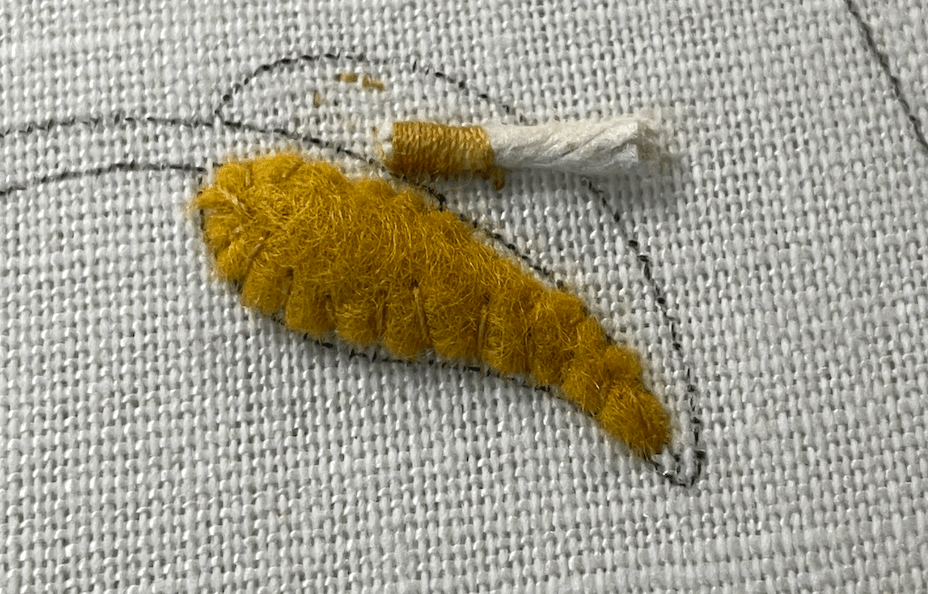
Algo nuevo para mí, fue el uso del relleno duro, usando un cordón encerado.
Relleno duro
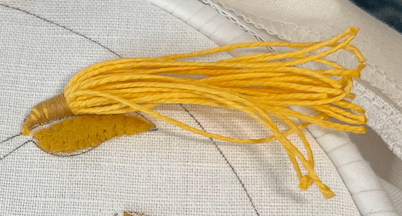
Y el relleno suave se hace con un hilo grueso de algodón al que se encera para manipularlo usando varios dobleces que se van cortando para reducir el grosor de la forma.
Relleno suave
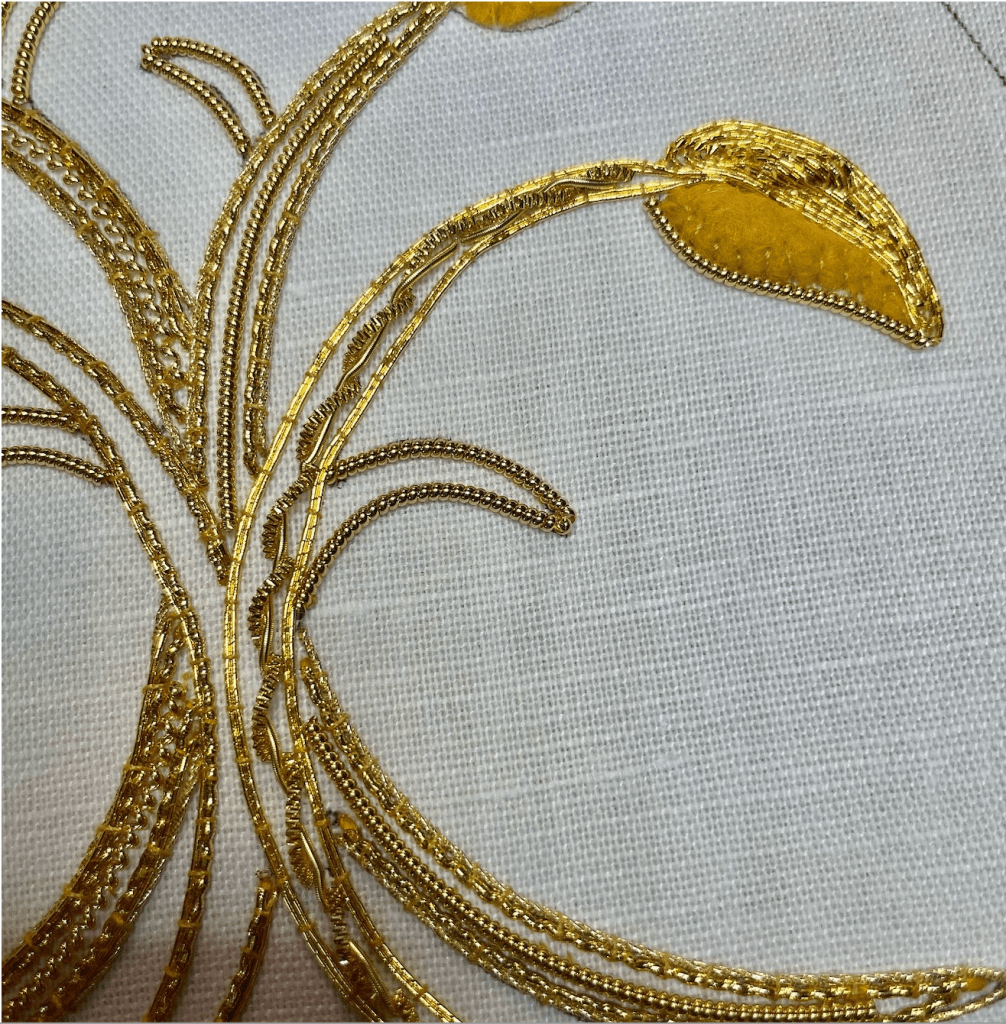
En el proyecto se utilizó hilos (o alambres) japoneses y rococos para hacer los bordes de las ramas y para algunas hojas. Los hilos de oro se pegan a la tela usando hilo de coser (puntada de boloña.)
Hilo japonés sobre el relleno duroHilos japoneses y rococó en el border de las ramas.
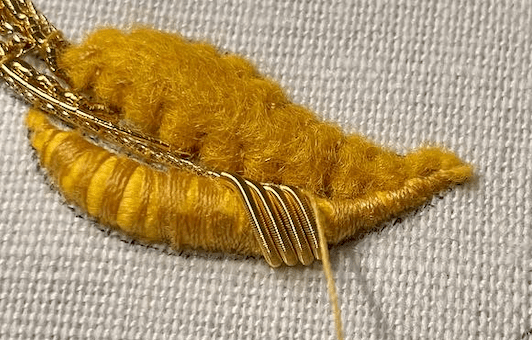
Las hojas también fueron cubiertas con canutillo liso, frisado (cortado en pedacitos) jaserón y hojilla.
El canutillo es un tubo de resorte que puede ser cortado y pegado como una cuenta. El hilo y la aguja pasan a través del canutillo.
El canutillo frisado o rizado se corta en pedacitos de uno o dos milímetros y se pega como si fuera una cuenta al azahar hasta cubrir la superficie.
El jaserón es un canutillo donde los resortes son más gruesos, dando la ilusión de cuentas o perlas muy pequeñas y muy pegadas.
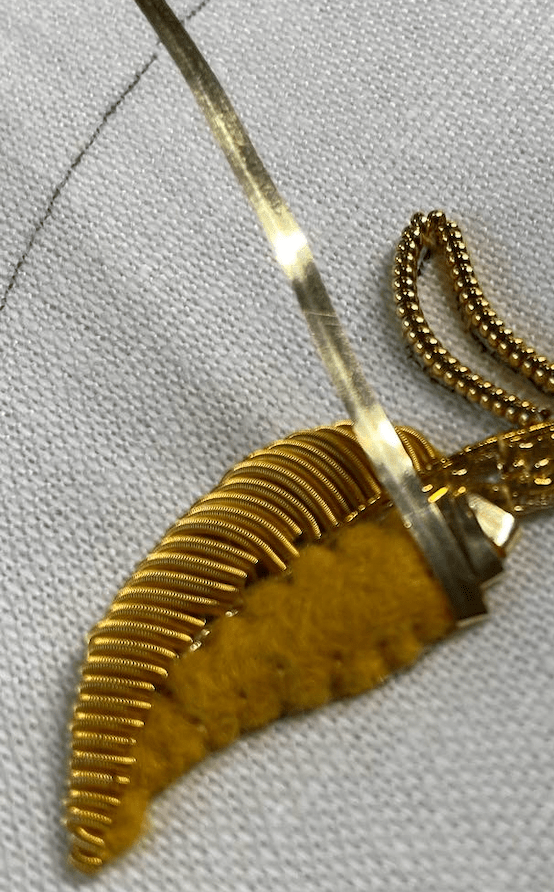
La hojilla es una cinta de metal que se pega con hilo a manera que se va doblando hacia sí. Los dobleces cubren el hilo.
Canutillo sobre el relleno suaveHojilla sobre relleno de fieltro
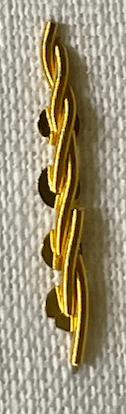
La hojilla fue algo nuevo para mí y también lo fue hacer el cordoncillo de canutillos, formándolos en letra S.
Letras S de canutillos en la mitad de las ramas. Los bordes pequeños fueron hechos con jaserón. Letras S de canutillos con lentejuelas.
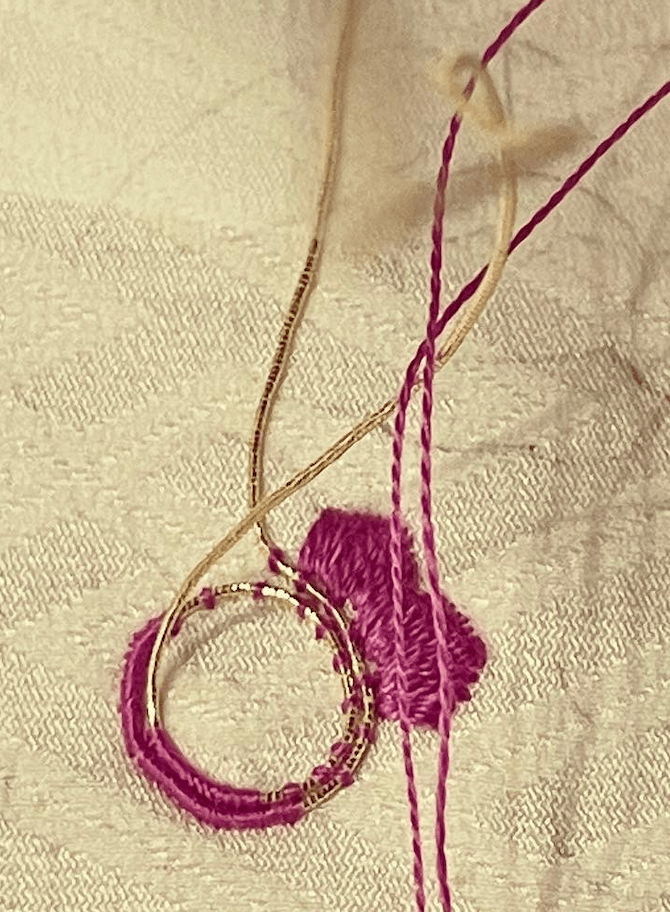
Los azahares incluyen Or Nué (sombreado de hilos de oro con hilos de coser, en colores.) También se usó relleno de fieltro para las hojas con canutillos en cada mitad (liso y frisado en pedacitos.) El jaserón se usó para los bordes de las diferentes figuras.
Un azahar en camino
El sombreado del Or Nué se va haciendo con cada hilo de oro, cuando se pega a la tela.
Sombreado de Or Nué en camino.
El diseño de las hojas doradas fue exclusivo para la clase de Kelley.
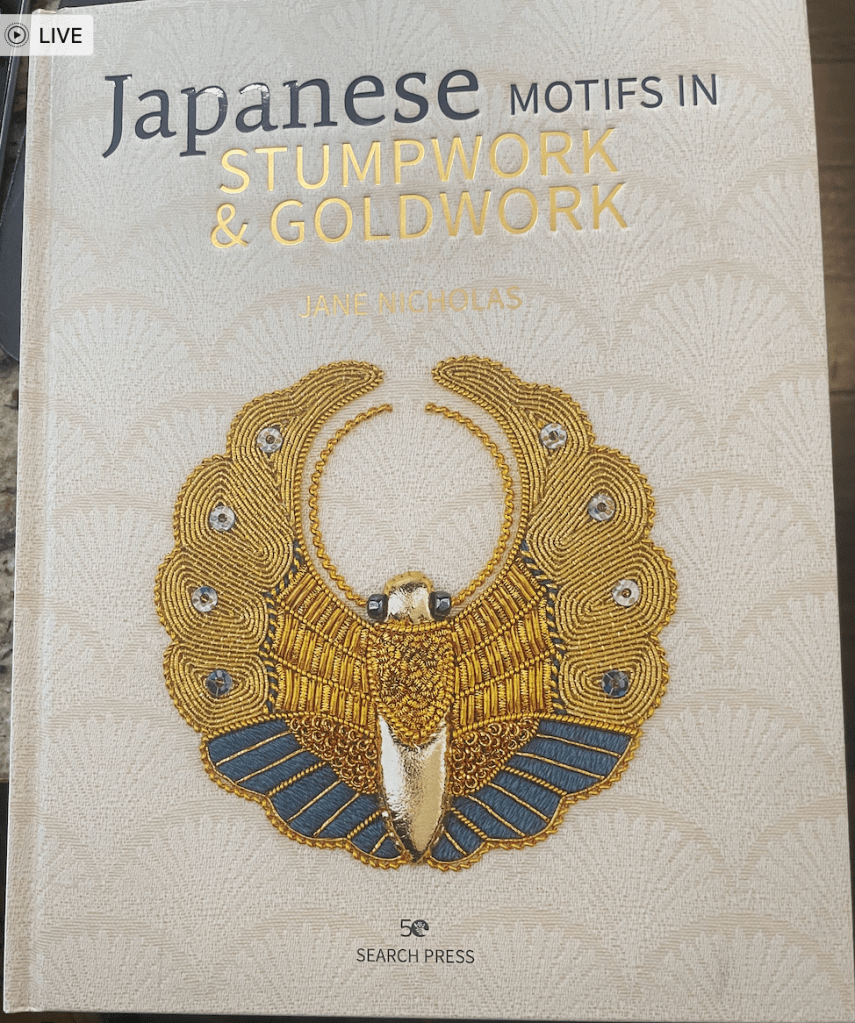
Pero los azahares japoneses se pueden ver en el nuevo libro de Jane: Japanese Motifs in Stumpwork and Goldwork (Motivos japoneses en el bordado dimensional y en oro.) El libro incluye el molde las instrucciones, etc.
El libro de Jane NicholasLos azahares están en el capítulo cinco.
Me parece que el bordado en oro es mi segundo favorito después de las labores en blanco.
Lleva mucha textura y es muy elegante. Hay que enmarcar cada proyecto.
This past summer I worked on two goldwork projects:
Leaves of Gold by Kelley Aldridge as part of the RSN Summer School.
Japanese Cherry Blossoms by Jane Nicholas as part of the EGA National Seminar.
Leaves of Gold, design by Kelley AldridgeJapanese Cherry Blossoms, design by Jane Nicholas
Goldwork Techniques
The Leaves of Gold project had three types of padding.
I’ve done felt padding before, where pieces of felt are layered to achieve a curved surface.
Felt padding
New to me, this project introduced me to hard padding using a waxed cord
Hard padding
And soft padding using a cotton yarn that is waxed in order to be manipulated.
Soft padding
The project used Japanese and Rococo threads for the outlines of the stems and inside the leaves. The gold threads are couched onto the fabric using sewing thread.
Japanese thread over the hard paddingJapanese thread and rococo thread on the stem outlines
The leaves also had rough purl, and chipping (cutwork) and broad plate.
Rough purl is a coiled tube that can be cut and attached like a bead. The needle and thread go through the purl.
Chipping is down with a checked purl (very textured, catches the light really well) that is cut in small pieces (one or two millimeters) hence the name “cutwork” and attached with needle and thread like a bead in a random pattern.
Broad plate is a metal ribbon that is attached with thread as it is folded onto itself. The folds hide the thread.
Rough Purl over the soft paddingBroad plate over the felt padding
The broad plate was new to me as well as the s-ing of purls to make them look like stem stitch.
S-ing of check and rough purl in the middle of the stems, small outlines on pearl purlS-ing with rough purl and spangles.
The Japanese Cherry Blossoms included some Or Nué (thread shading on the gold threads) and some felt padding in the leaves with rough purl and chipping (cutwork.) Pearl purl was used for the outline of the shapes.
Japanese Cherry Blossom in progress
The Or Nué shading is done as the gold thread is laid onto the fabric
Or Nué shading in progress.
The Leaves of Gold design was exclusive to Kelley’s class.
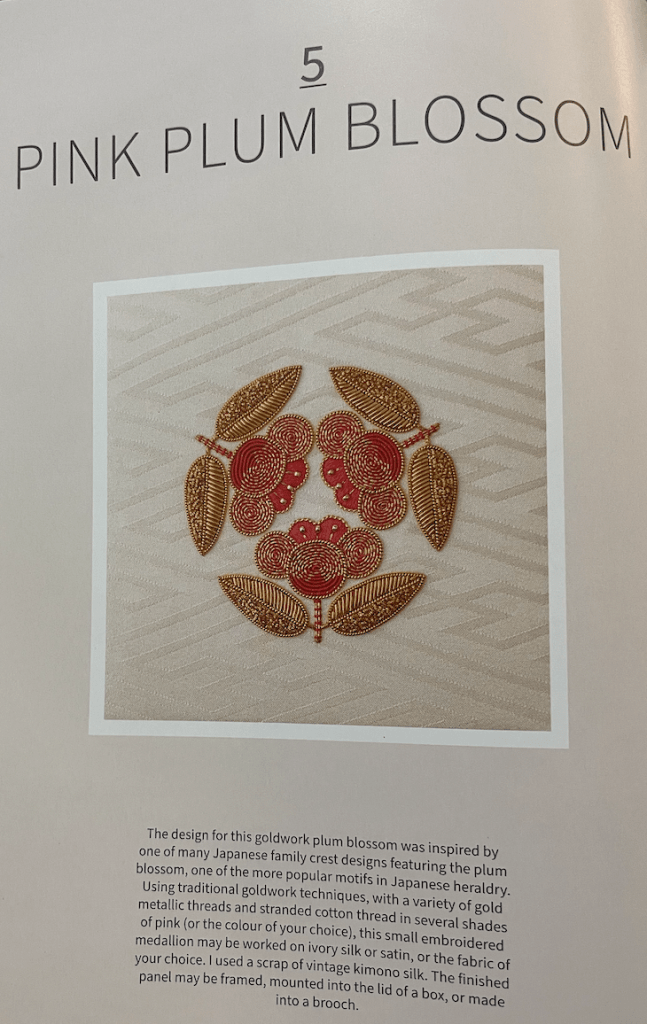
But the Japanese Plum Blossom can be seen in Jane’s new book, Japanese Motifs in Stumpwork and Goldwork. It includes the pattern, instructions, etc.
Jane Nicholas’s BookChapter 5 of the book is the Plum Blossom
I think goldwork is becoming my second favorite type of embroidery after whitework.
It is full of texture and it’s so showy! I feel like I need to frame each project.